33
Operation of SMH/HMH Series
English
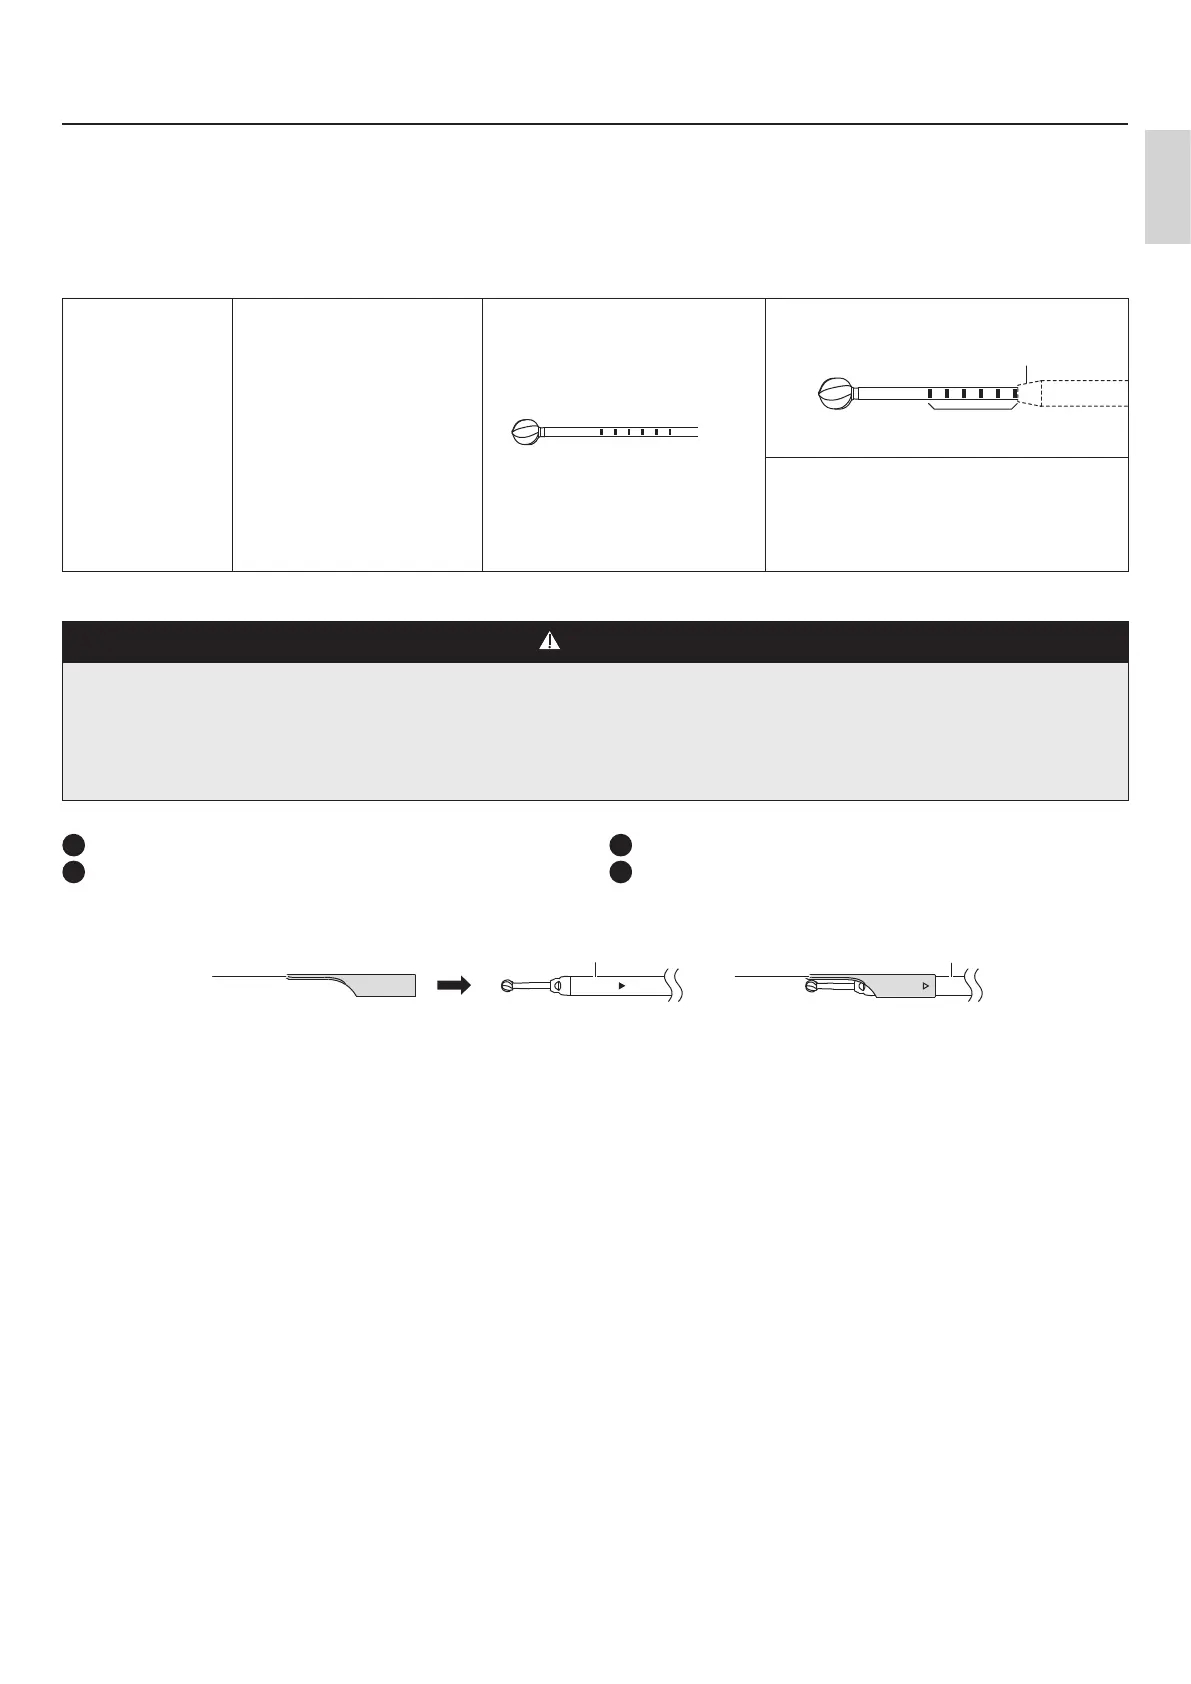
Ring Marks
Some of the NSK Cutting Accessories have Ring Marks.
Check the Ring Marks of each Cutting Accessory to mount it appropriately.
* There is no Ring Mark on the Cutting Accessories not shown in this Operation Manual.
Applicable
Attachment
Applicable Cutting Accessories Ring Mark Correct Mounting Position
P300-2S10
P300-2A10
P300-2S20
P300-2A20
P300-2S40
P300-2A40
P300-2S60
P300-2A60
P300-2S80
P300-2A80
PDS-2□□UL-□□
There are 6 Ring Marks.
Each Ring Mark goes inside the Attachment
each time the exposure length is adjusted.
Mounting and Removing the Beak (Optional)
CAUTION
● Be sure to mount the Beak after the Cutting Accessory is mounted on the Attachment.
● Insert the Beak until ' ▶ ' mark on the Bur Guard is hidden when mounting the Beak.
● Use the Cutting Accessory with its tip of Ø4mm or less when mounting the Beak.
* The Beak cannot be used for attachments other than Slim Attachment 300 or Standard Attachment 300.
● Be sure to completely stop rotation of the Attachment before mounting/removing the Beak.
_ Mounting
1
Make sure that the rotation of the Attachment is stopped.
2
Mount the Beak Ⓐ on the Bur Guard Ⓑ.
_ Removing
1
Make sure that the rotation of the Attachment is stopped.
2
Pull the Beak Ⓐ straight out from the Bur Guard Ⓑ.
Ⓐ Ⓐ
Ⓑ
Ⓑ
<Before Mounting> <Mounted>
Ring Mark
Tip of Attachment
 Loading...