90
Part 1 - General Safety Information
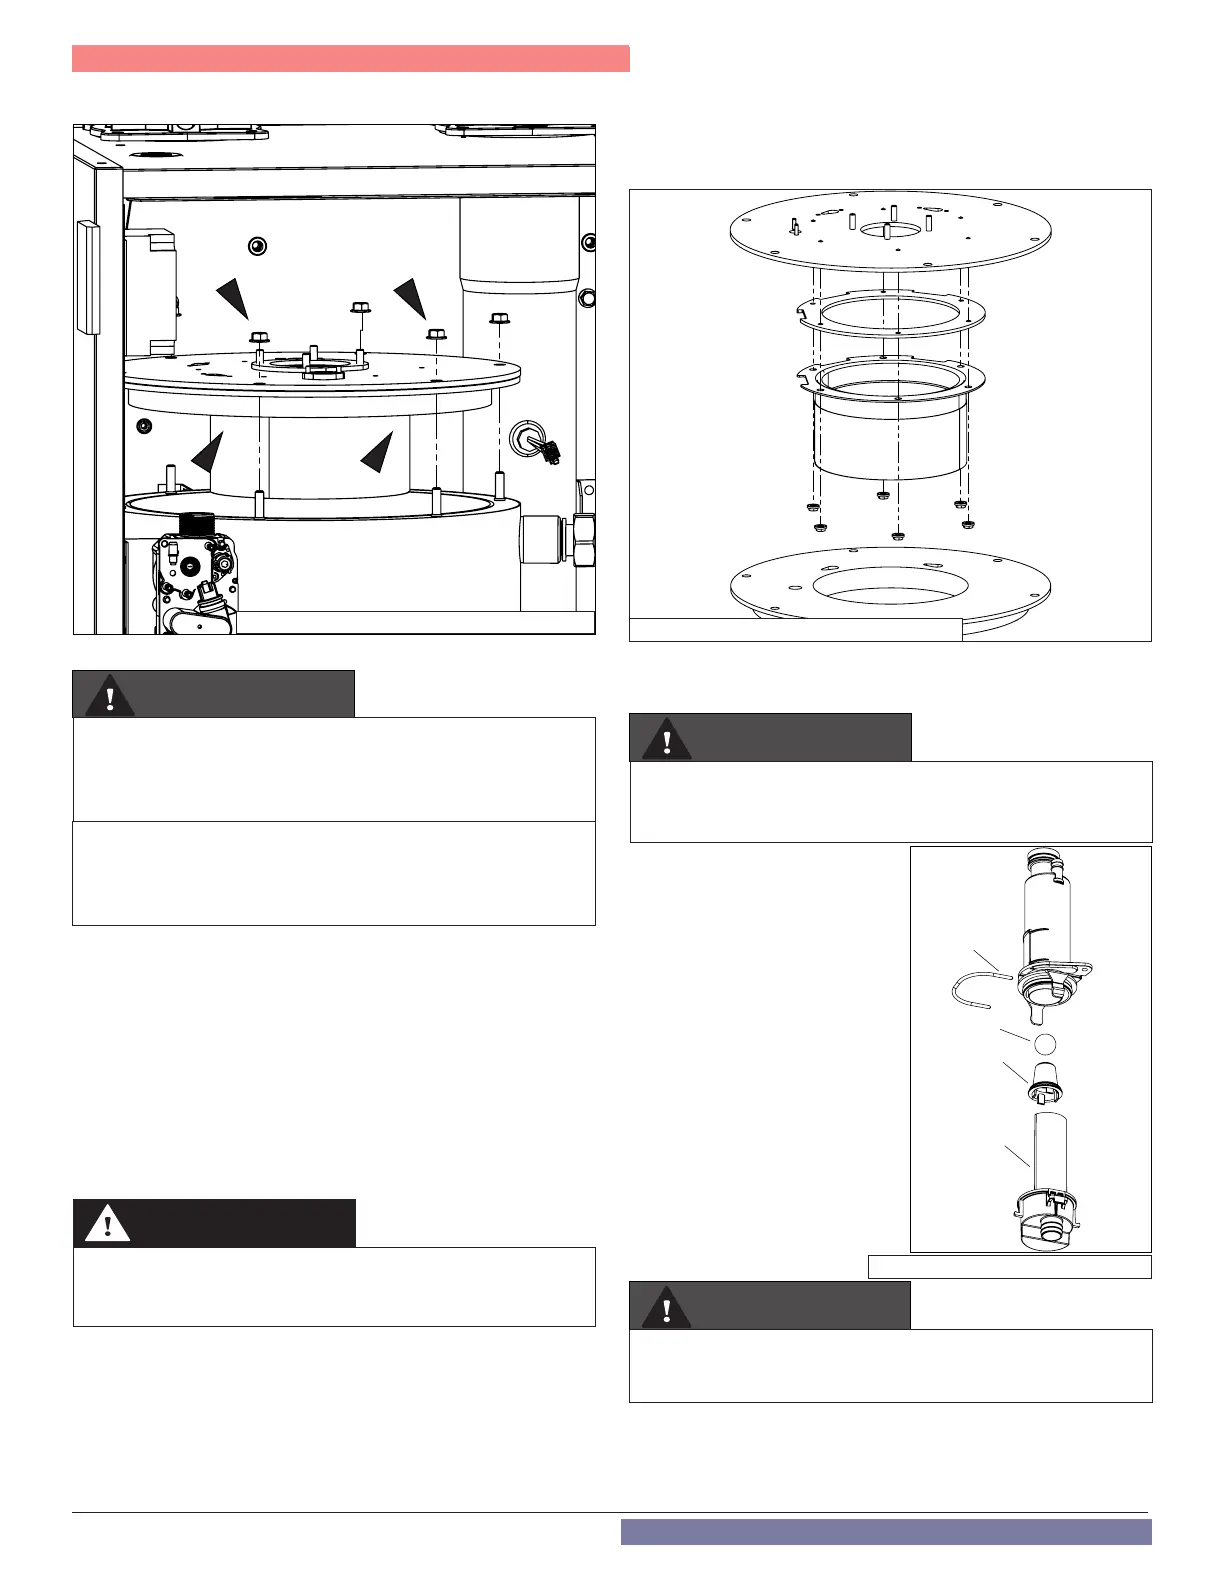
6. Remove the six (6) lock nuts securing the top plate to the heat
exchanger. Remove the top plate and burner.
Part 14 - Maintenance
7. Disconnect the condensate hose and siphon cap from the boiler.
4. Restore power and gas to the boiler. Restart the boiler. Check for
leaks in the combustion system. Observe operation for 5 to 10
minutes.
If boiler is operating properly, condensate is owing normally, and no
gas leaks are detected, combustion coil cleaning is complete.
Clean the Condensate Trap
1. Remove the condensate drain hose from the bottom of the boiler.
2. Working from below the
boiler, remove the siphon cap
retaining clip. Then remove the
siphon cap by depressing the
two (2) lateral hinges (use a tool
if necessary).
3. Remove the cone and the ball.
4. Clean each part.
5. When the condensate trap is
suciently clean, reassemble in
the reverse order.
NOTE: Ensure all parts shown in
Figure 87 are installed with the
boiler. If any parts are missing DO
NOT operate the boiler. Replace the
entire condensate trap assembly.
6. If a condensate neutralizer kit is installed, check the assembly
when cleaning the condensate trap, and replenish the limestone
chips if necessary. When replacing the limestone chips, take
care to ensure chips are no smaller than ½” to avoid blockage in
condensate piping. See Figure 45 for piping details.
WARNING
Protect the top plate insulation from water before performing
any cleaning. Failure to do so could result in damage to the
insulation, improper boiler operation, personal injury, or
death.
Do not use solvents to clean any of the boiler components.
The components could be damaged, resulting in unreliable
or unsafe boiler operation, substantial property damage,
severe personal injury, or death.
Figure 85 - Remove the Top Plate and Burner
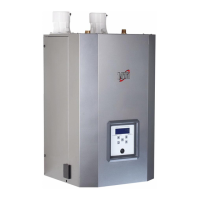
Figure 86 - Disassembled Burner Assembly
Failure to replace a damaged sealing ring will result in exhaust
gas leaks, substantial property damage, severe personal injury, or
death.
DANGER
WARNING
Take care when removing the condensate hose, as condensate
may escape. Failure to do so could result in property damage due
to leaks, personal injury, or death.
8. Clean the combustion chamber by spraying water or solution
into the combustion assembly and monitor the ow through the
combustion system. Liquid should ow freely through each tube.
If there is an obstruction, increase the ow on the tube to force the
blockage out.
Checking the Burner
While the combustion assembly is removed from the heat exchanger,
inspect the burner assembly. Proceed as follows:
1. Observe the burner assembly (burner, associated gaskets, and
combustion assembly sealing ring). Replace any components that
are are damaged or showing signs of deterioration.
NOTE: Whenever assembling the burner to the top plate, ALWAYS
replace the burner gasket.
2. Reassemble the burner assembly. Ensure the components are
installed as described in Figure 86.
3. After all maintenance is complete, reinstall the combustion
assembly following the reverse order of steps 7 - 2 of Cleaning
the Heat Exchanger Combustion Chamber. Ensure all gaskets are
installed and all components are tightened properly.
Figure 87 - Clean the Condensate Trap
WARNING
Do not install the condensate assembly if a component is lost or
missing. Replace the entire assembly. Failure to follow this warning
could result in property damage, serious personal injury, or death.
Siphon Cap
Retaining Clip
Siphon Cap
Cone
Ball