NXP Semiconductors
LPCXpresso55S36UM
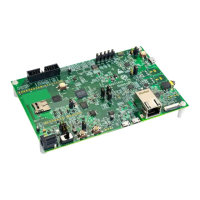
LPCXpresso55S36 Development Board User Manual
Debug scenario Feature support
Use MCU-Link as debugger for the
target MCU (LPC5536)
• Serial wire debug (SWD):
– MCU-Link SWD feature is enabled (MCU-Link SWD disable jumper JP27 is
open)
– The target MCU SWD interface is connected to MCU-Link
– The target MCU SWD connector J38 is not used for external connection
• Virtual communication (VCOM): MCU-Link VCOM feature is enabled
• USB serial input/output (USBSIO): MCU-Link USBSIO feature is enabled
• Target selection: Target selection jumper JP7 is open
• Target power selection: Target power selection jumper JP8 is set to 1-2 shorted
Use an external debugger to debug the
target MCU (LPC5536)
• SWD:
– Disable MCU-Link SWD feature by shorting MCU-Link SWD disable jumper
JP27
– Connect the external debugger to the target MCU SWD connector J38. The
target MCU SWD interface is connected to the external debugger.
• VCOM: MCU-Link VCOM feature can be used
• USBSIO: MCU-Link USBSIO feature can be used
• Target selection: Target selection jumper JP7 is open
• Target power selection: Target power selection jumper JP8 is set to 1-2 shorted
Use MCU-Link as debugger for an
external target MCU
• SWD:
– MCU-Link SWD feature is enabled (MCU-Link SWD disable jumper JP27 is
open)
– Connect the external target MCU to the target MCU SWD connector J38
• VCOM: MCU-Link VCOM feature is not supported
• USBSIO: MCU-Link USBSIO feature is not supported
• Target selection: Short target selection jumper JP7
• Target power selection:
– If the external target MCU has to get power from the board, then set target
power selection jumper JP8 to 1-2 shorted
– If the external target MCU has to use its own power, then set jumper JP8 to
2-3 shorted
Table 25. Supported debug scenarios
3.5 Connecting to a target through a USB-to-UART bridge
MCU-Link supports the VCOM serial port feature, which adds a serial COM port on the
host computer, and connects it to the target MCU by using MCU-Link as a USB-to-UART
bridge.
In the LPCXpresso55S36 board, MCU-Link is connected to the Flexcomm 0 (USART)
port of the target MCU through a voltage translator U22, which enables communication
between MCU-Link and the target MCU, by shifting voltage levels of signals between the
two devices from 3.3 V to 3.3/1.9 V and vice versa.
To use MCU-Link as a USB-to-UART bridge, verify the following jumper settings and
connect the J1 connector on the board to the USB port of the host computer:
• Jumper JP25 is open (MCU-Link is in Normal mode)
• Jumper JP26 is open (USB-to-UART bridge is enabled)
When you boot the LPCXpresso55S36 board, a VCOM port with the name MCU-Link
Vcom Port (COMxx) is enumerated on the host computer, where “xx” may vary from
one computer to another. Each MCU-Link based board has a unique VCOM number
associated with it.
LPCXpresso55S36UM All information provided in this document is subject to legal disclaimers. © NXP B.V. 2022. All rights reserved.
User manual Rev. 2 — 5 September 2022
39 / 46
 Loading...