Troubleshooting > 123
9. Remove any sheets of paper as follows:
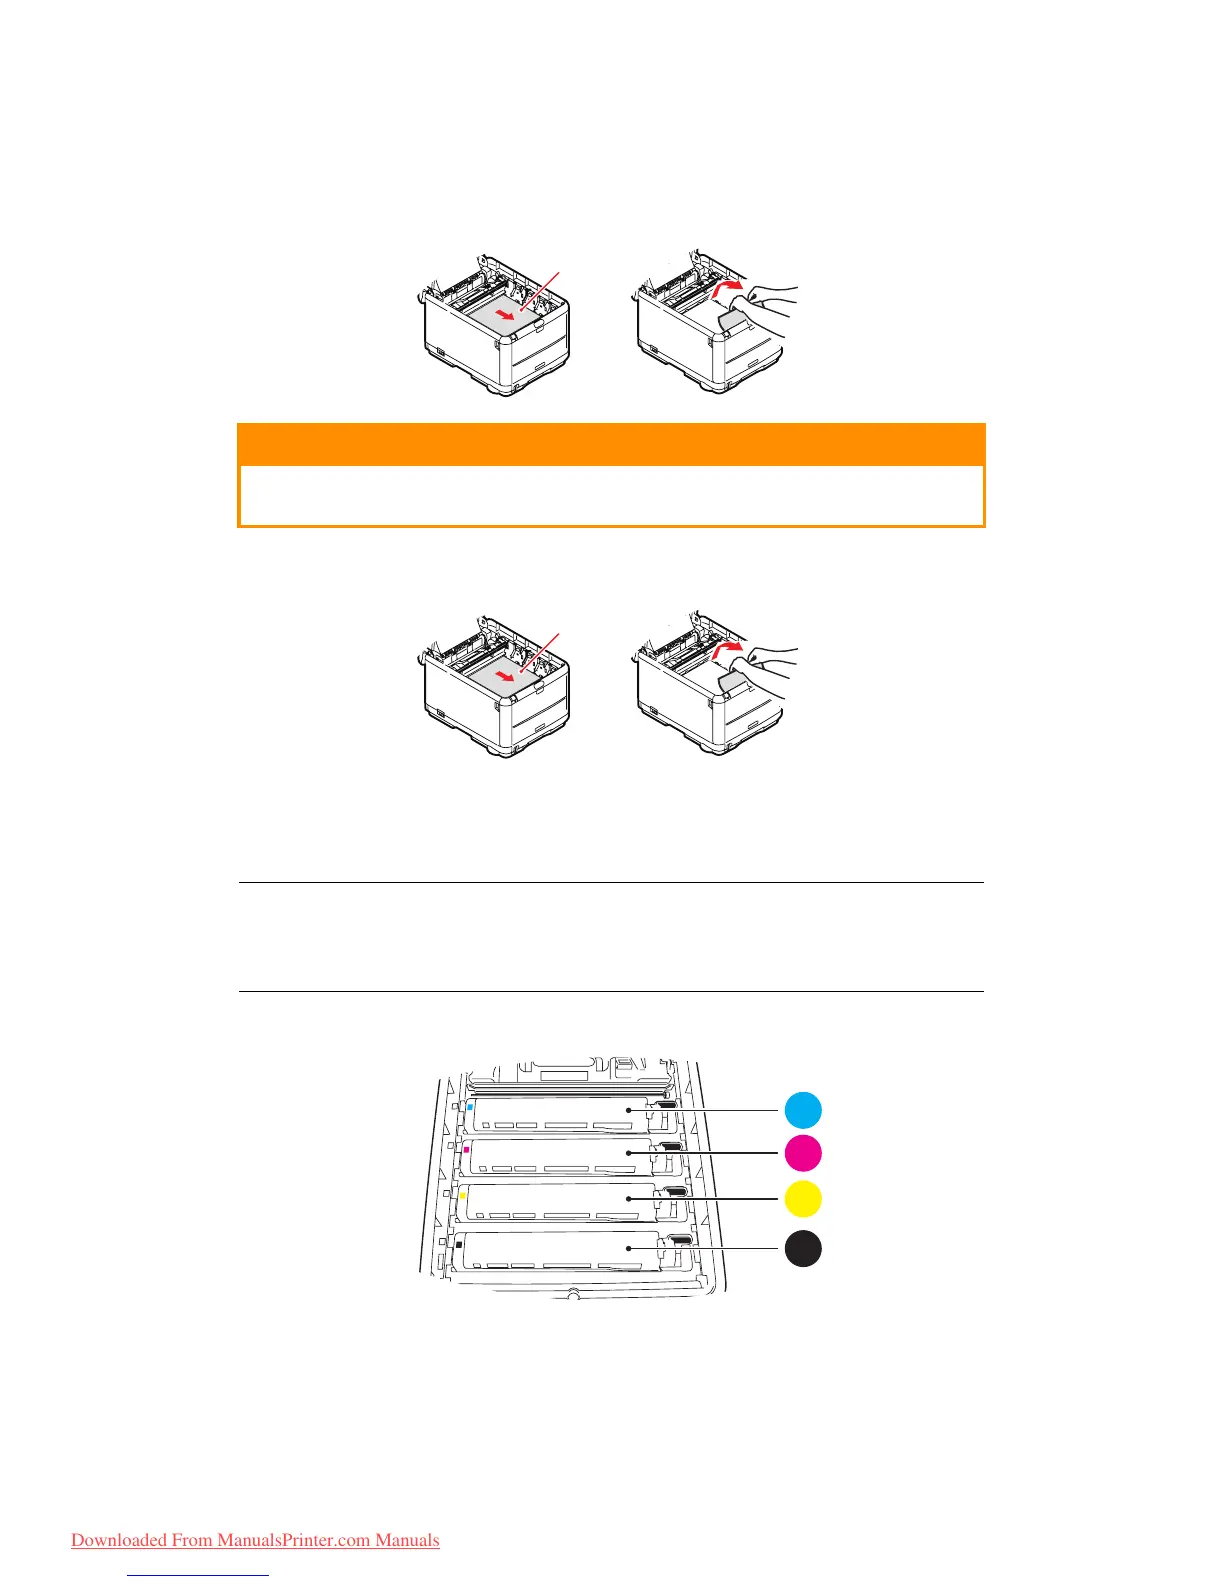
> To remove a sheet with its leading edge at the front of the belt (1), carefully lift
the sheet from the belt and pull it forwards into the internal drum cavity and
withdraw the sheet.
> To remove a sheet from the central area of the belt, carefully separate the sheet
from the belt surface and withdraw the sheet.
> To remove a sheet just entering the fuser, separate the trailing edge of the sheet
from the belt, push the fuser pressure release lever (1) towards the front and
down to release the fuser’s grip on the sheet, and withdraw the sheet through the
drum cavity area. Then allow the pressure release lever to rise again.
10. Starting with the cyan image drum unit nearest the fuser, replace the four image
drums into the drum cavity, making sure to locate them in the correct order.
Holding the complete assembly by its top centre, lower it into place in the printer,
locating the pegs at each end into their slots in the sides of the printer cavity.
CAUTION!
Do not use any sharp or abrasive objects to separate sheets from
the belt. This may damage the belt surface.
NOTE
If the sheet is well advanced into the fuser (only a short length is still visible),
do not attempt to pull it back. Follow step 12 to remove it from the rear of the
printer.
1. Cyan cartridge 3. Yellow cartridge
2. Magenta cartridge 4. Black cartridge