,
F
ig.
20
Fig.
21
Fig
.
22
Fig. 23
BX50
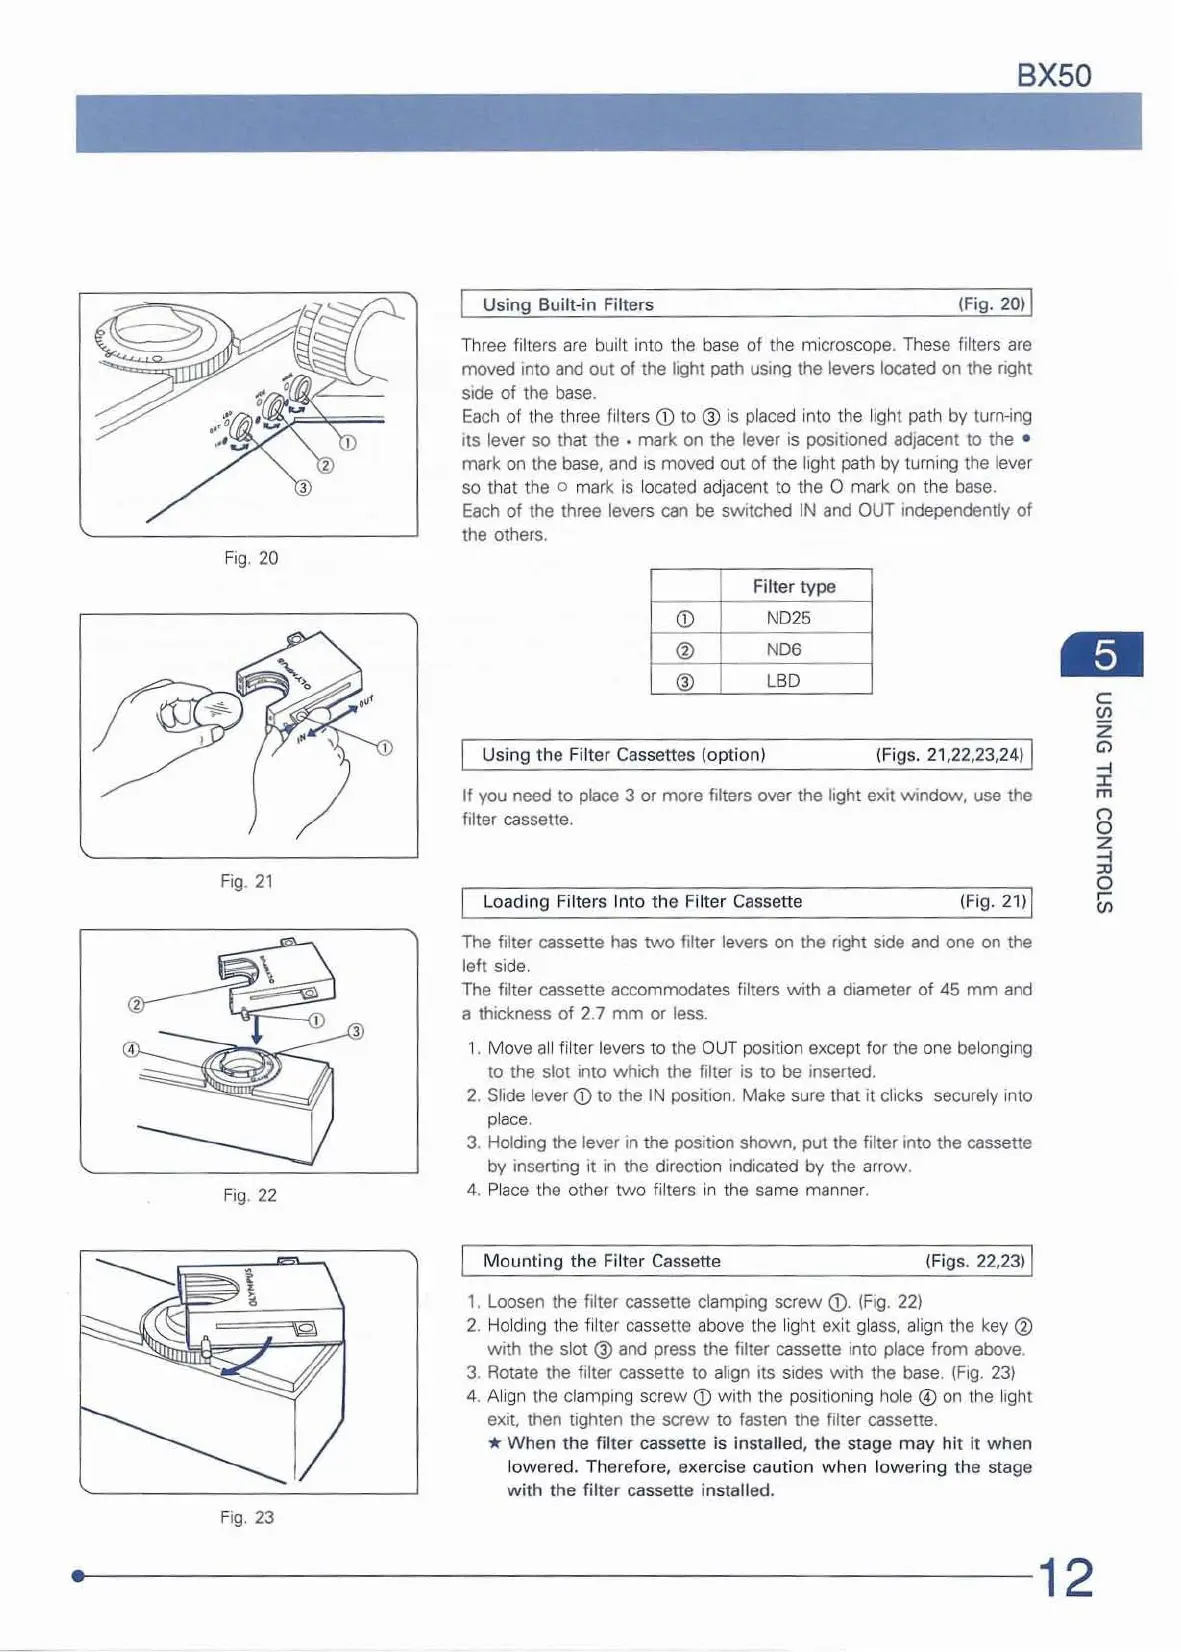
Using Built-in Filters
Three filters
are
built into t
he
ba
se of t
he
microscope. These filters
are
moved into
and
out of the light path using the levers located on the right
side
of
the base.
Each
of t
he
three filters
CD
to @
is
placed
in
to the
li
ght path by turn-ing
its
lever so that the . mark on the lever
is
positioned adjacent
to
the •
mark on the
base,
and
is
moved out of the light path by turning the lever
so that the 0 mark is l
oca
ted adjacent
to
the 0 mark on the base.
Each
of the three levers can be
sw
itched
IN
and
our
independently
of
the others.
Filter
typ
e
Q)
ND2
5
(j)
ND6
@
LBD
Using the Filter Cassettes (option) (Figs. 21,22,23,24)
If you need to place 3 or more filters over the light exit window, use the
filter cassette,
load
ing Filters Into the Filter Cassette
The filter cassette has two filter levers on the right
stele
and
one on the
left
si
de.
The
filter cassette accommodat
es
filters with a diameter of 45
mm
and
a thickness
of
2.7
mm
or less,
, . Move a
ll
filter levers to the OUT position except for the one belonging
to the slot into which the filter is
to
be inserte
d.
2. Slide lever 0 to the
IN
position. Make sure
tha
t it clicks securely into
place.
3. Holding the lever in the position shown,
put the filter into the cassette
by inserting it in
th
e direction indicated by the arrow.
4. Pla
ce
t
he
o
th
er
tw
o filters
in
t
he
same manner.
Mounting
the Filter Cassette
(F
igs. 22,23) I
, .
loosen
the filter cassette clamping screw
0.
(Fig.
22)
2.
Ho
l
di
ng
the filter c
as
sette above the
li
ght exit gla
ss,
ali
gn the key @
with
the slot ®
and
press the filter cassette into place from above.
3. Rotate the filter
cassette to a
li
gn its sides with the
base.
(Fig.
23)
4. Align the
cl
amping
sc
rew 0 w ith the posi
ti
oning hole @ on t
he
light
exit. then tighten the screw to fasten the fiiter cassette.
* When the filter cassette is installed, the stage
may
hit
it
when
lowered. Therefor
e,
exerci
se
caution
when
lowering the stage
with
the filter cassette installed.
--
--------------------
----
-----
12
c:
!!2
z
Gl
-<
I
m
n
o
z
:;j
o
~
en