2-2 Assembly Procedure
Fig. 1
,
Fig.
2
5
Fig. 3
Fig. 4
..
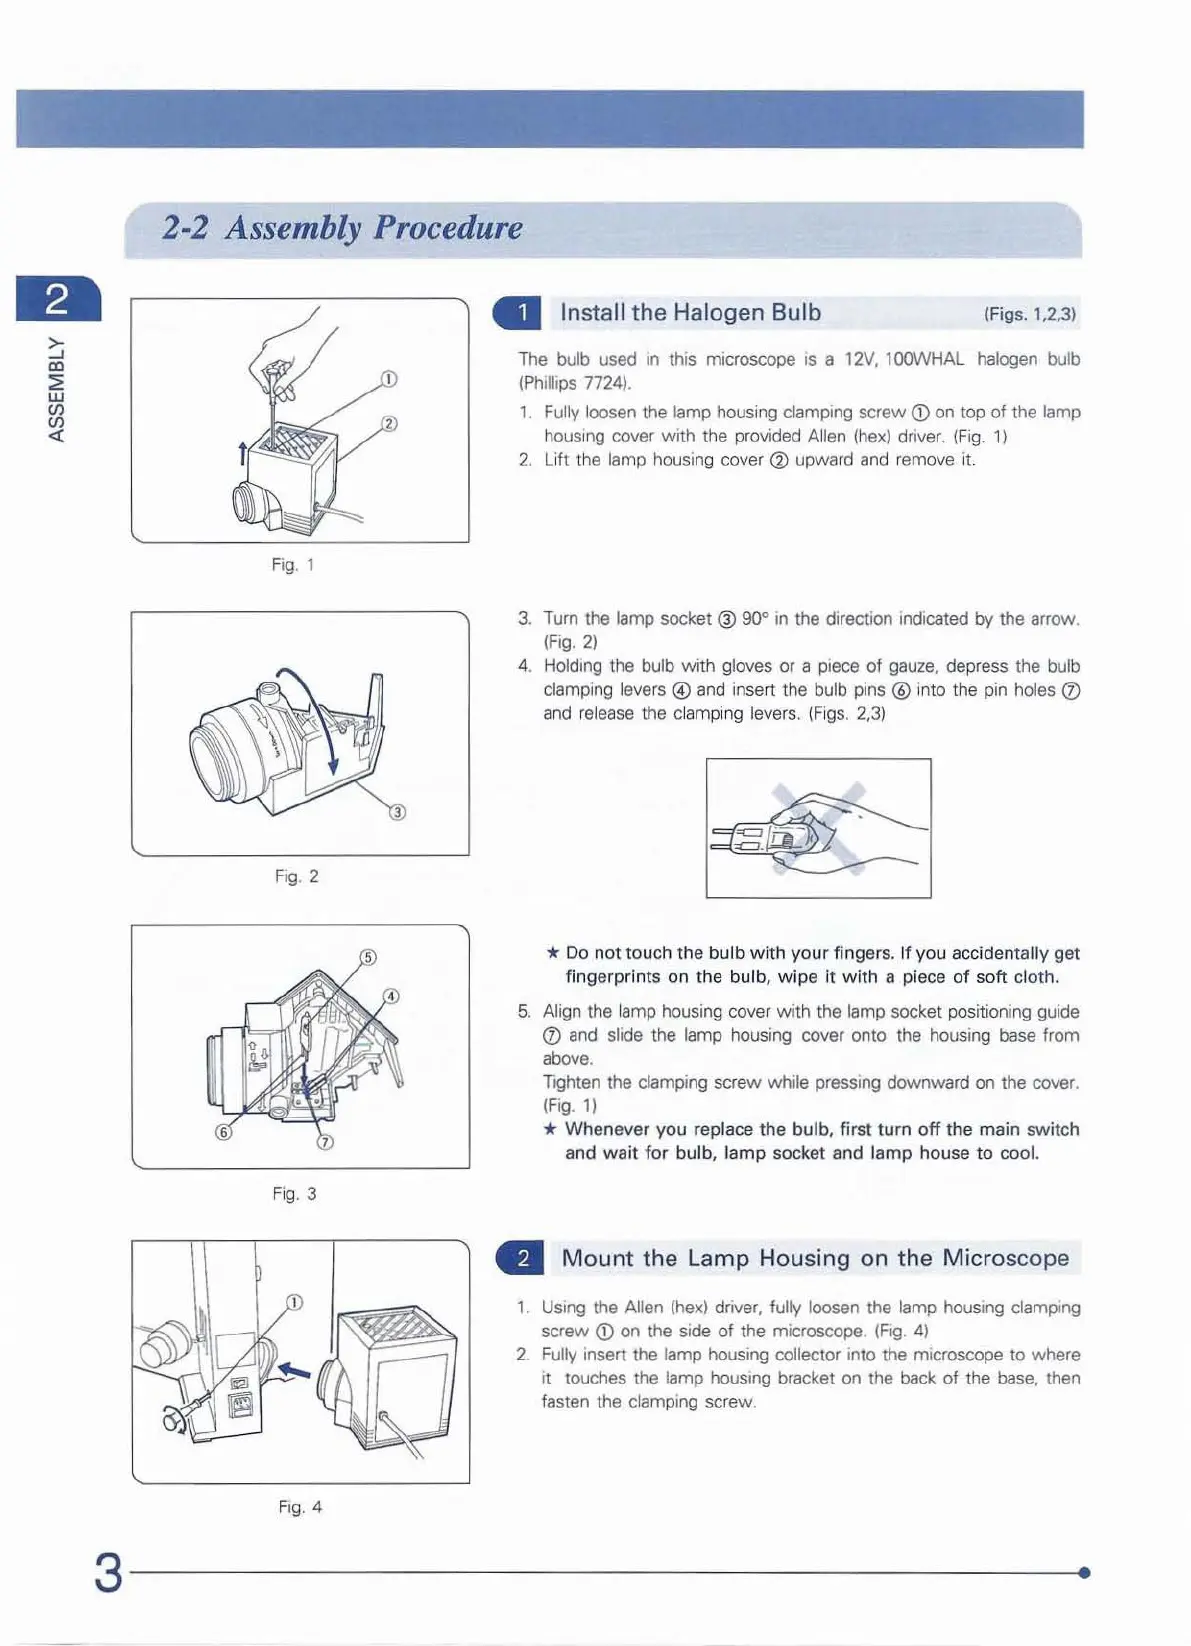
Install the Halogen
Bu
lb
(Figs. 1,2,3)
The
bulb used
In
this microscope
IS
a
12V,
l00wHAL
halogen bulb
(Phillips 7724).
1.
Fully loosen the lamp housing clamping
screw
<D
on top
of
the lamp
houSing cover with the provided Allen
(hex)
driver. (Fig.
1)
2.
Lift t
he
lamp housing cover ® upward
and
remove
it.
3.
Turn
the lamp
socket@
90° in the direction Indicated
by
the arrow.
(Fig.
2)
4.
Holding the bulb with gloves or a piece of
gauze,
depress the bulb
clamping levers @
and
in
sert the bulb pins @ into the
pin
holes
CD
and
release the clampi
ng
levers.
(F
igs.
2,3)
* Do not touch the bulb
wit
h
yo
ur fingers. If you accidentally get
fingerprints on
th
e bulb, w ipe
it
with
a piece
of
soft
cl
o
th
.
5.
Align the lamp housing cover with the lamp socket positioning guide
([)
and
slide the lamp housing cover onto the housing base from
above.
Tighten the clamping screw while pressing downward
on
the cover.
!Fig.
1)
* Whenever you replace the bulb, first turn
off
the main switch
an
d
wait
for bu l
b,
l
amp
socket and
lamp
house
to
coo
l.
•
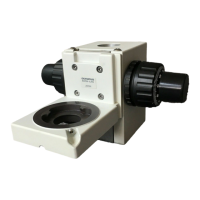
Mount
the Lamp Housing on
th
e
Mi
croscope
1.
USing
the Allen
(hex)
driver, fully loosen the lamp housing clamping
screw
<D
on the side of the microscope.
(Fig.
4)
2.
Fully
insert the lamp housing collector Into the microscope to where
it touches the
lamp housing bracket
on
the back of the
base.
then
fasten the clamping screw.
3
--------
--
--------
------
-------