3
Press í on the arrow pad to select
MODE MENU.
● In this step and the following steps, the
screens show examples of the menus
displayed in the P mode.
4
Press ñ to select SETUP, then press
í.
● The items in the SETUP menu appear.
5
Press Ññ to select , then press í.
● The screen appears.
32
Chapter 1
Date/time setting
It is possible to set the date/time of the built-in clock. Since the date/time is
saved with recorded pictures, be sure to set it correctly.
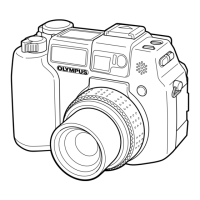
1
Set the mode dial to any
position except OFF.
● Be sure to remove the lens cap
beforehand since the lens
automatically extrudes when the
mode dial is set to any position
except .
2
Press to display Menu
(P. 43).
● The monitor turns on
automatically.
m
SETUP
CAM
CARD
PIC
BABATTERTTERY SAY SAVEVE
SHORT CUT
m/ftm/ft
’01.01.01
00:00
SETUP
CAM
CARD
PIC
LOWLOW
ONON
ONON
RESETRESET
REC VIEWREC VIEW
FILE NAME
PIXEL MAPPINGPIXEL MAPPING
ALL RESET
 Loading...