48
6-3 Replacing the halogen bulb
2
Replacing the halogen bulb
a
b
c
Loosen the clamping screw
a
on the top of the lamp housing using
the Allen screwdriver provided with microscope frame.
Raise the lamp housing
b
up and remove it.
Tilt the lamp socket
c
in the arrow direction by 90°.
1
2
3
1
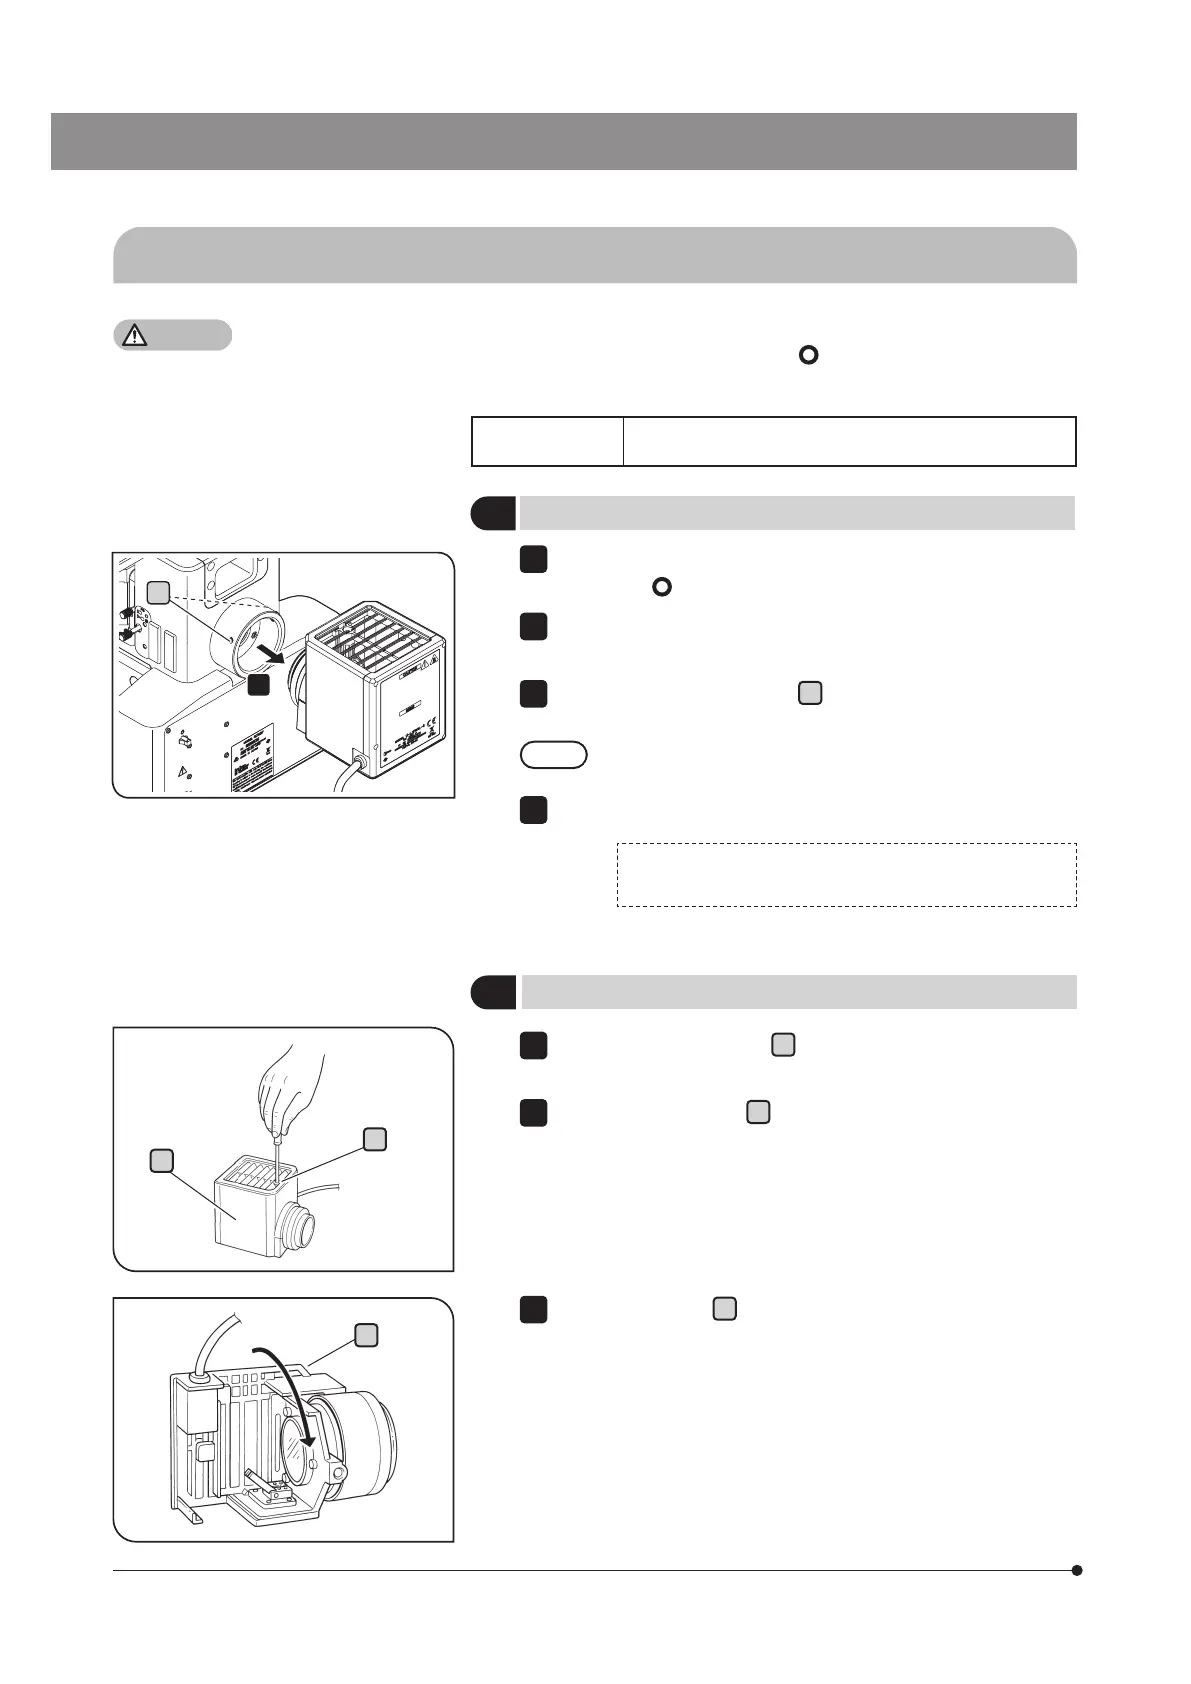
Removing the halogen lamp housing
Set the main switch of the power supply for halogen bulb (TH4-100/
TH4-200) to
(OFF) and disconnect the power cord.
Disconnect the connector of the lamp housing from the power supply
(TH4-100/TH4-200).
Loosen the clamping screws
a
(2 positions) on the rear of the
microscope frame using the Allen screwdriver.
Be careful, if the clamping screw is loosened too much, it
may come off.
Remove the lamp housing.
For details of the power supply for halogen bulb (TH4-100/
TH4-200), refer to the instruction manual provided with the unit.
1
2
4
The bulb, lamp housing and areas around the lamp housing are extremely hot during and right after use.
When replacing the burner during observation, set the main switch to (OFF) and disconnect the power
cord. Wait until the bulb, the lamp housing and areas around the lamp housing are sufficiently cooled down.
Applicable lamp
12V100WHAL-L (made by PHILIPS Co. 7724I)
12V100WHAL (made by PHILIPS Co. 7023)
a
4