16
Chapter 2 Instrument Nomenclature and Specifications
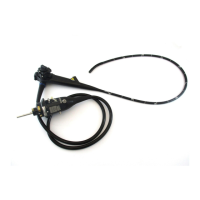
VISERA RHINO-LARYNGO VIDEOSCOPE ENF-V2
2.2 Endoscope functions
1. Bending section
The bending section moves the distal end of the endoscope when the
UP/DOWN angulation control lever is operated.
2. UP/DOWN angulation control lever
When turned in the “U” direction, the bending section moves UP; when
moved in the “D” direction, the bending section moves DOWN.
3. Remote switches 1 to 4
The functions of the remote switches 1 to 4 can be selected on the video
system center. When selecting the functions, refer to the instruction manual
for the video system center.
4. Light guide connector
The light guide connector connects the endoscope to the output socket of
the light source and transmits light from the light source to the endoscope.
5. Video connector
The video connector connects the endoscope to the output socket of the
video system center and makes the endoscopic image visible.
6. UP mark
When the video plug is connected to the video system center, this mark is
facing upward.
7. Venting connector
Attach the ETO cap or leakage tester here.
8. ETO cap
The ETO cap must be attached prior to ethylene oxide gas sterilization and
aeration and removed prior to immersion or clinical examination. The cap
must also be attached when the endoscope is transported outside the
hospital (shipment, return for repairs, etc.).
9. Identification mark for STERRAD
®
200/NX material compatibility
This mark indicates that this endoscope has material compatibility with the
STERRAD
®
200/NX Sterilization System. The endoscope without this
mark is not applicable to STERRAD
®
200/NX.
 Loading...