22
Chapter 3 Preparation and Inspection
VISERA RHINO-LARYNGO VIDEOSCOPE ENF-V2
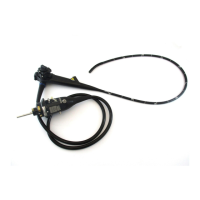
5. Using both hands, bend the insertion tube into a semicircle. Moving your
hands as shown by the arrows, confirm that the entire insertion tube can be
smoothly bent to form a semicircle (see Figure 3.3).
Figure 3.3
6. Inspect the covering of the bending section for sagging, swelling, cuts, holes
or other irregularities.
7. Gently hold the midpoint of the bending section and at a point 10 cm from
the distal end. Push and pull gently to confirm that the angle between the
bending section and the distal end is not loose.
8. Inspect the objective lens at the distal end of the endoscope’s insertion tube
for scratching, cracks, stains, gaps or other irregularities around the lens.
Inspection of the bending mechanism
Perform the following inspection while the bending section is straight.
If the movement of the UP/DOWN angulation control lever
does not work smoothly, the bending mechanism may be
abnormal. In this case, do not use the endoscope because it
may be impossible to straighten the bending section during
an examination.
 Loading...