Page 18 of 76
Issue 20 : July 2012
WM--P1 SERIES WORKSTATIONS
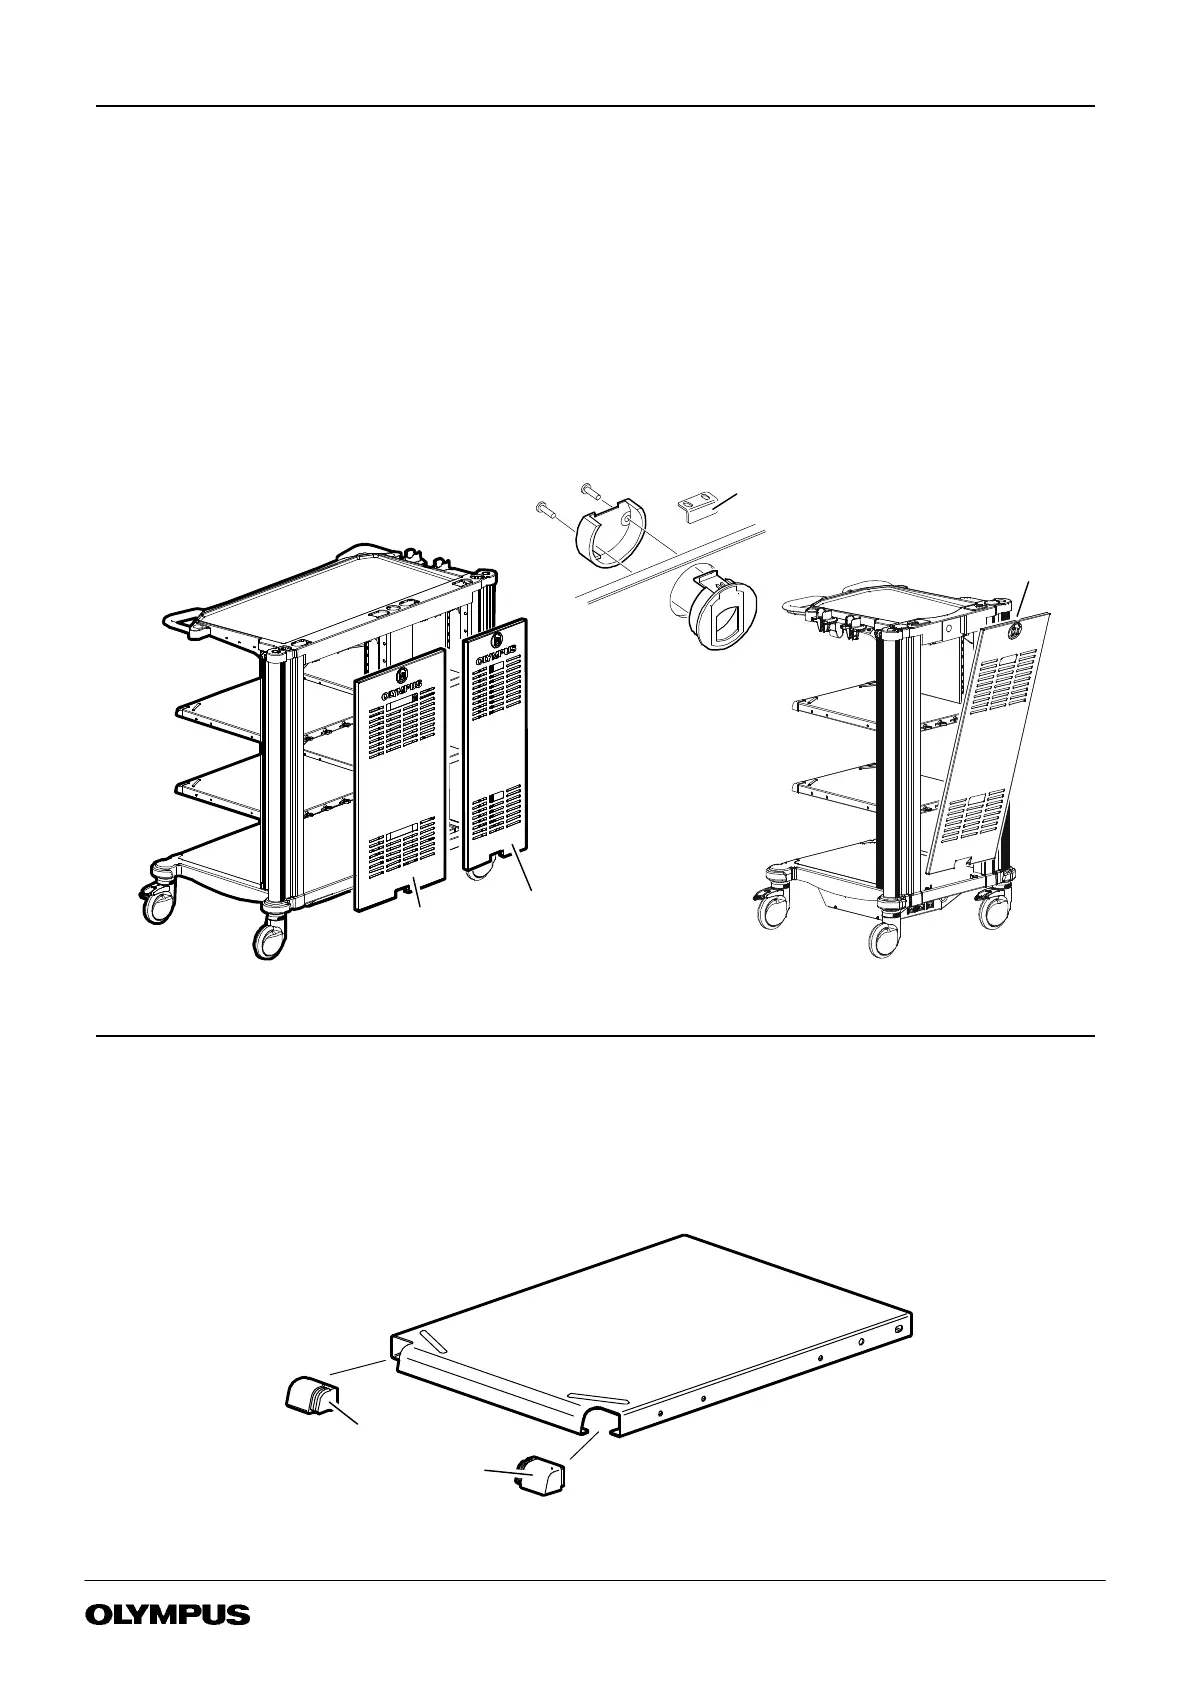
6.4 Rear panel replacement
Each Rear panel is available as a kit which inclues two feet and a finger latch pack. Fit the finger latch as shown in
Figure 6-2 and discard the keeper plate, if supplied.
WM--NP1 Rear panel -- part no K10005044. WM--WP1 Rear panel -- part no K10005045
(1) Refer to Figure 6-2, pull the finger latch to release the top of the rear panel.
(2) Lift the rear panel from the two studs on the base of the workstation.
(3) Refit /replace the rear panel.
FIGURE 6-2
REAR PANEL REPLACEMENT
Finger
latch
WM-- WP1
Rear panel
WM-- NP1
Rear panel
Discard
keeper plate
Contents of
Finger latch pack
6.5 Shelf corner moulding replacement
(1) Refer to Figure 6-3 each corner buffer (item 23 & 24) may be levered off.
(2) Reassemble by pushing each buffer into place.
FIGURE 6-3
SHELF CORNER MOULDINGS
24
23
 Loading...