Page 23 of 76
Issue 20 : July 2012
WM--P1 SERIES WORKSTATIONS
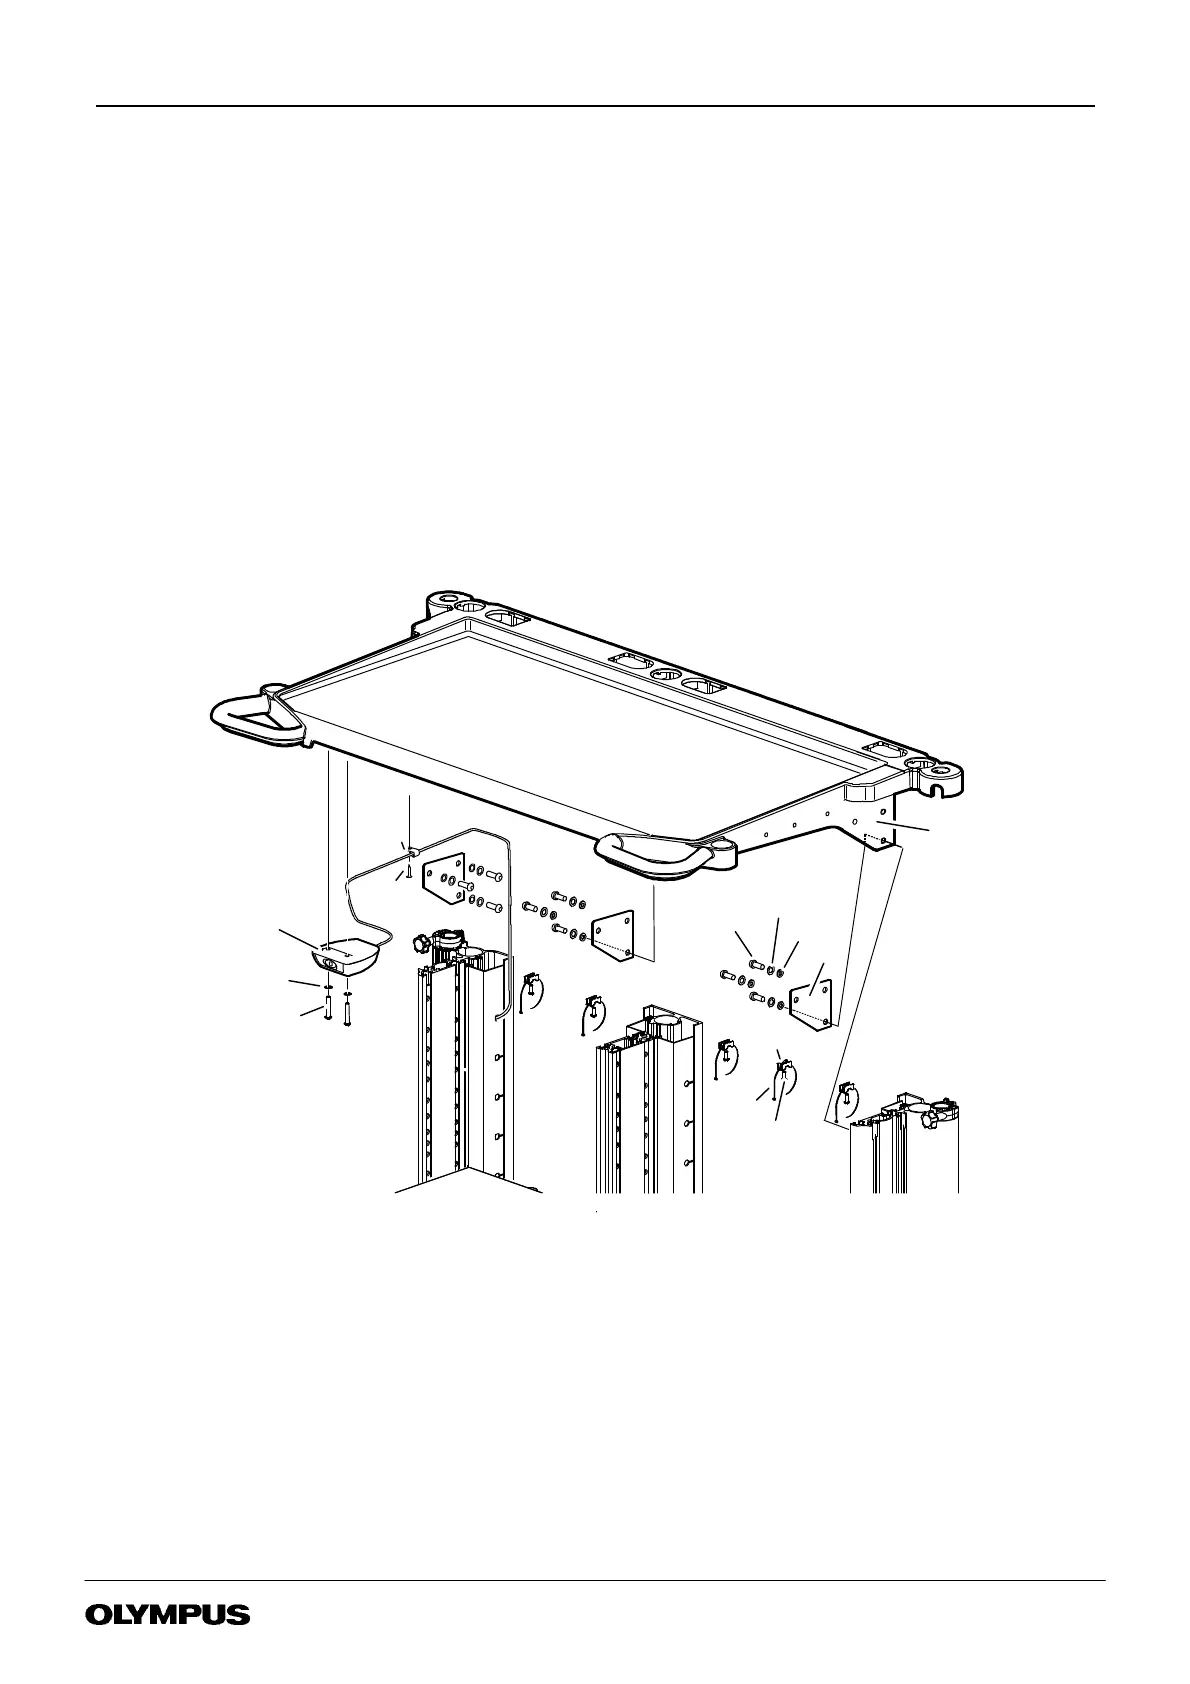
6.10 Top Tray Replacement WM- DP1
(1) Remove all equipment from the top tray (item 14)
(2) Refer to Section 6.7 and remove the Remote switch assembly and cable (item 2) from the top tray.
(3) Refer to Figure 6-7 to release Support plates WM--DP1 (item 10) and Top tray (item 14). Using a 6mm allen key unscrew
nine screws (item 75) with washer crinkle (item 49) and washer (item 45).
(4) Reassemble in reverse order. Place top tray assembly into place between the side columns. Position each Support plate
WM--DP1 (item 10) insert but do not fully tighten, three screws (item 75) with washer crinkle (item 49) and
washer (item 45) using 6mm hex drive tool. Using 6mm hex drive tool in torque wrench fully tighten to 20Nm.
(5) Refer to section 6.7 to refit remote switch.
FIGURE 6-7
WM--DP1 REMOTE SWITCH AND TOP
TRAY REPLACEMENT
45
9
75
92Nm
2
14
49
9
34
5
42
5
10
40
22Nm
50
2
32
5
77
42.2Nm
78
4
 Loading...