O.M.A.C. s.r.l.
Via Giovanni Falcone, 8 42048 Rubiera (RE) - Italy Tel.0522/629371 - 629923 Fax 0522/628980
Rev.4 del 01/2011 O.M.A.C. s.r.l.
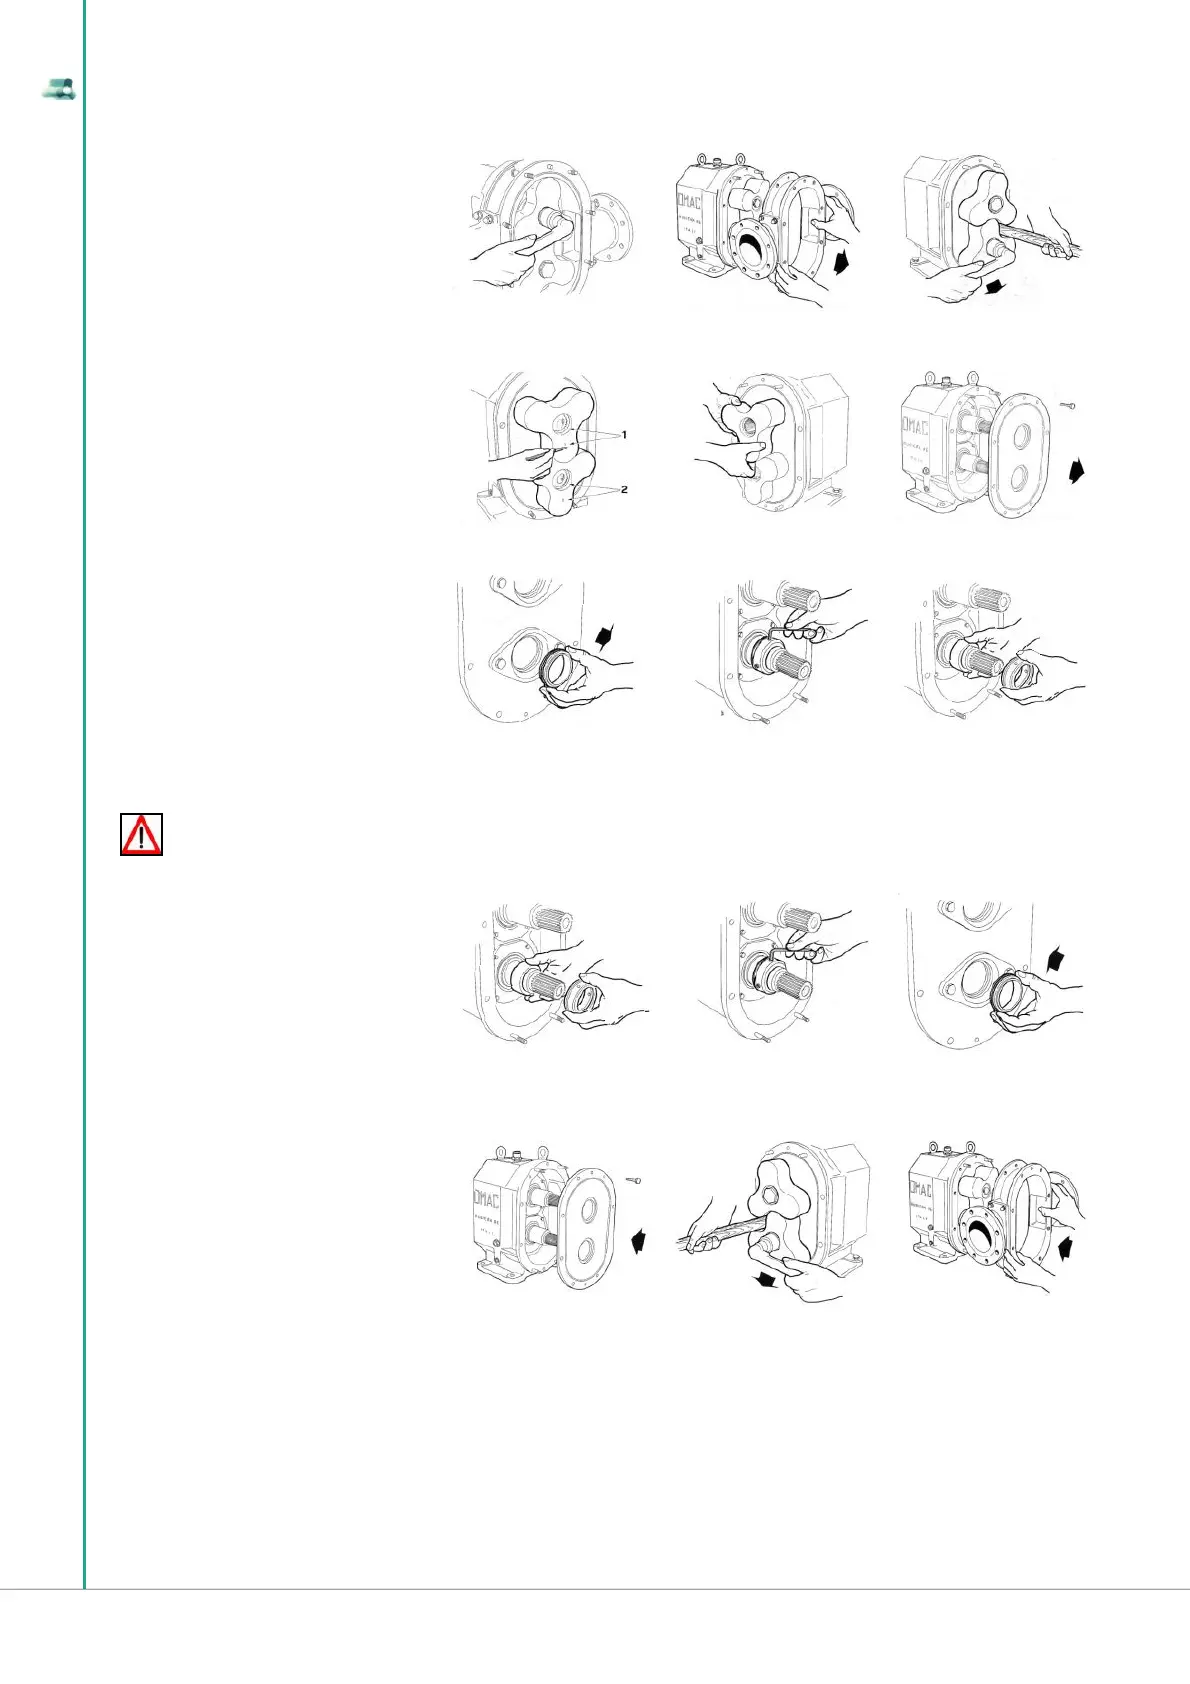
5.9.1 Disassembly of the B660/B680 pumping body
5.9.2 Assembly of the B660/B680 pumping body
1 Remove the end cover and untighten the two
locking nuts of the rotors
2 Untighten the back nuts and remove the rotor
case
3 Unscrew anticlockwise the rotor nuts, inter-
posing a non metal element between the rotors,
making them stop rolling
4 Take care of the reference marked on rotors
and shafts (1-2) so that you will set them rightly
while re-assembling
5 Extract the rotors, taking care you don’t dama-
ge by means of metal tools
6 Untighten the two security screws and remove
the seal fl ange
7 Extract the stationary part of the seal from the
support fi xed on seal fl ange
8 Untighten the socket head screws on mecha-
nical seal
15 Assemble the rotors, setting them on pitch according to the reference marks (1-2). Clamp the rotors nuts (see tab. 14). In order to stop turning,
interpose a non metal element between rotors. Tighten the rotor nuts (see chap.1)
16 Assemble the rotor case, setting the O-ring
9 Extract the rotating part of the seal from the
shaft
11 Clean carefully the shafts. Be sure the spa-
cers for the seals are set (295). Lubricate lightly
the O-rings and insert the rotating part of the
seals on the shafts.
Exert pressure only with hands; avoid using me-
tal tools
12 Be sure the mechanical seals stand on the
shaft shoulder and tighten by degrees the soc-
ket head screws. We suggest you should use a
thread locking adhesive in order to avoid their
untightening on work
13 Assemble the stationary part of the seals
on supports, taking care to aline the slot with the
retainer pin. Assemble these supports on seal
fl a nge, setting the O-ring
14 Clean carefully the seal slide surface and assemble the seal fl ange delicately in order not to damage the seals. Be sure the fl ange is set according
to reference pins and tighten the suited screws
10 During the following operations, take care you don’t damage the lapped seal surfaces; don’t lay them on the bench and
handle them with clean hands
DANGER
1 2 3
4 5 6
7 8 9
14 15 16
11 12 13