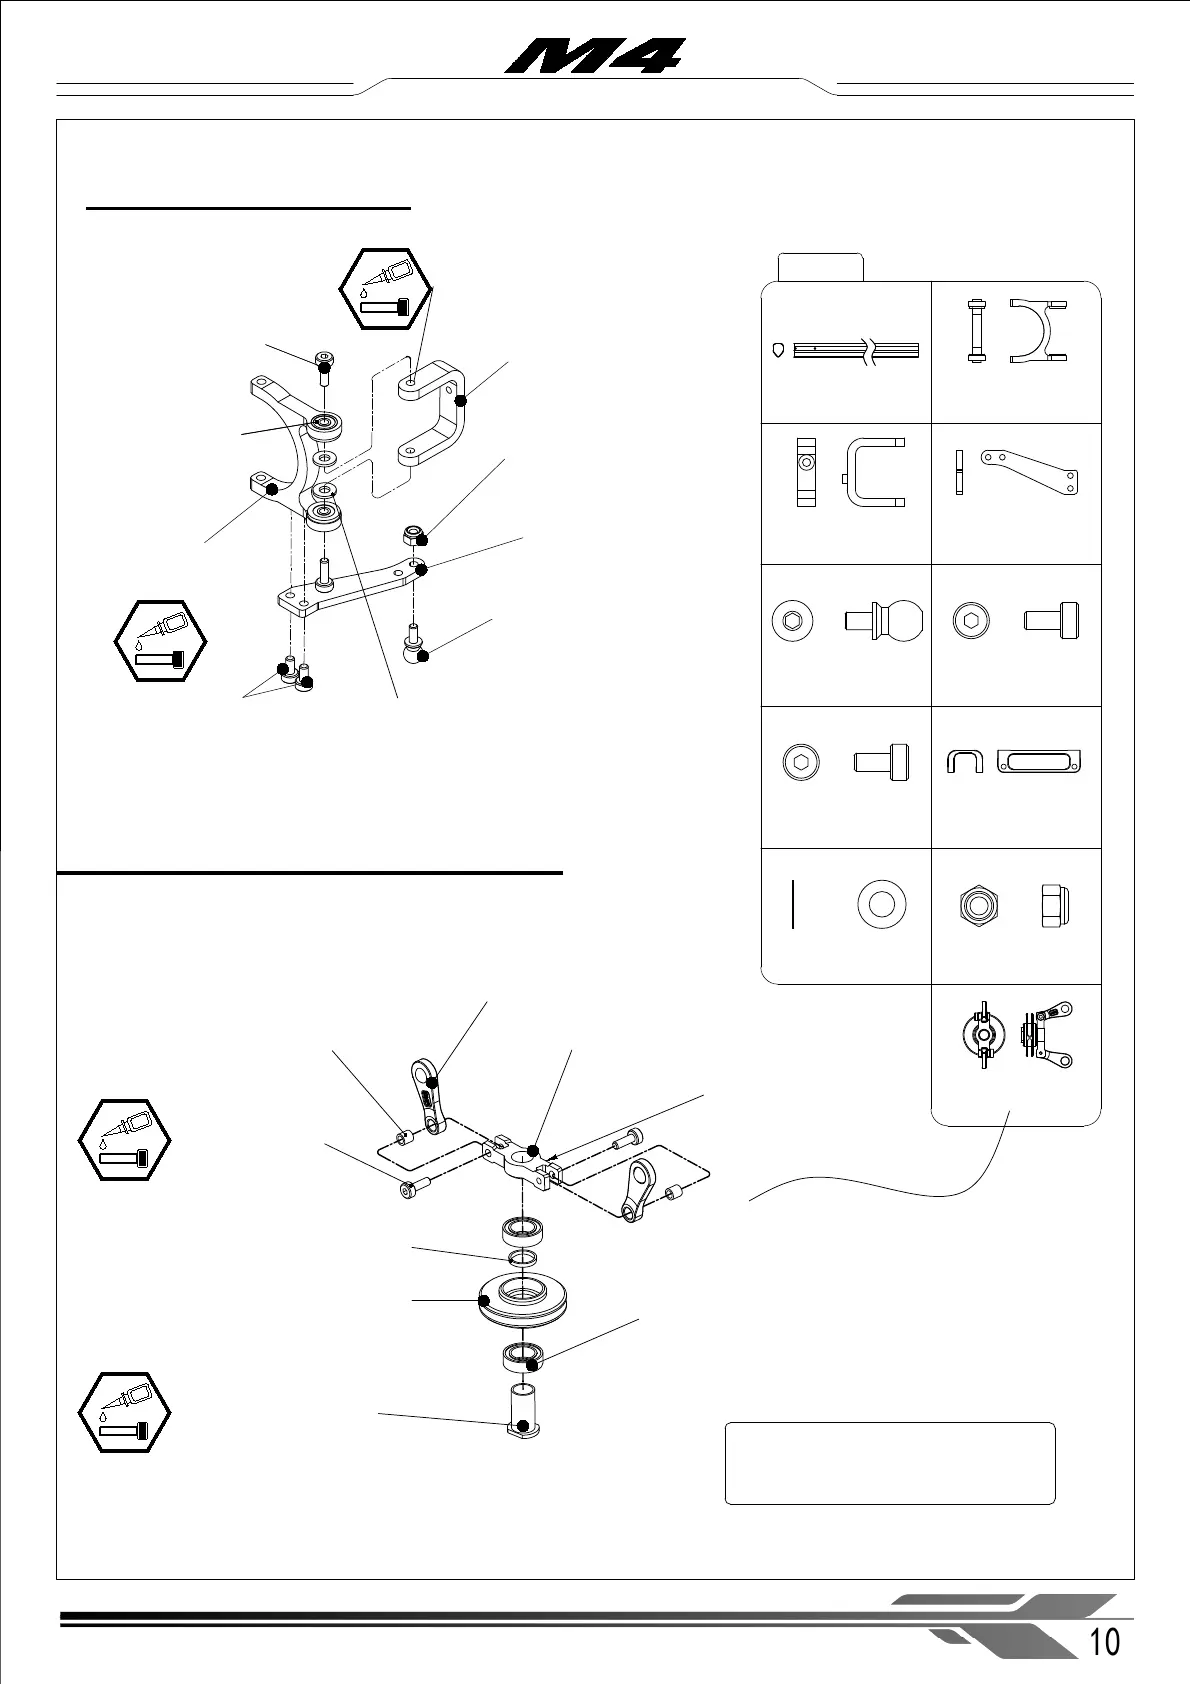
Tail Slider Ring Set (× 1)
1 0
WWW.OMPHOBBY.COM
Installation steps 安装步骤
Tail Slider Sleeve ( × 1)
Bearing
∅ 6x ∅ 10x3mm (× 2)
Tail Slider Ring ( × 1)
Tail Slider Bridge (× 1)
4.5mm Tail Slider
Joint ( × 2)
Shim
∅ 6x ∅ 7x1mm ( × 1 )
Socket cap screw
M2x6mm ( × 2)
Tail Slider Joint
Bushing ( × 2)
※ Note that the raised
face of the tail slider yoke
must face the bearing.
※ The tail slider comes pre-assembled
with thread locker from the factory, there
is no need to disassemble it again.
3-1 Tail rotor assembly
Tail bellcrank Arm ( × 1)
Tail Bellcrank Base ( × 1)
Tail Bellcrank ( × 1)
Flanged Bearing
∅ 2x ∅ 6x3mm ( × 2)
Socket cap screw
M2x6mm ( × 2)
M2 Nylon locknut (× 1)
Ball Joint Screw - L4.65 (× 1)
Tail Housing Mounting Brace (× 1)
Socket cap screw
M2x4mm ( × 2)
Tail boom (× 1)
Tail Bellcrank Base ( × 1)
Tail bellcrank Arm ( × 1)
Tail Bellcrank ( × 1)
Socket cap screw
M2x4mm ( × 2)
Socket cap screw
M2x6mm ( × 2)
Ball Joint Screw - L4.65 (× 1)
M2 Nylon locknut
(× 1)
M4-301
Flanged Bearing
∅ 2x ∅ 6x3mm ( × 2)
Apply thread-lock into threaded holes
to avoid contamination of bearing.
※ Use the outer hole for long throw tail servos
like the OMPHOBBY DS2312T. If you are using
a short throw tail servo, use the inner hole to
achieve adequate tail travel.
Shim
∅ 2x ∅ 3.2x0.5mm ( × 2)
Shim
∅ 2x ∅ 3.2x0.5mm ( × 2)