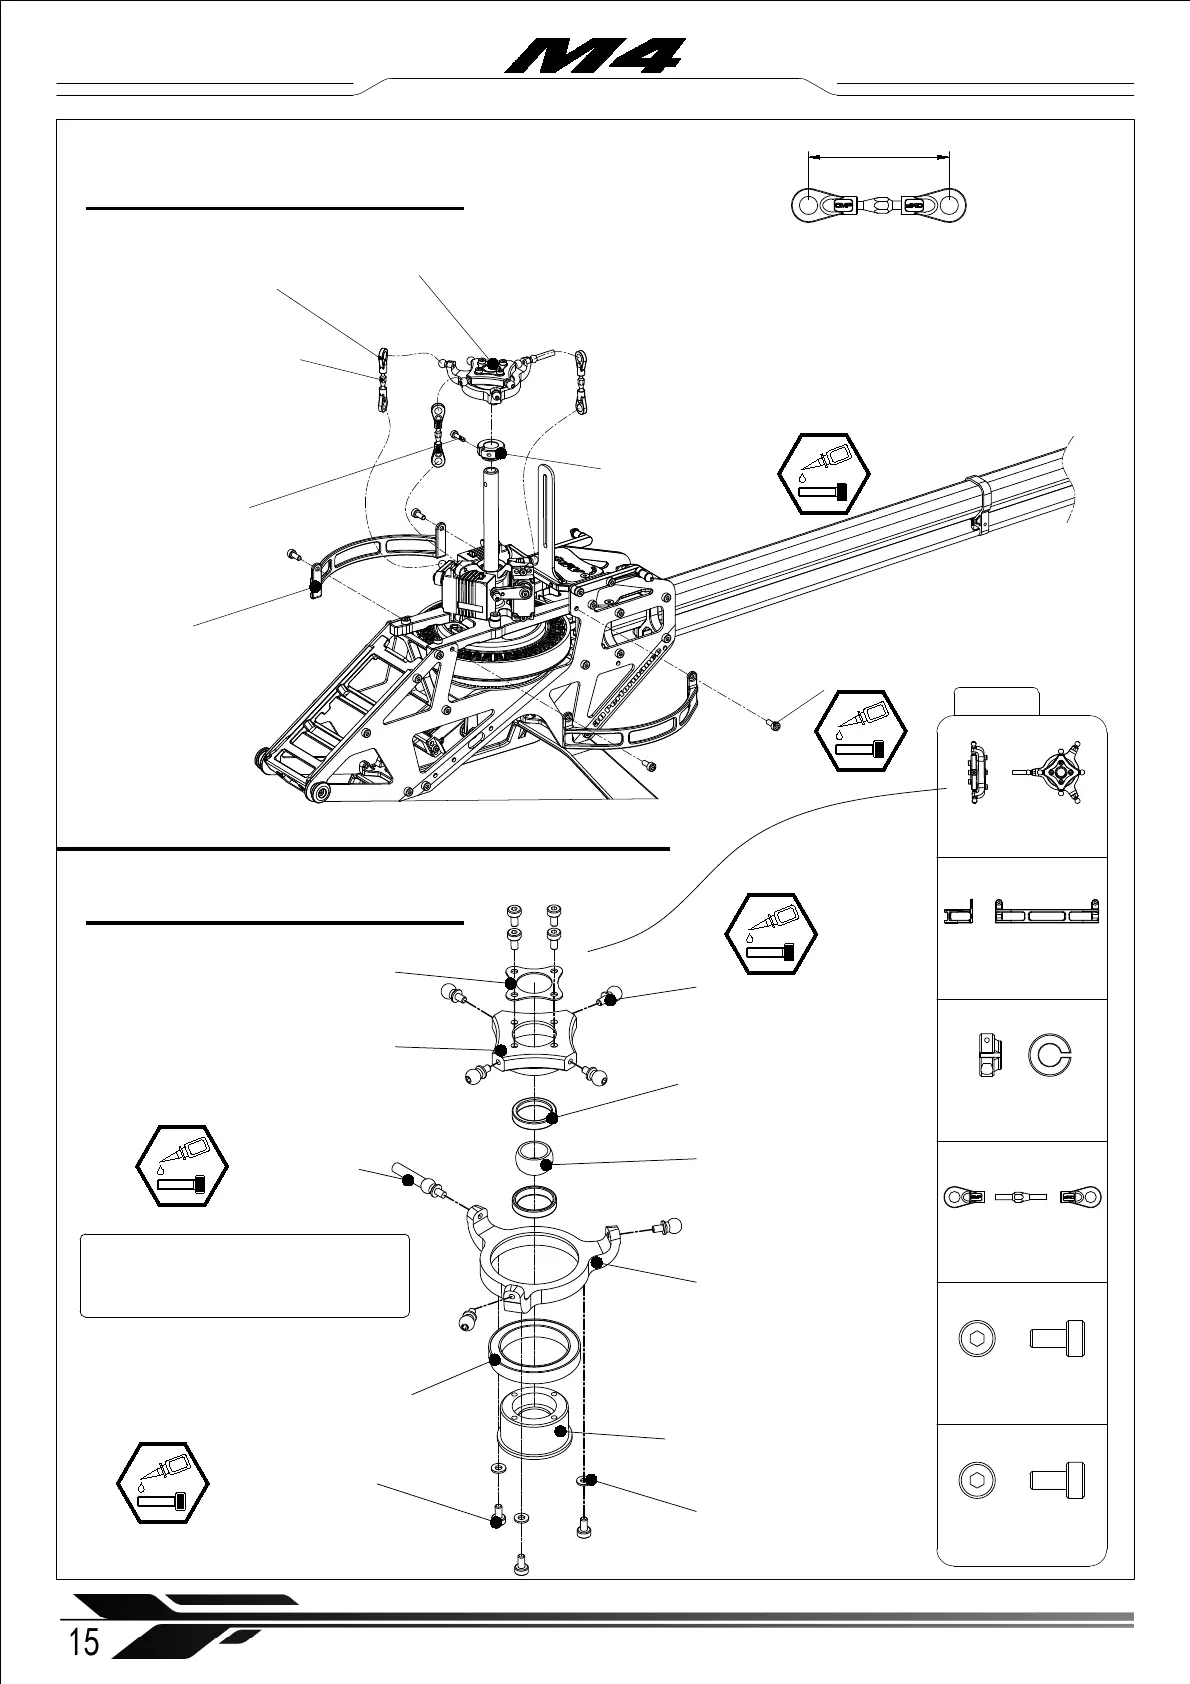
4-1 Swashplate assembly
约31mm
4.5mm linkage Ball
Joint Set ( × 6)
Servo linkage ( × 3)
Main shaft clamping
ring ( × 1)
Socket cap screw
M2x8mm ( × 1)
※ Make three linkages of the same length, note that
turnbuckles feature one right hand and one left hand thread
each. The tapered side of the turnbuckle faces down. The ball
joint’s flat spot with OMP logo faces outward when connecting
the linkages with the ball screws. The turnbuckles can be
adjusted in length without removing them from the helicopter.
Socket cap screw
M2.5x6mm ( × 4)
Swashplate ( × 1)
Motor roll bar ( × 2)
Main shaft spacing ring ( × 1)
Servo linkage ( × 3)
4.5mm linkage Ball Joint Set ( × 6)
Swashplate (× 1)
Motor roll bar ( × 2)
Socket cap screw
M2x8mm ( × 1)
M4-401
Socket cap screw
M2.5x6mm ( × 4)
Socket cap screw
M2x4mm ( × 7)
Ball Joint Screw - L3 (× 6)
Guidance Ball
Screw (× 1)
Swashplate Bearing
Retainer ( × 1)
Swashplate Hub ( × 1)
Bearing
∅ 20x ∅ 27x4mm (× 1)
Swashplate Outer
Ring ( × 1)
Swashplate Connector ( × 1)
Swashplate Spherical Joint
∅ 8x ∅ 11x6 ( × 1)
Swashplate Joint Seat ( × 2)
Shim
∅ 2x ∅ 4.3x0.5mm ( × 3 )
15
WWW.OMPHOBBY.COM
Installation steps 安装步骤
4-1 swash plate assembly
※ The swashplate comes pre-assembled
with thread locker from the factory, there
is no need to disassemble it again.