246
Wiring Section 5-3
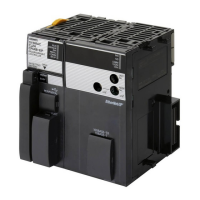
4. Assemble the connector (purchased separately).
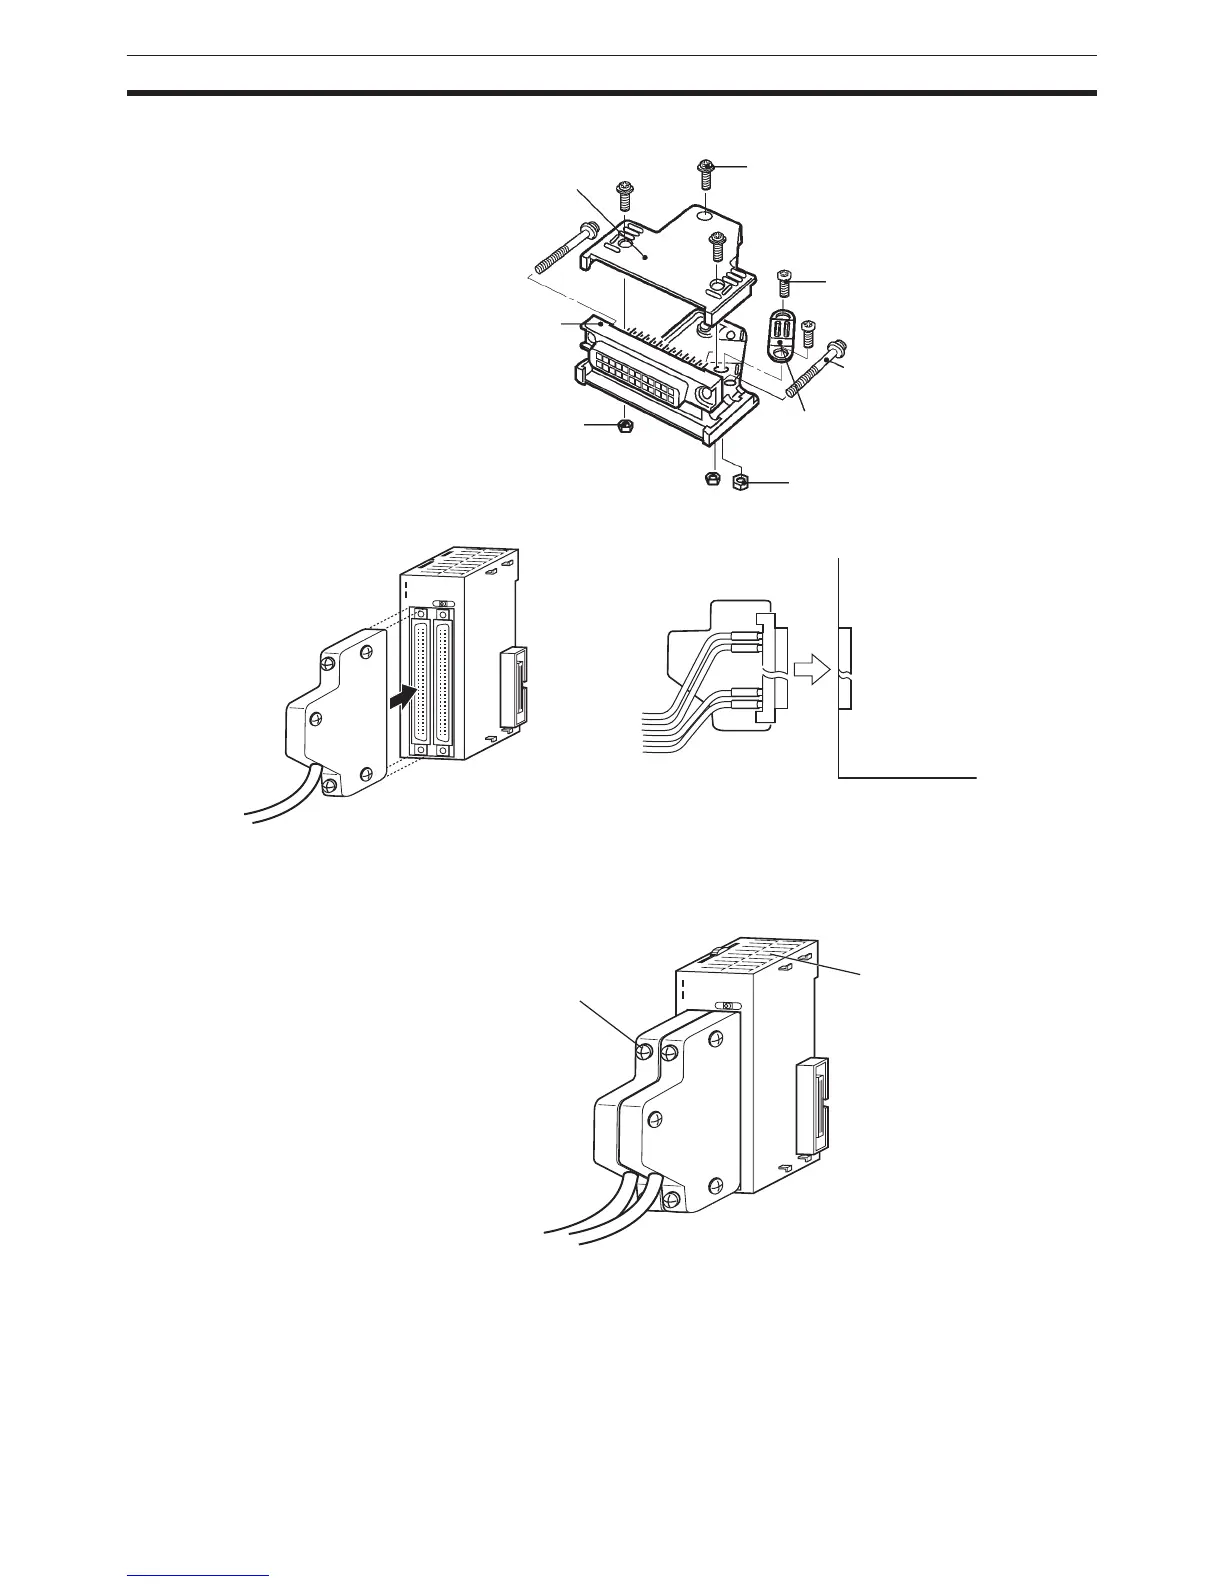
5. Insert the wired connector.
6. Remove the protective label after wiring has been completed to allow air
circulation needed for cooling.
Tighten the connector-attaching screws to a torque of 0.2 N
•m.
Connector bar
Small screws (3)
Socket
Nuts (3)
Small screws (2)
Connector-attaching
screws
Cable-securing
bracket
Nuts (2)
0 1 2 3 4 5 6 7
8 9
12
13 14
15
10 11
0 1 2 3 4 5 6 7
8 9
12 13 14 15
10 11
I
II
ID261
Connector
Connector
I/O Unit
I/O Unit
0 1 2 3 4 5 6 7
8 9
12 13 14 15
10 11
0 1 2 3 4 5 6 7
8 9
12
13
14
15
10 11
I
II
ID
261
After wiring
Remove label after wiring
Connector lock screws
 Loading...