STAND: 17.06.2019 9910_Operation_Manual_STANDCONTROL_C1_Rev1v1_EN Seite 18 von 41
8 Commissioning
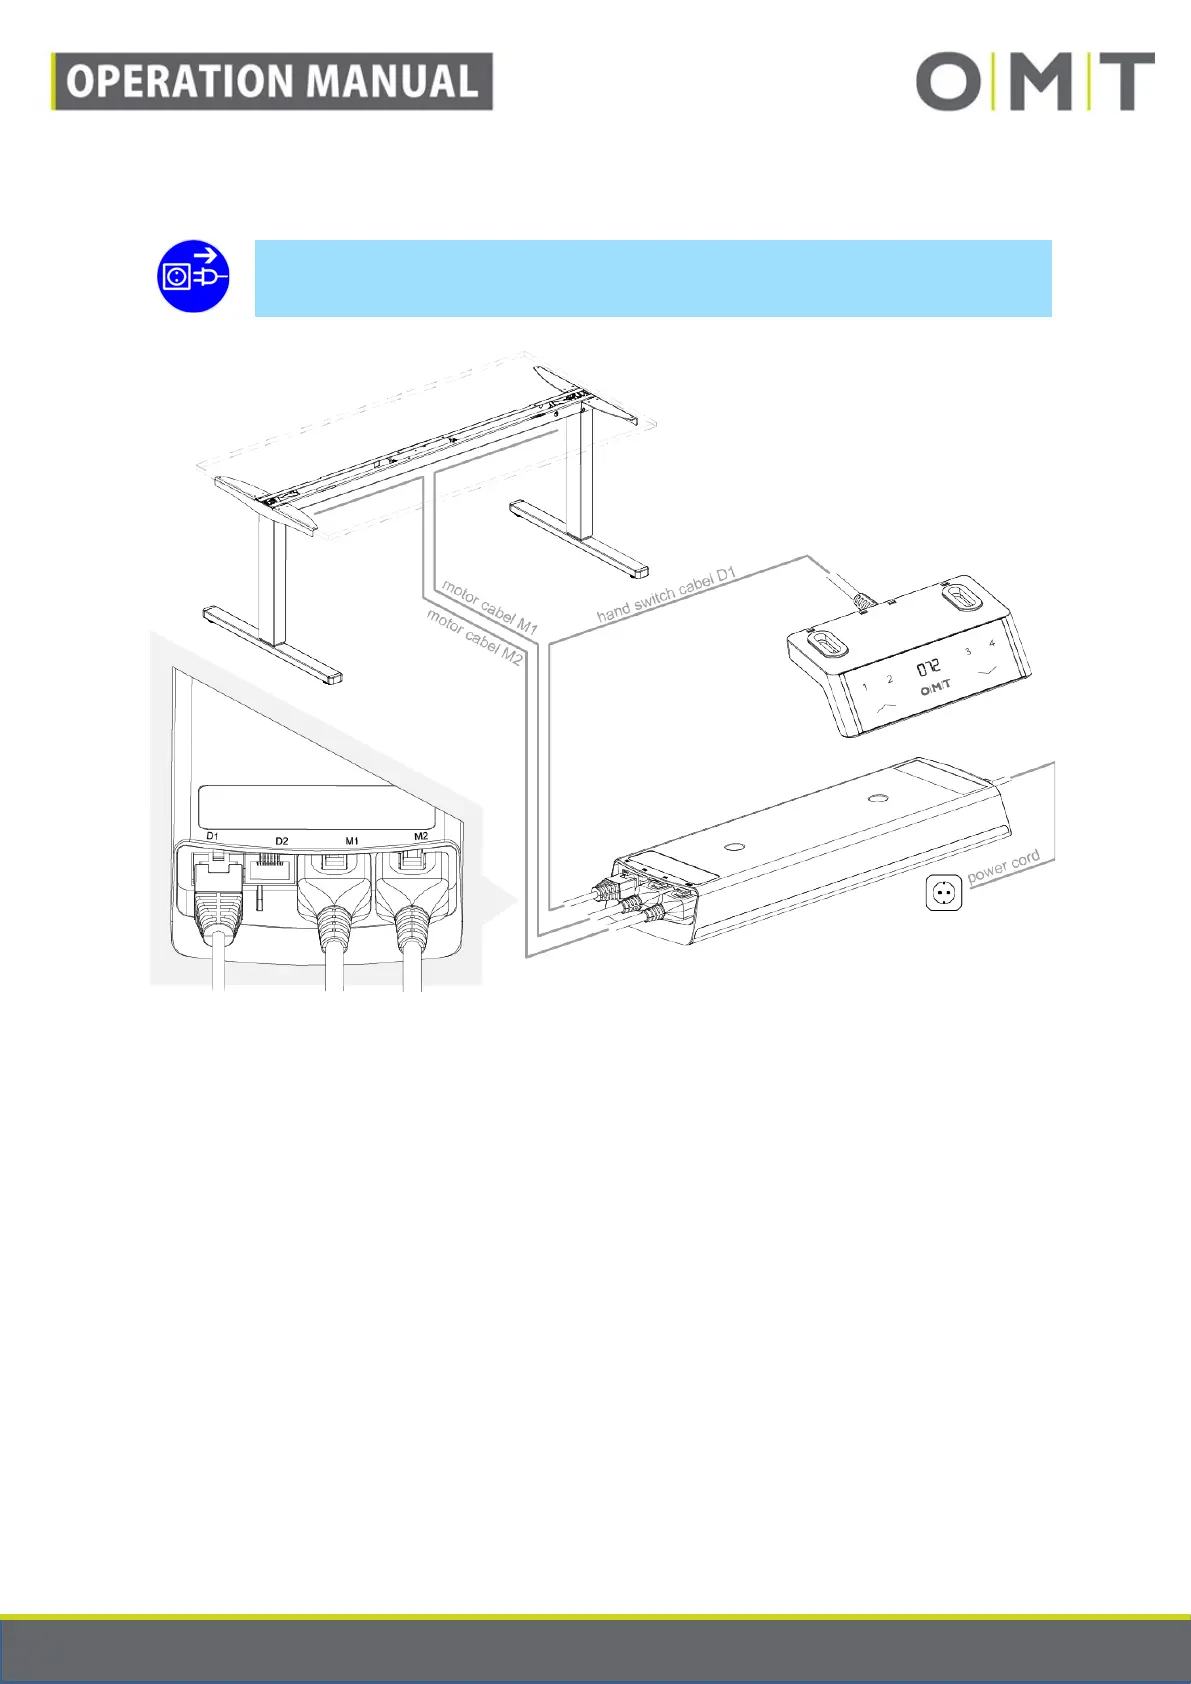
Note: Before commissioning, the controller must be electrically de-energised.
Figure 6: Example configuration for a table.
8.1 Connecting the drives
If you receive a pre-assembled table-top support frame, in which the columns and the controller are
already connected to one another, continue with the instructions in Section 8.2.
Connect the motor cables to the columns. This step is only required for fitted columns without an
integrated motor cable. In this case, you can skip to the next step.
Connect the free end of the motor cable of the left-hand column with one of the motor terminals (M1 or
M2). Connect the free end of the motor cable of the right-hand column with the free motor terminal (M1
or M2). Make sure that the motor cables snap audibly into place in all the plug connections. If required,
verify correct fitting by pulling on the cable using only slight force.
8.2 Connecting the hand switch and accessories
Connect the hand switch with one of the RJ45 ports (D1 or D2). Ensure that the RJ45 connector snaps
into place audibly when it is connected. If required, verify correct fitting by pulling on the cable using
only slight force.