8
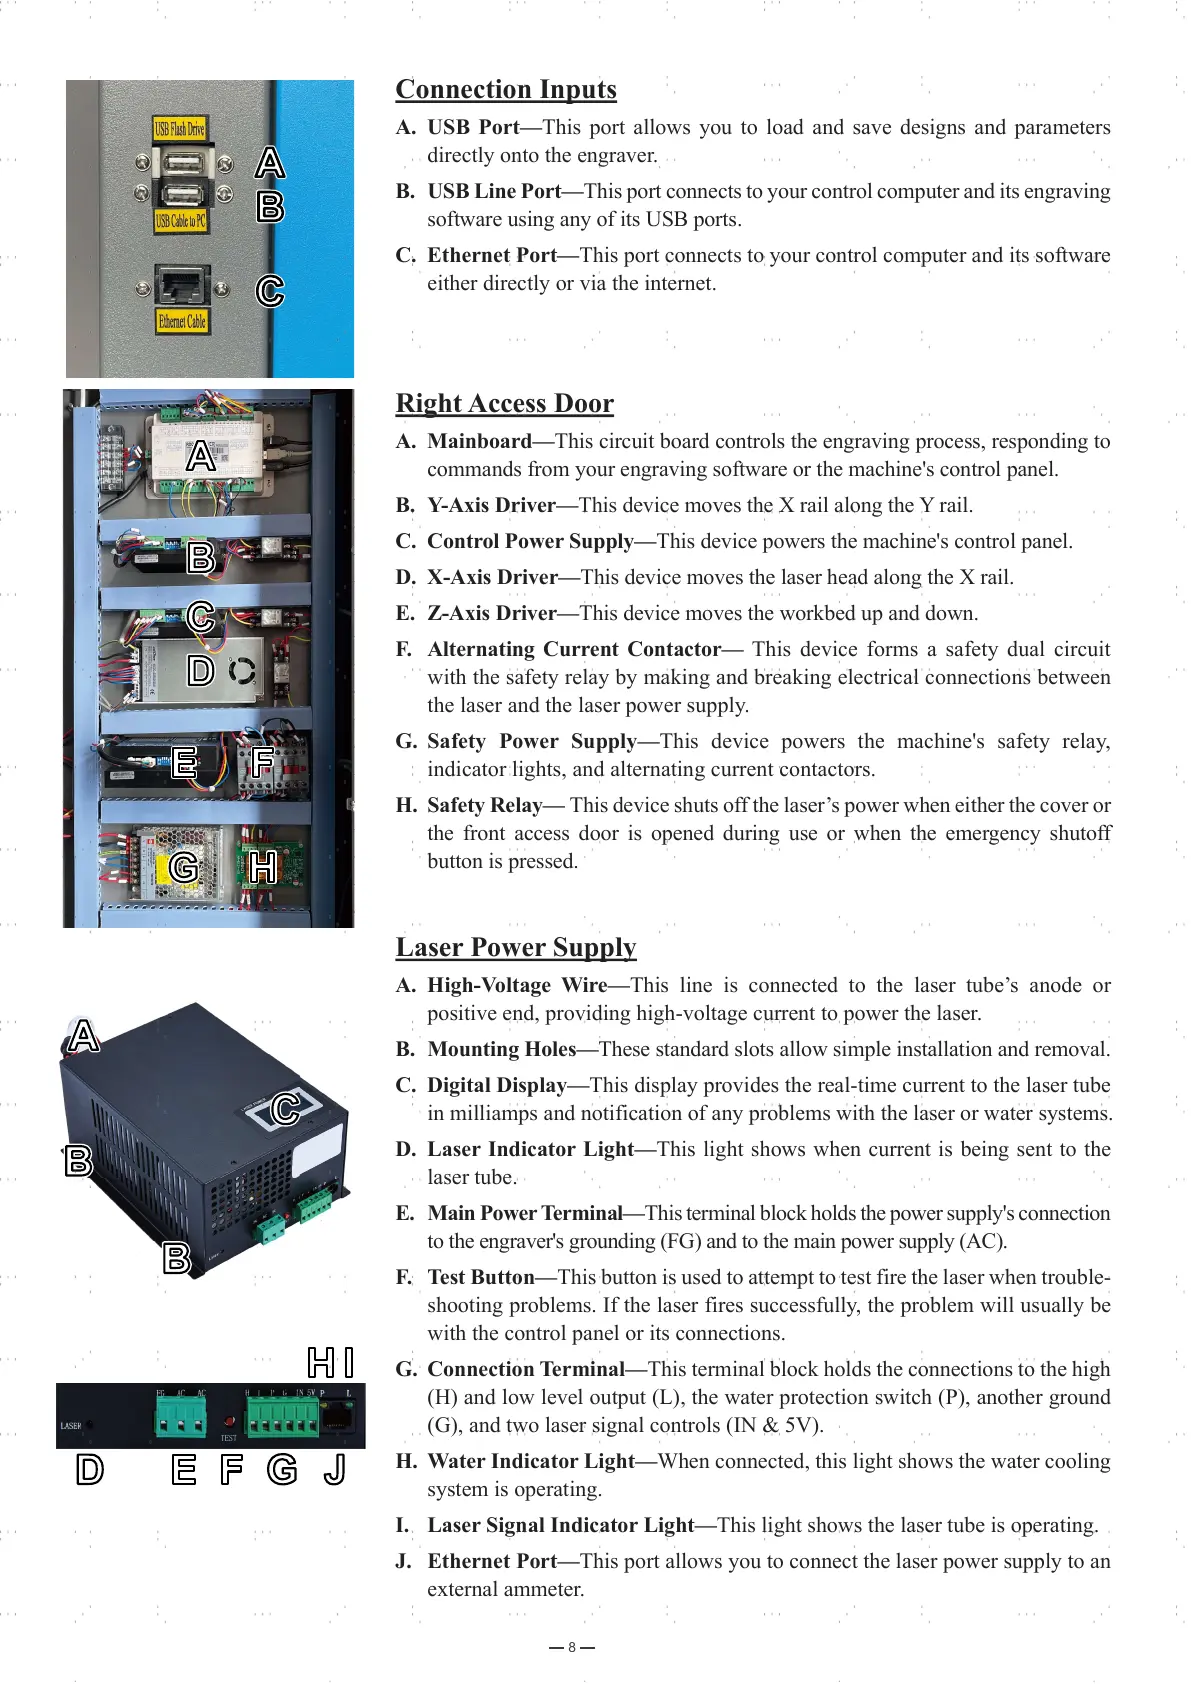
Right Access Door
A. Mainboard—This circuit board controls the engraving process, responding to
commands from your engraving software or the machine's control panel.
B. Y-Axis Driver—This device moves the X rail along the Y rail.
C. Control Power Supply—This device powers the machine's control panel.
D. X-Axis Driver—This device moves the laser head along the X rail.
E. Z-Axis Driver—This device moves the workbed up and down.
F. Alternating Current Contactor— This device forms a safety dual circuit
with the safety relay by making and breaking electrical connections between
the laser and the laser power supply.
G. Safety Power Supply—This device powers the machine's safety relay,
indicator lights, and alternating current contactors.
H. Safety Relay— This device shuts off the laser’s power when either the cover or
the front access door is opened during use or when the emergency shutoff
button is pressed.
Laser Power Supply
A. High-Voltage Wire—This line is connected to the laser tube’s anode or
positive end, providing high-voltage current to power the laser.
B. Mounting Holes—These standard slots allow simple installation and removal.
C. Digital Display—This display provides the real-time current to the laser tube
in milliamps and notification of any problems with the laser or water systems.
D. Laser Indicator Light—This light shows when current is being sent to the
laser tube.
E. Main Power Terminal—This terminal block holds the power supply's connection
to the engraver's grounding (FG) and to the main power supply (AC).
F. Test Button—This button is used to attempt to test fire the laser when trouble-
shooting problems. If the laser fires successfully, the problem will usually be
with the control panel or its connections.
G. Connection Terminal—This terminal block holds the connections to the high
(H) and low level output (L), the water protection switch (P), another ground
(G), and two laser signal controls (IN & 5V).
H. Water Indicator Light—When connected, this light shows the water cooling
system is operating.
I. Laser Signal Indicator Light—This light shows the laser tube is operating.
J. Ethernet Port—This port allows you to connect the laser power supply to an
external ammeter.
GG HH
Connection Inputs
A. USB Port—This port allows you to load and save designs and parameters
directly onto the engraver.
B. USB Line Port—This port connects to your control computer and its engraving
software using any of its USB ports.
C. Ethernet Port—This port connects to your control computer and its software
either directly or via the internet.
AA
BB
CC
AA
BB
CC
EE FF
DD
AA
BB
BB
CC
EE FF GGDD JJ
IIHH