5
G. Top Right Access Door—This door provides access to the Y-axis drag chain, X-axis motor, and controller.
H. Bottom Front Access Door—This door provides access to the waste hopper for easy cleanup after each project.
I. Inputs—This panel includes the ports for the machine's USB, computer, and internet connections.
J. Right Access Door—This door provides access to the mainboard, motor drivers, and power supplies.
K. Feet—These feet can be rotated down to help anchor the machine in place.
L. Caster Wheels—The front wheels include locks to hold the engraver in place.
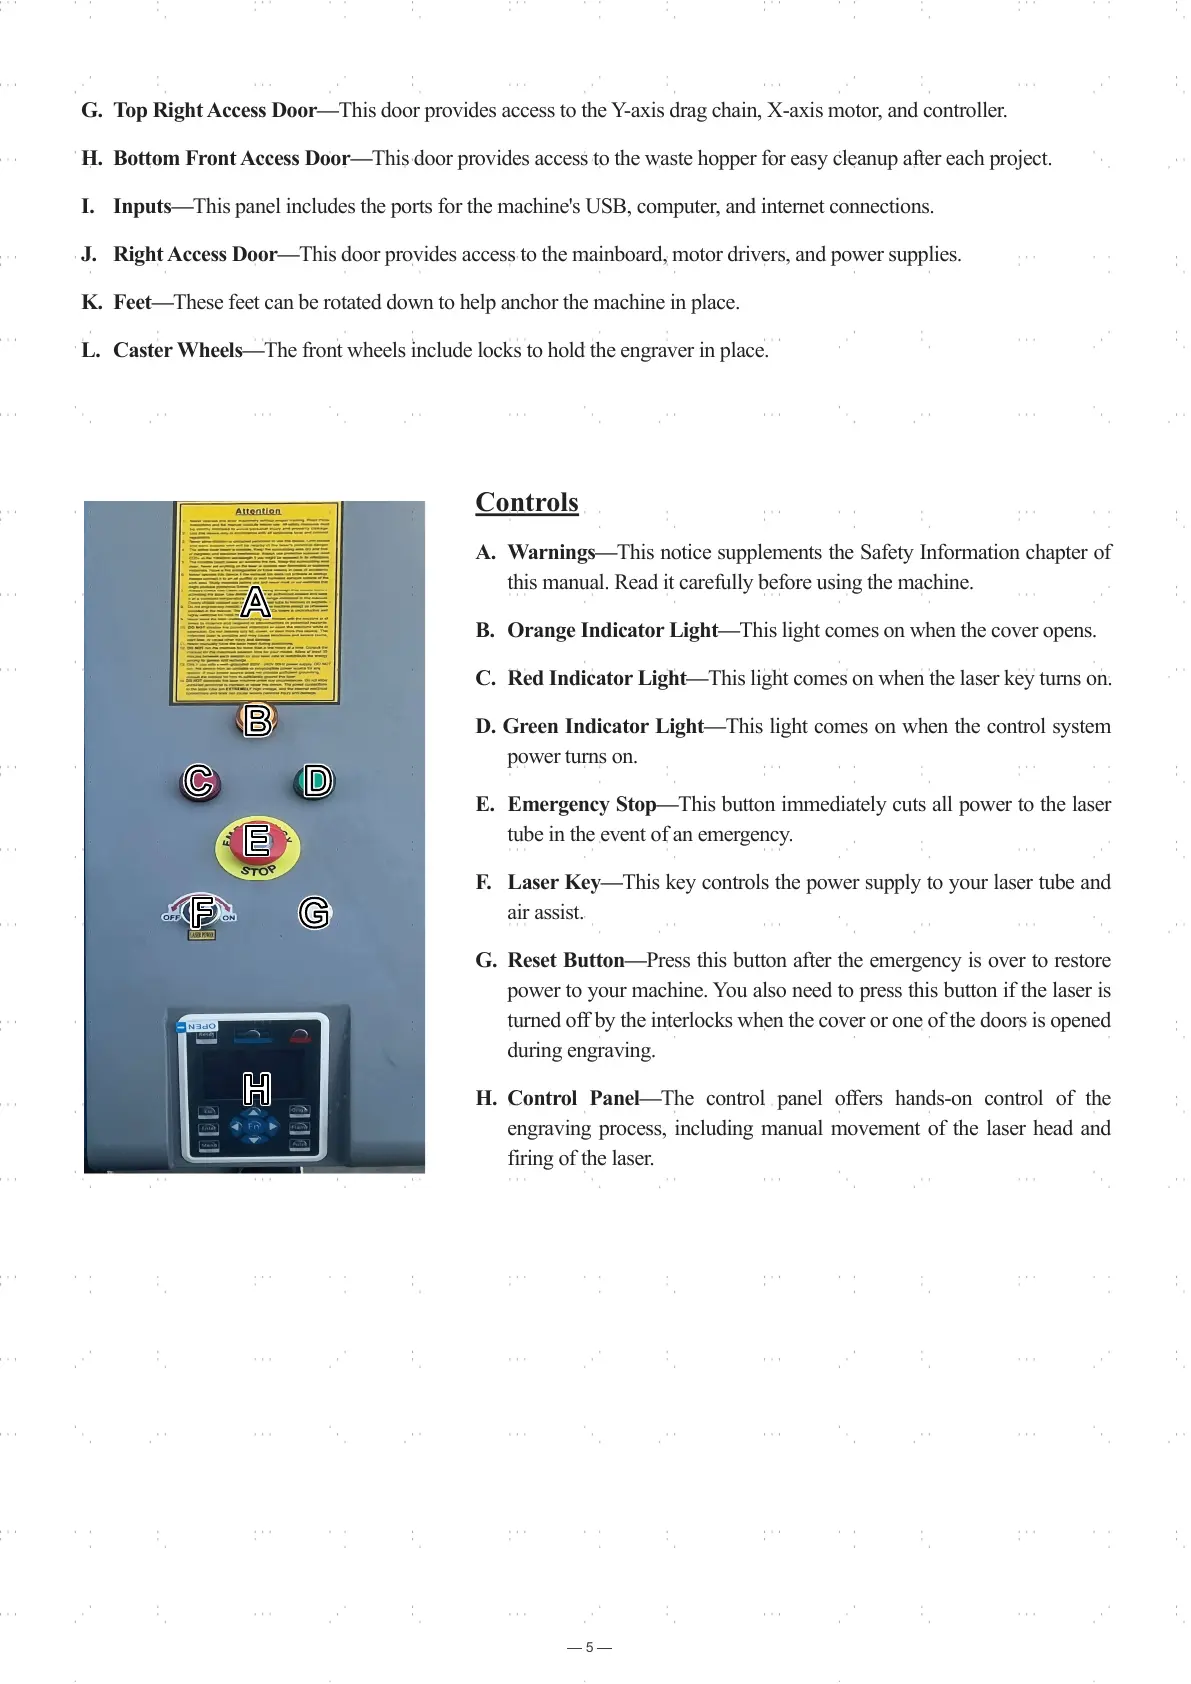
Controls
A. Warnings—This notice supplements the Safety Information chapter of
this manual. Read it carefully before using the machine.
B. Orange Indicator Light—This light comes on when the cover opens.
C. Red Indicator Light—This light comes on when the laser key turns on.
D. Green Indicator Light—This light comes on when the control system
power turns on.
E. Emergency Stop—This button immediately cuts all power to the laser
tube in the event of an emergency.
F. Laser Key—This key controls the power supply to your laser tube and
air assist.
G. Reset Button—Press this button after the emergency is over to restore
power to your machine. You also need to press this button if the laser is
turned off by the interlocks when the cover or one of the doors is opened
during engraving.
H. Control Panel—The control panel offers hands-on control of the
engraving process, including manual movement of the laser head and
firing of the laser.
BB
CC
EE
FF
DD
AA
GG
HH