Use the bracket for normal installation. The unit may be mounted directly on the wall, without
the bracket, only if the following three conditions are not;
The mounting height 3.0 m (9'10").
Horizontal direction adjustment is unnecessary.
The ground is level.
•
•
•
2-1
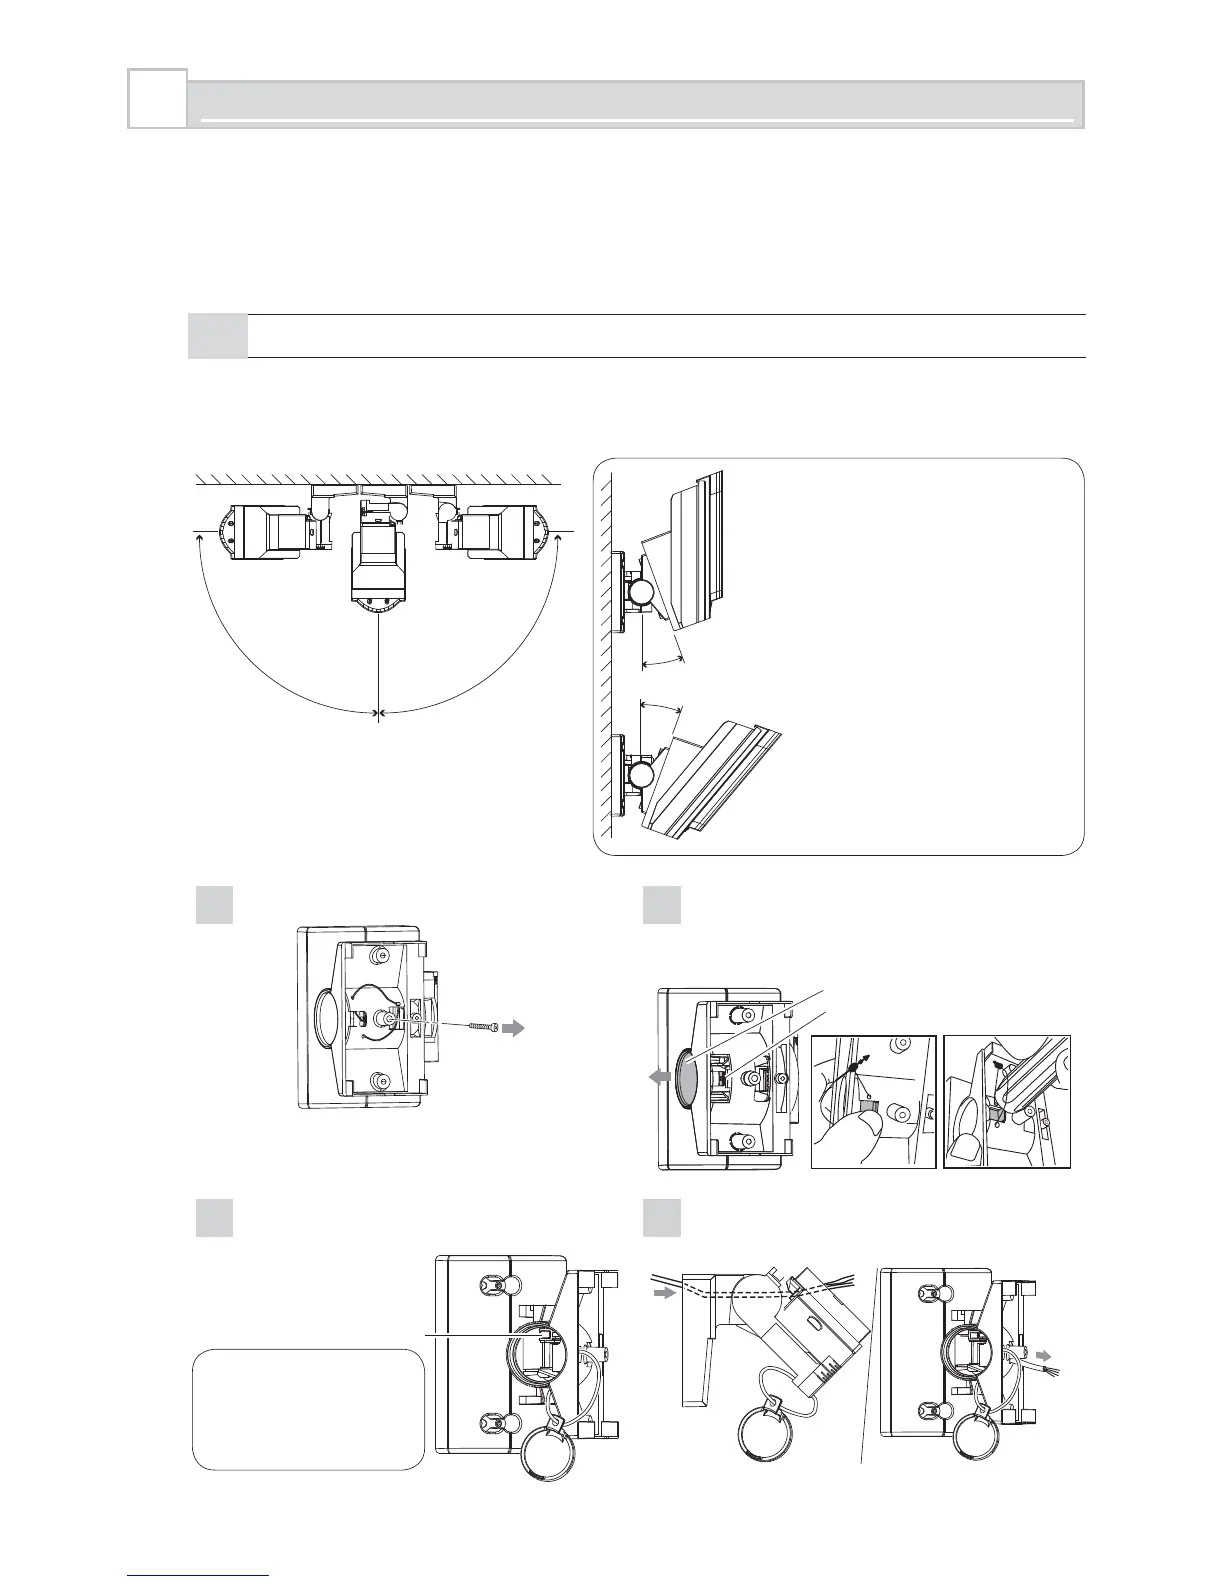
MOUNTING WITH BRACKET
Using the bracket makes it possible to adjust the unit horizontally by ±90°.
In cases where the ground is uneven and/or not parallel with the base of the unit, it is possible
to adjust the unit vertically by ±20°.
2
INSTALLATION
90° 90°
20°
20°
Caution>>
Do not change the detection
length with bracket.
Use the masking seal to
adjust the detection length.
1
Remove the Up-Down lock screw.
2
Push the shaft cover clip straightforwardly with
your thumb. In case the clip is stuck, use a
suitable tool. e.g. back side of a screw driver.
Shaft cover clip
Shaft cover
3
Loosen the adjustment screw two turns.
4
Tilt the bracket about 45° and pass
through the wire.
In
Out
Adjustment screw
Caution>>
Do not loosen the
screw too much.
It may disassemble.
- 6 -
 Loading...