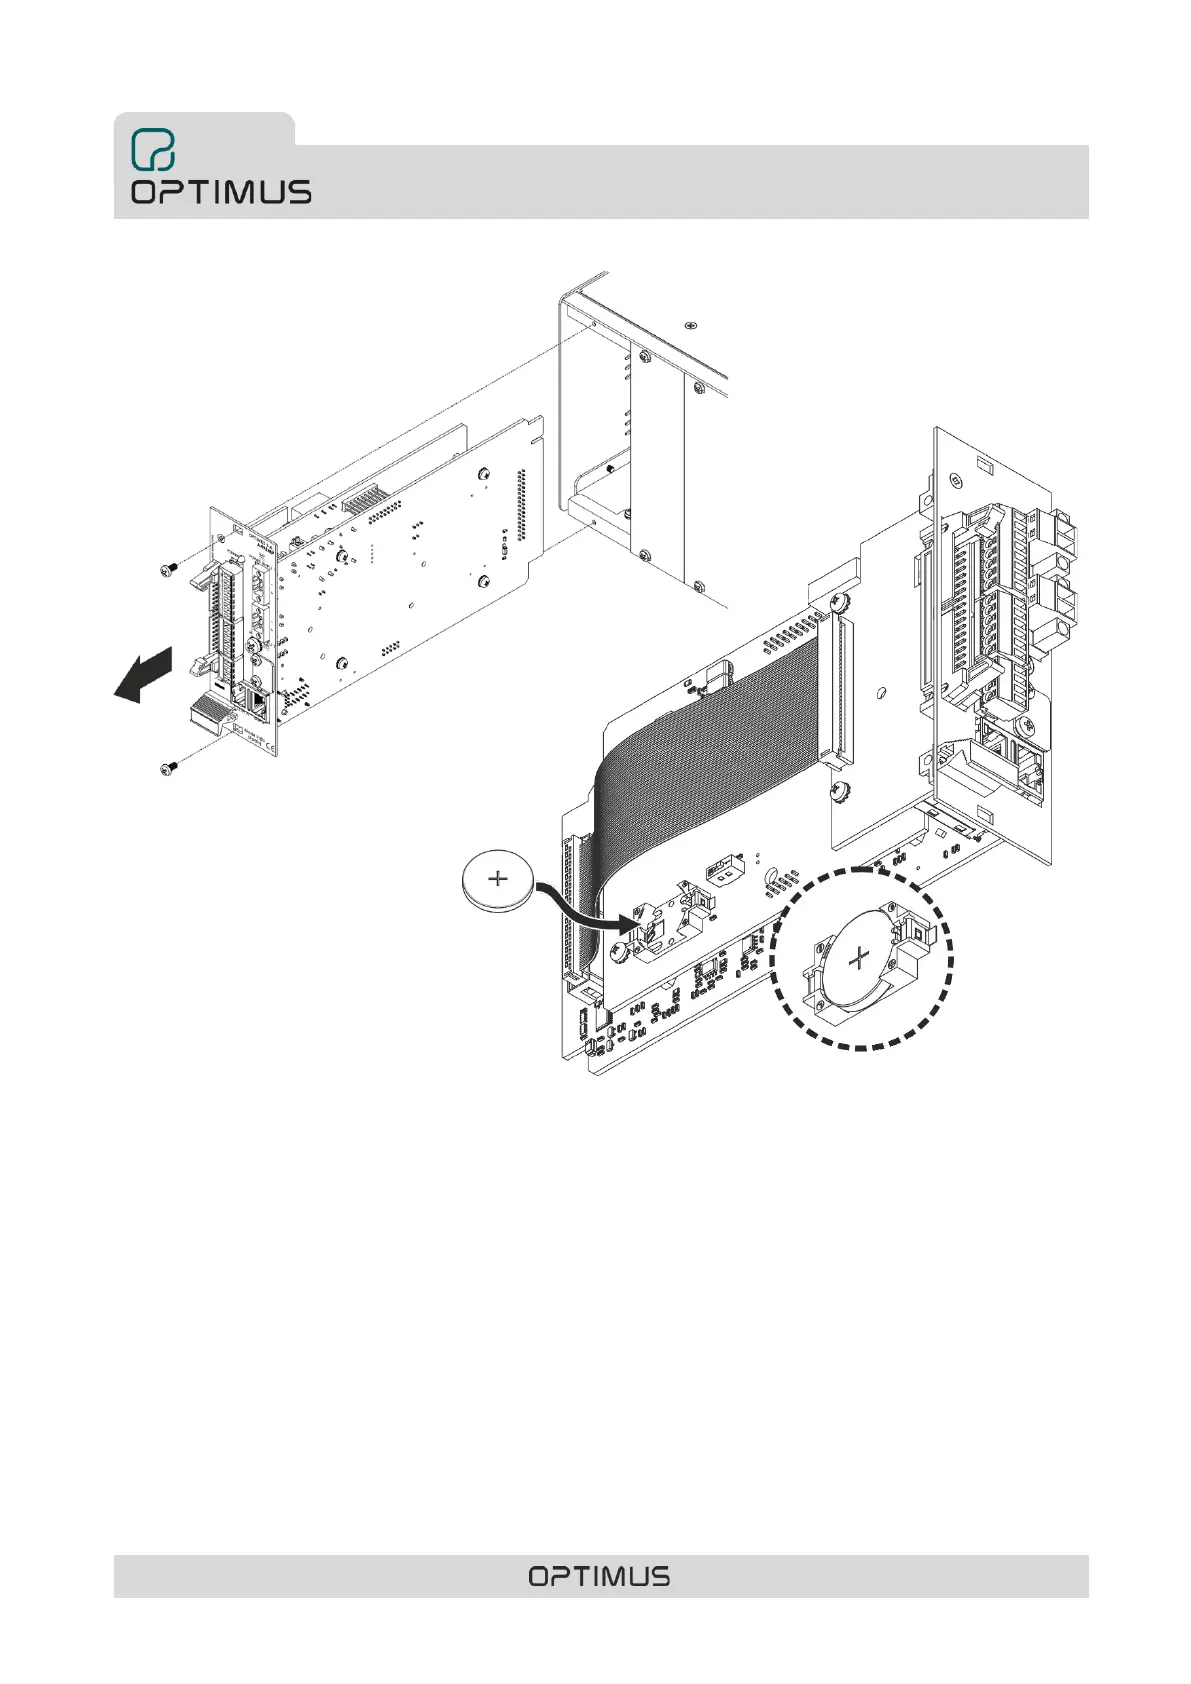
2) Remove the control module.
3) Insert the battery respecting the
polarity indicated in the drawing in
figure 14.
4) Once placed, insert the control
module and turn on the COMPACT
power.
When inserting or changing the battery, it is necessary to synchronize the time of the equipment with the rest of the equipment
in the installation. To do this:
• If one or more NTP servers are configured in the system, the time and date of the equipment will be updated automatically.
• If there is a server PC in the system, you can update the time using the Call Point software.
• If there are neither NTP servers nor server PCs in the system, connect to the web server of the unit to change
the date and time:
1. From a PC whose IP address is in range with that of the unit, open a browser, enter the IP address of
the unit and press ENTER.
By default, the unit's network settings are as follows:
IP ADDRESS: 10.1.1.1
NETMASK: 255.0.0.0.0
GATETEWAY: 0.0.0.0.0 (no Gateway)
2. Enter the username optimax, the password 1933 and click the Login button.
3. In the Setup section, select Time.
4. Modify the date and time parameters and click Set Time.