9
OrionWelders.com
ch.1
7. Place an alligator clip into the positive port on the front
panel of the welder. *Remember to attach the alligator
clip to the work piece before welding.
Darkening Lens Setup
SET UP THE DARKENING LENS
e Orion’s darkening lens system is easy to use. e darkening lens will automatically darken
when the weld takes place. is allows the user to have a magnified view of the work piece
and protection from the flash during the welding process. A video explanation for setting up
the microscope can be found at http://www.orionwelders.com/resources/orion-c-series-
resources/
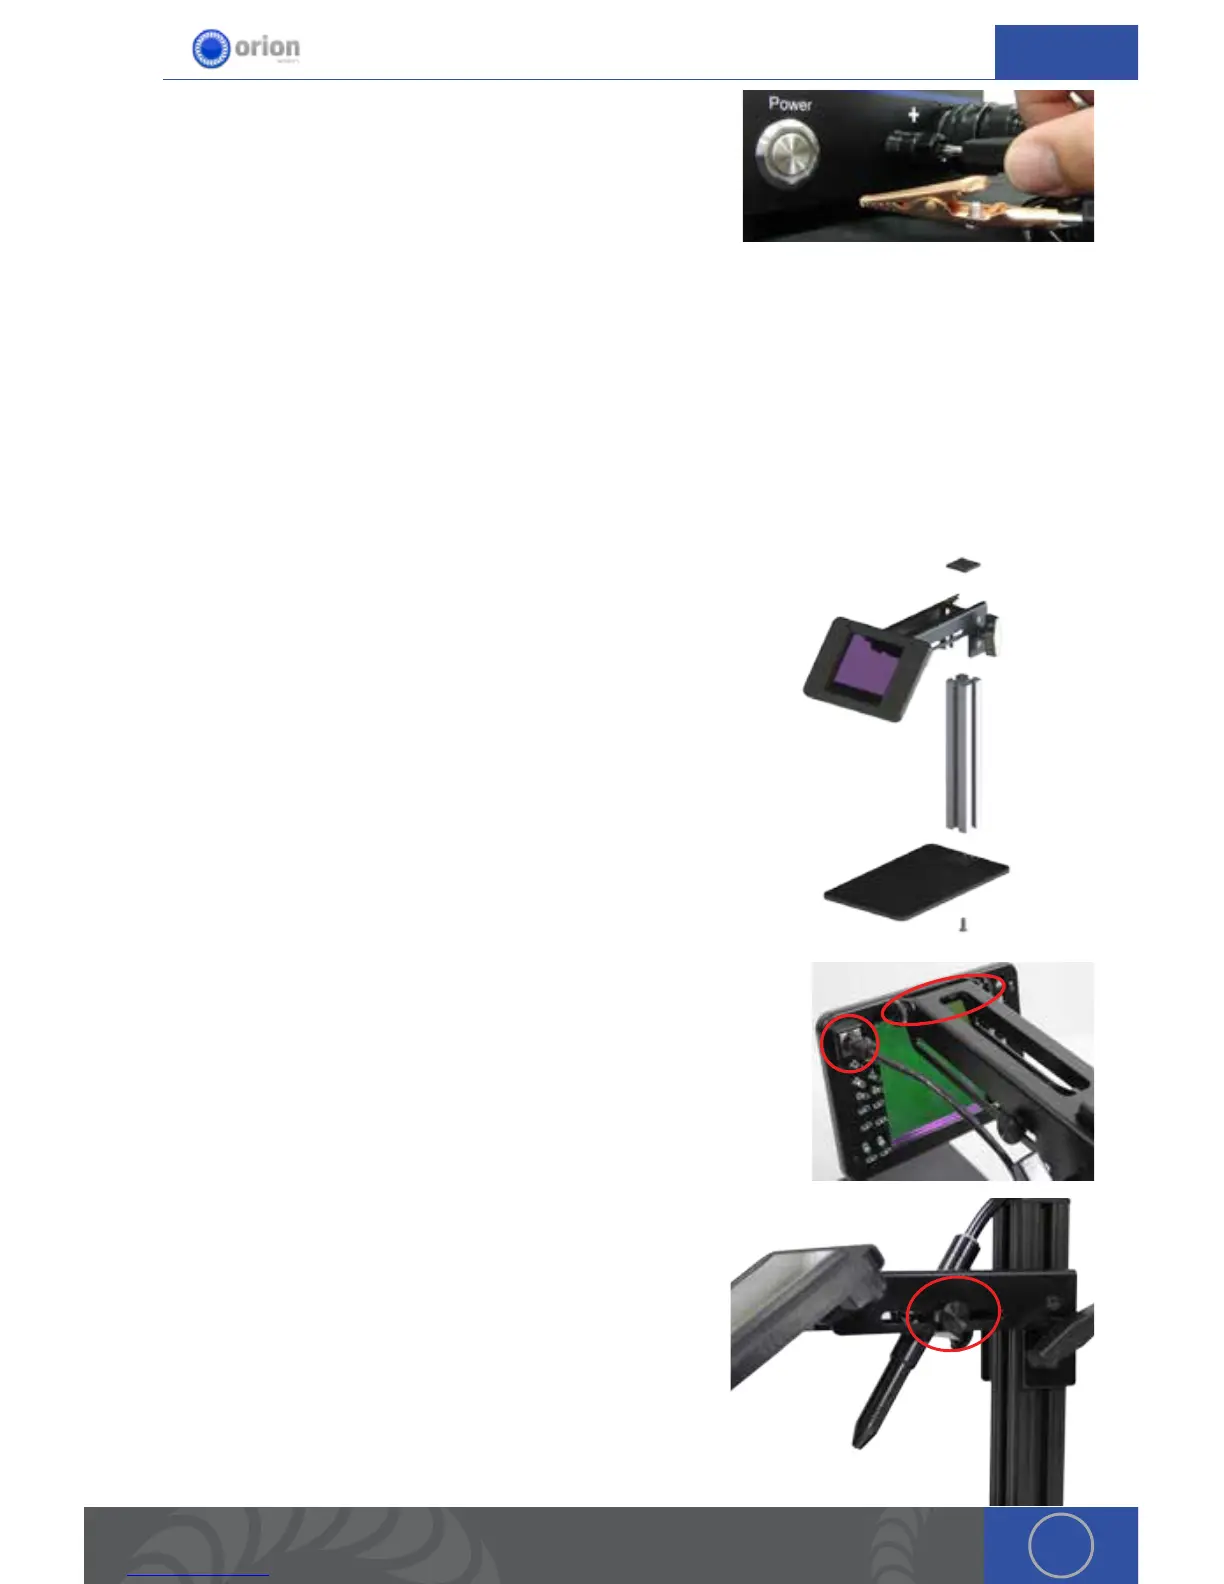
1. Remove Darkening Lens parts from the box and place
them on your workbench.
2. Connect the Base Plate to the Base Plate Stand by
running the included Phillips screw through the bottom
of the Base Plate into the Base Plate Stand. (e Phillips
screw will be attached to the bottom of the Base Plate
Stand. Unscrew it then follow this step)
3. Slide the Darkening Lens Arm onto the Base Plate
Stand. Adjust it to your desired height then tighten the
Darkening Lens Arm knob.
4. Place the Base Plate Stand Cap on top of the Base Plate
Stand.
5. Adjust the Darkening Lens Position by loosening/tightening
the adjuster knobs on the front of the Darkening Lens Arm.
6. Plug the RJ45 Darkening Lens cable into the Darkening Lens
light ring and the other end of the cable into the “Foot Pedal/
Microscope” port on the back of the welder.
7. Insert the Orion stylus into the Stylus Holder on the
Darkening Lens Arm. Adjust the position of the stylus by
loosening/tightening the adjuster knobs on either side
of the Darkening Lens Arm.
Base Plate
Stand Cap
Base Plate
Stand
Base Plate
Phillips Screw
Darkening
Lens Arm
Darkening
Lens Arm
Knob
Darkening
Lens
5.
6.