11
OrionWelders.com
ch.1
FOCUS THE BASE MICROSCOPE
1. Move the microscope head up or down to a comfortable height.
2. Adjust the stylus rod so the stylus is at a 45-degree angle.
3. Adjust the stylus rod holder up and down to a height that gives the user room to position their
hands underneath the stylus and lift the work piece upward to the stylus.
4. Twist the Microscope Focus knob to focus the microscope.
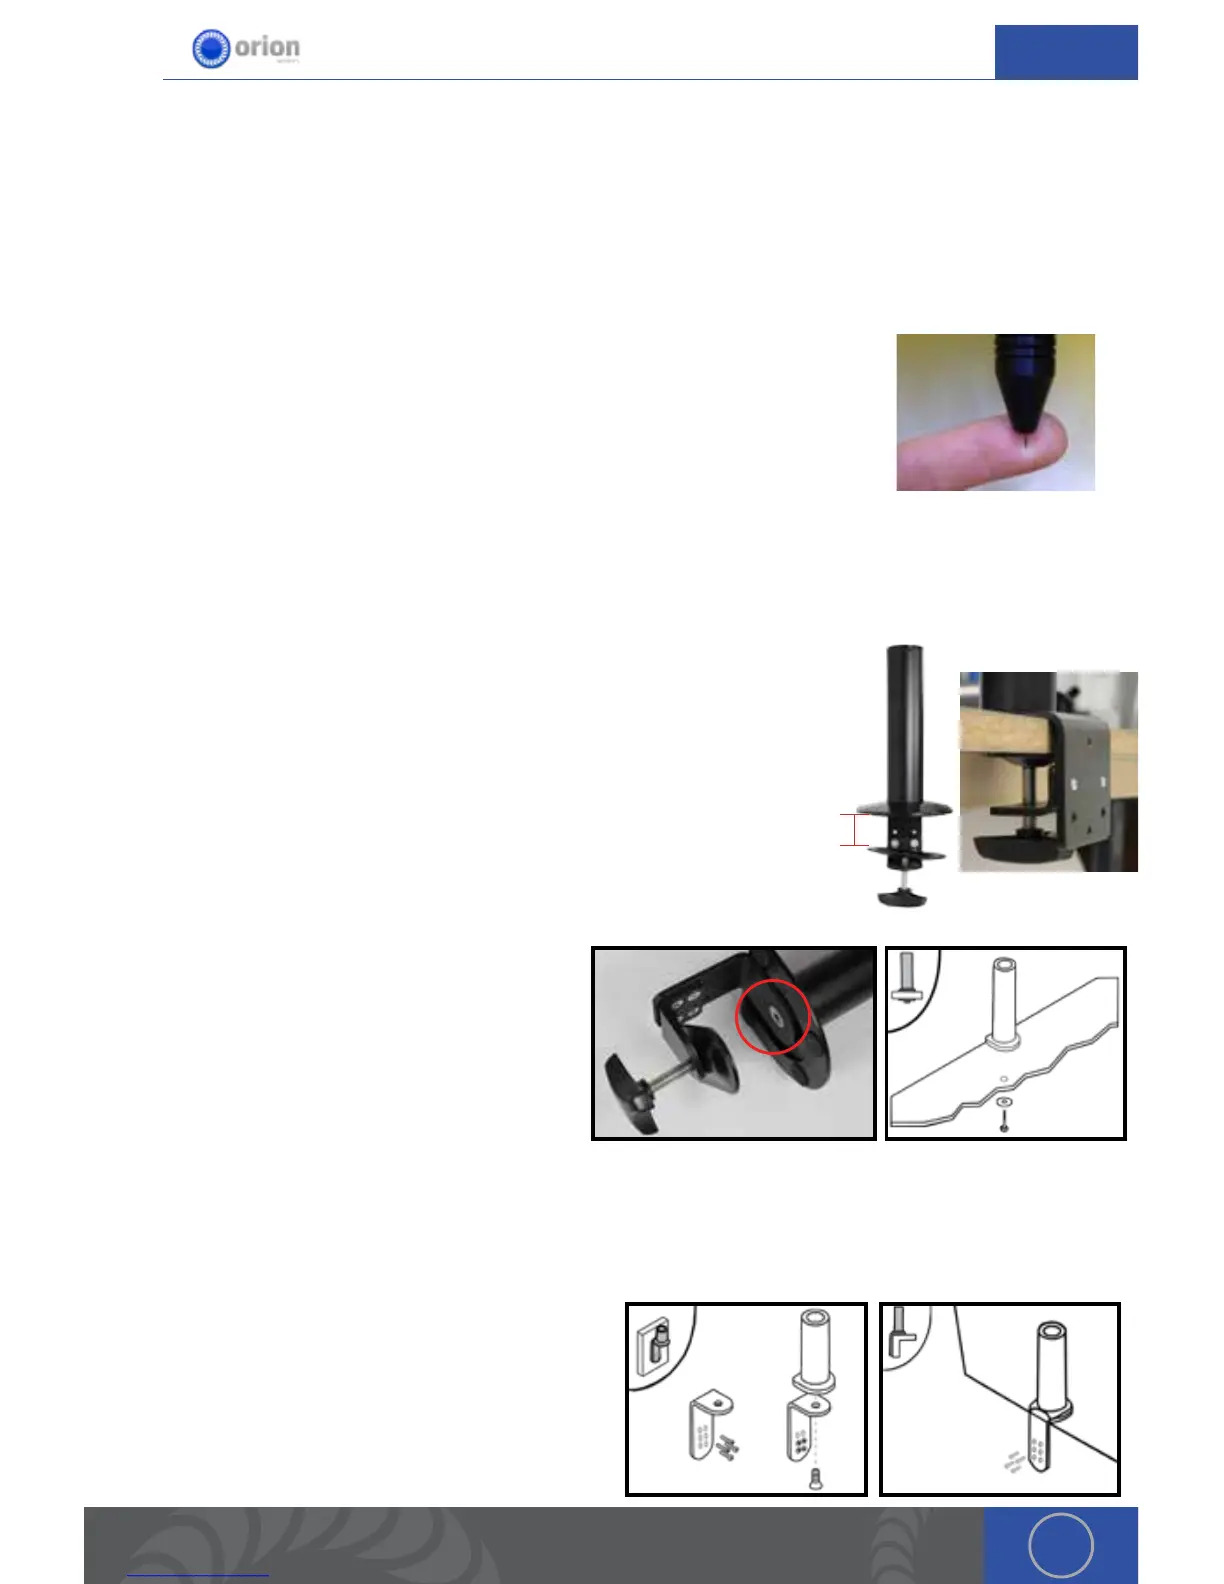
When adjusting the microscope focus, place your finger at the tip of the
welding stylus to help judge the correct focus location. Focus the microscope
till the texture on the skin of your finger is clearly visible.
Microscope Arm Setup
MICROSCOPE ARM MOUNTING OPTIONS
A video explanation of the 3 different mounting options can be found at
http://www.orionwelders.com/resources/orion-c-series-resources/
Mounting Option 1 - Clamp to table
1. Determine the height of the tabletop. *If it is thicker than 2-3/4’
(7cm), follow arm base mounting options 2 or 3.
2. Position the microscope arm clamp under the tabletop.
3. Turn the clamp knob clockwise until the clamp is very snug.
Mounting Option 2 - Bolt through table
1. Using the provided allen wrench, unscrew
the 10m x 1.5 allen bolt underneath the
arm base.
2. Drill a 3/8’ (10mm) hole through the
tabletop.
3. Place a washer on the 10m x 1.5 bolt
(length will depend on tabletop thickness)
and run it up through the tabletop into the arm base.
4. Tighten the bolt until it is very snug.
Mounting Option 3 - Bolt to table
1. Position the base against the table.
2. Trace drill holes with a pen or marker.
3. Drill 1/4’ holes in the tabletop.
4. Run screws through the base into the drilled
holes.
2¾”