3OrionWelders.com
Chapter 1: Welder Setup & Assembly
What is in the Box
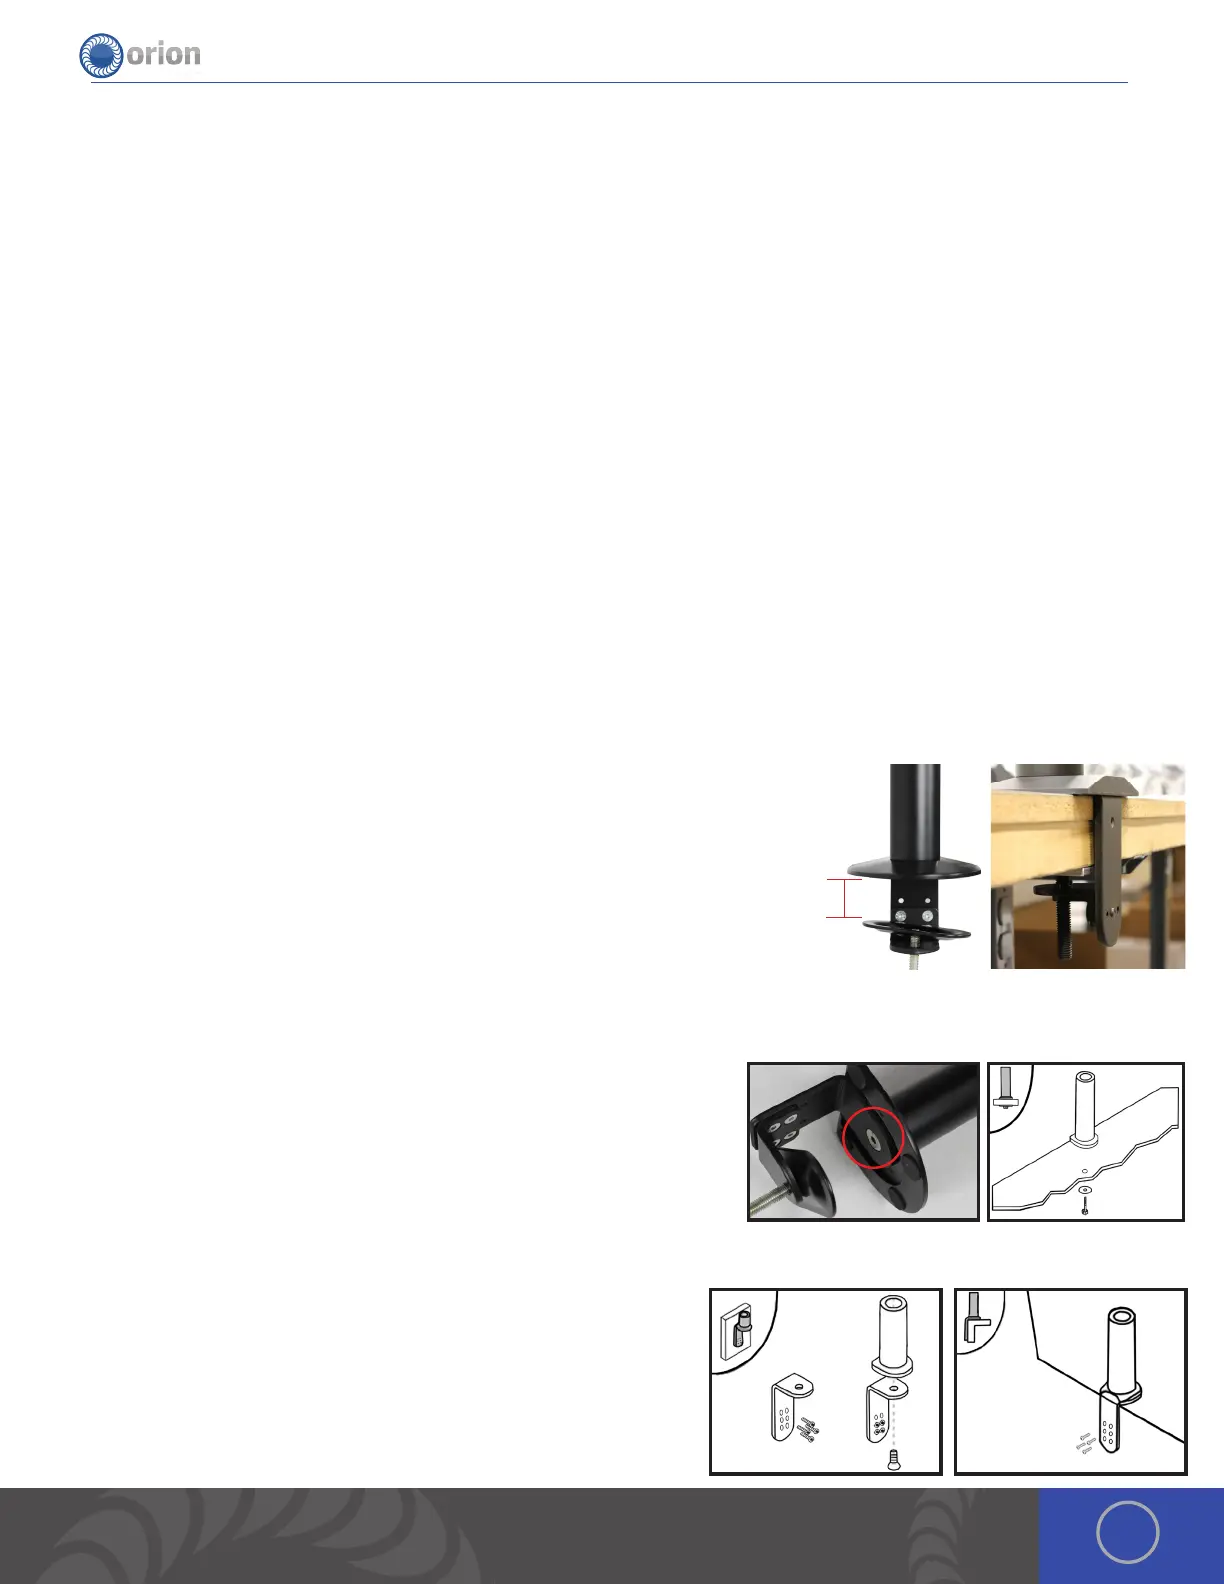
Mount the Microscope Arm
MOUNTING OPTION 1 CLAMP TO TABLE
• 1. Determine the height of the tabletop. *If it is thicker than 2-3/4’ (7cm), follow arm base mounting options 2 or 3.
• 2. Position the microscope arm clamp under the tabletop.
• 3. Place the included allen wrench in the opening at the bottom of the clamp
bolt. Turn the bolt clockwise until the clamp is very snug.
MOUNTING OPTION 2 BOLT THROUGH TABLE
1. Using the provided allen wrench, unscrew the 10m x 1.5 allen bolt underneath the arm base.
2. Drill a 3/8’ (10mm) hole through the tabletop.
3. Place a washer on the 10m x 1.5 bolt (length will depend on tabletop thickness) and run it up through the tabletop into
the arm base.
4. Tighten the bolt until it is very snug.
MOUNTING OPTION 3 BOLT TO TABLE
1. Position the base against the table.
2. Trace drill holes with a pen or marker.
3. Drill 1/4’ holes in the tabletop.
4. Run screws through the base into the drilled holes.
BOX
e Orion i2 Series System will arrive in 1 box.
MAIN BOX:
(1) User Manual & Getting Started/Quick Setting Guide
(1) Orion i2 Power Supply
(1) Orion i2 Microscope Arm
(1) Orion i2 Microscope Extender Arm
(1) Orion i2 Microscope Arm Table Mount
(1) Orion i2 Microscope Arm Support Bar
(1) Orion i2 Interface Box
(1) Orion i2 10 pin power cable
BOX WITHIN MAIN BOX:
(1) Welder Power Cord
(1) Stylus Hand Piece
(1) Pair Alligator Clips
(1) Foot Pedal
(1) Shielding Gas Hose
(1) Cross Lock Tweezers
(1) Electrode Vile (5x 0.5mm -- 5x 1.0mm Electrodes – 1x
Diamond Dremel Disk – 1x 0.5mm Orion Collet)
(1) Fiberglass Brush
(1) Stainless Steel Weld Sample Card
(1) 3 Allen Wrenches with green microscope protective cover
(1) Pair Microscope Eye Piece Shields
(1) Loop Closing Pliers
2¾”

 Loading...


