i Series User Manual
6
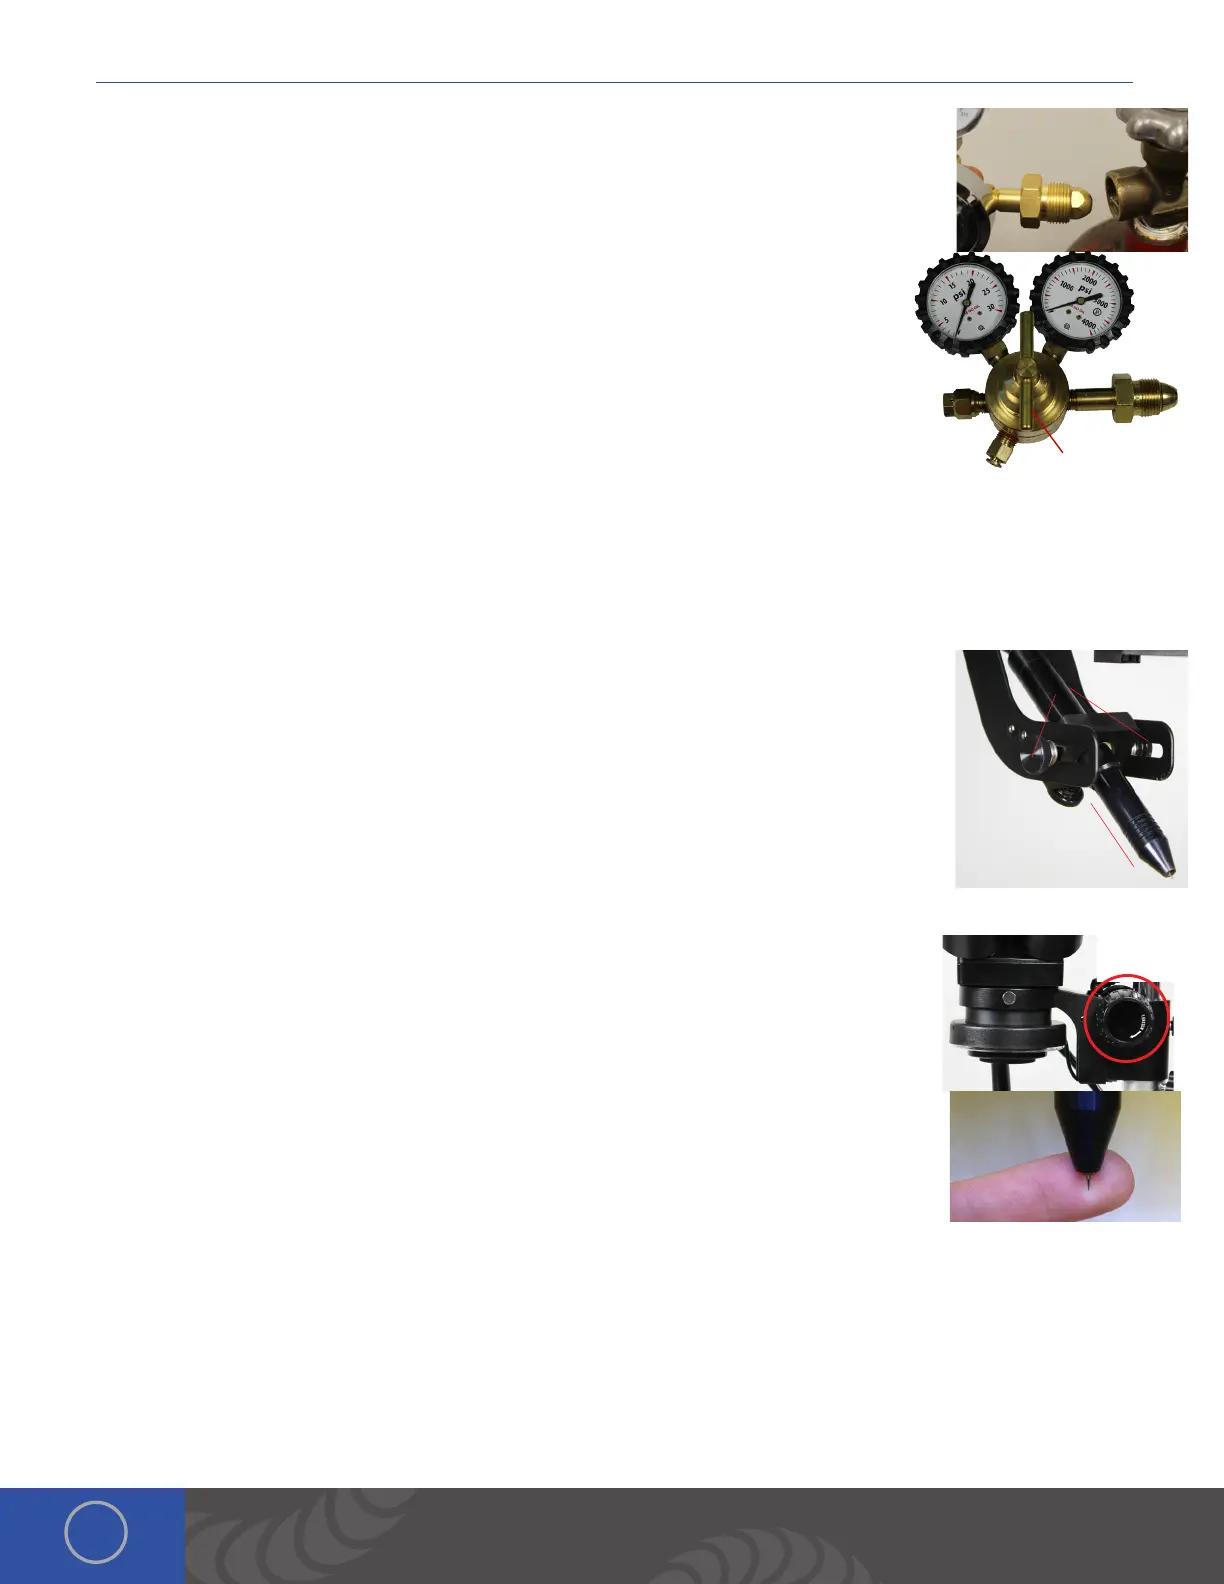
SHIELDING GAS TANK AND REGULATOR SETUP
1. Ensure that your shielding gas tank is securely fastened to a stationary point near the welding
area.
2. Turn the regulator dial COUNTER CLOCKWISE (closed) until it is fully backed out to prevent
over-pressurization of the line.
3. Screw the gas regulator onto the shielding gas tank.
4. Connect one end of the gas tubing into the gas regulator. It will stop when it is fully
connected. Tug gently on the tube to verify a tight fit.
5. Insert the other end of the gas tubing into the gas port on the back of the power supply.
It will stop when it is fully connected. Tug gently on the tube to verify a tight fit.
6. Open the gas tank slowly. e dial on the right should pressurize and the dial on the
right should remain at zero (when the regulator dial is fully backed out – see step 2).
7. Slowly turn the regulator dial CLOCKWISE until the gas pressure reads between 7-10 psi.
(is will adjust the dial on the left side of the regulator.)
Adjustments on the Microscope Arm
ADJUST WELDING STYLUS POSITION
1. Insert the welding stylus into the stylus holder under the microscope head then tighten the
stylus holder knob.
2. Loosen the screws on either side of the stylus holder.
3. Adjust the welding stylus to a 45-degree angle then slightly tighten the screws just enough to
hold the stylus in place at a 45-degree angle
4. While looking through the microscope, slide the welding stylus holder forward/backward until
the tip of the stylus is in the center of your focus.
5. Now securely tighten the stylus holder screws.
ADJUST THE MICROSCOPE FOCUS
1. Twist the large dial on either side of the microscope to move the microscope up or down in
order to focus the lenses.
When adjusting the microscope focus, place a finger under the welding electrode to help judge
the correct focus location. Focus the microscope till the texture on the skin of the finger is clearly
visible.
True Color Optical LCD Shutter
Sunstone Engineering has developed a truly revolutionary optical LCD welding filter. e True Color TM Optical LCD shutter
system allows Orion users an unimpeded full color view of the welding work-piece before welding. During a weld the Orion
pre-darkens the shutter to provide complete eye protection. Even when a weld is not taking place the user’s eyes are
always protected from harmful UV and IR radiation to levels exceeding typical safety requirements.
e True Color TM Optical LCD shutter system has been specifically design for the Orion i
2
seam mode. In seam mode the
1.
2. 45°
Regulator Dial
4.
 Loading...


