Hardware Installation
Step 1: Install the smart car basic frame work as per Smart Car Lesson 1 . If
you have already completed installation in Lesson 1 , please remove all wires
on Osoyoo Uno R3 board
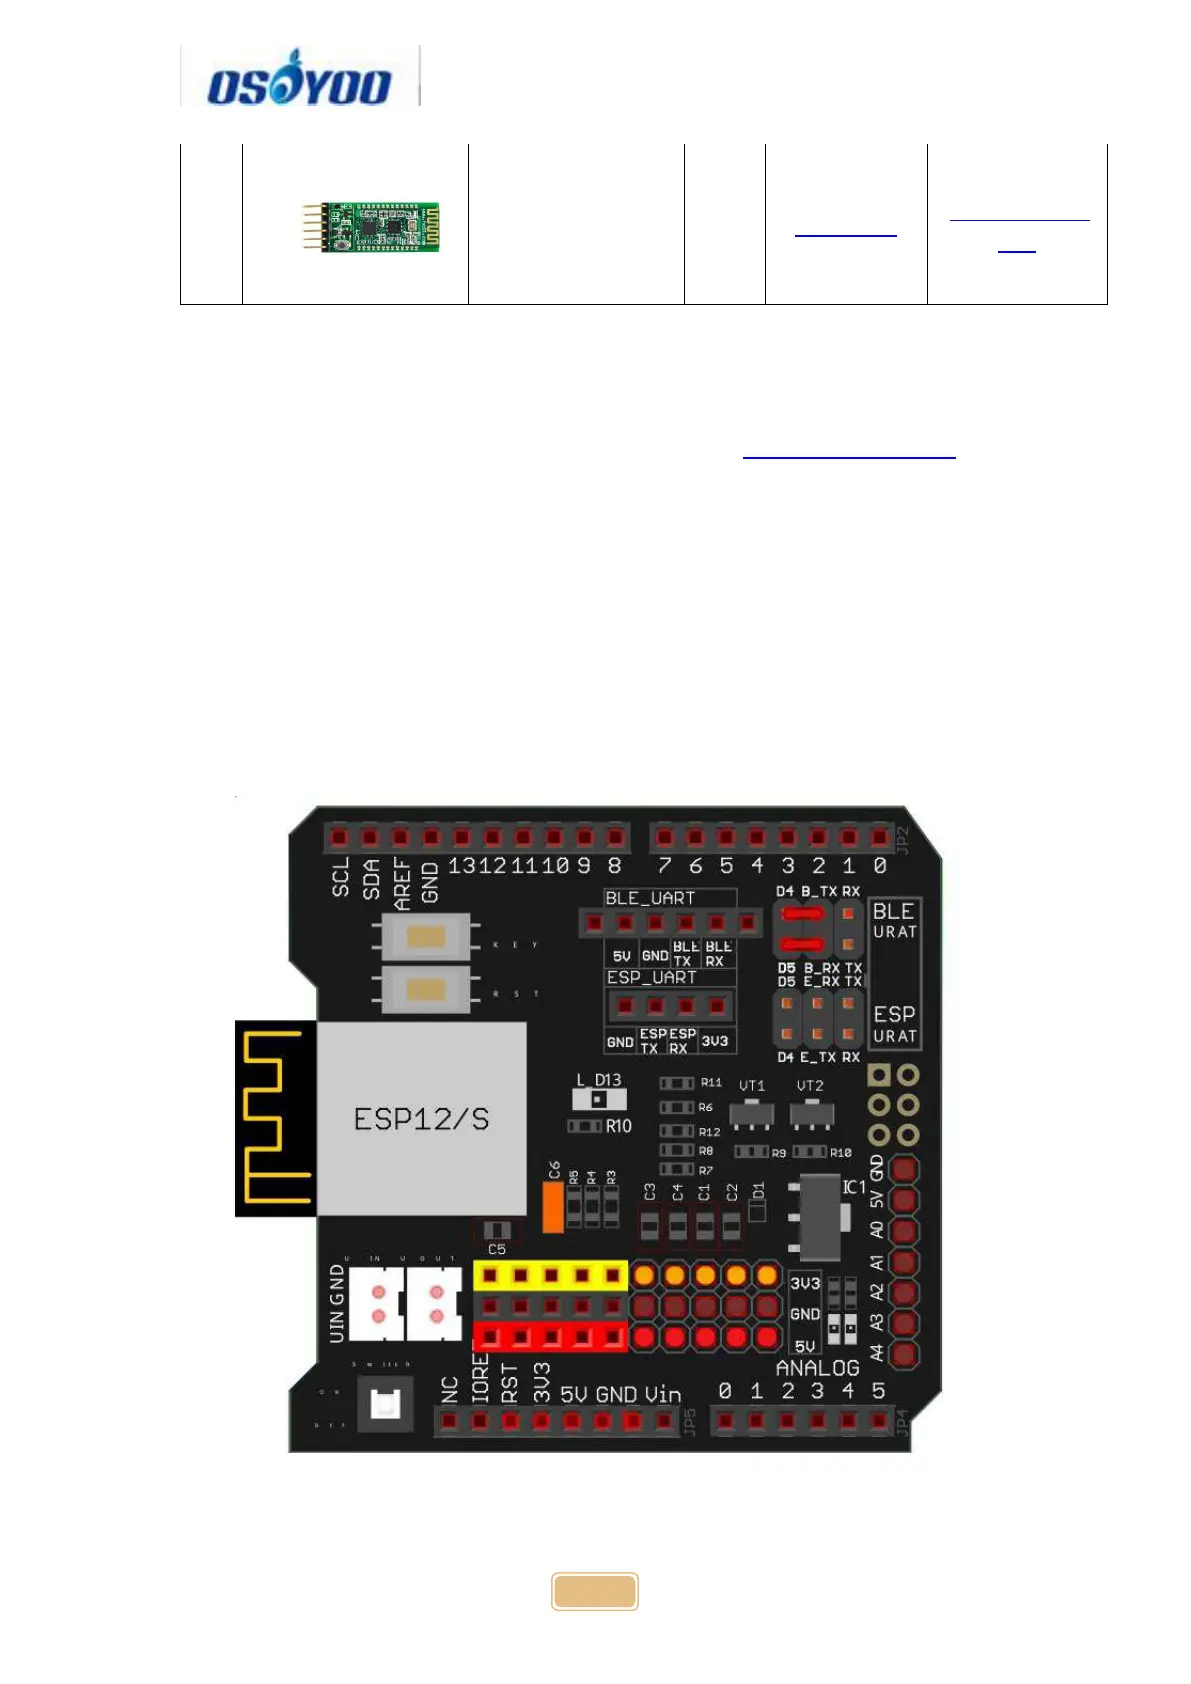
Step 2: Connect Bluetooth TX/RX ports to D4,D5 with jumper caps
Note: Our OSOYOO Uart WiFi shield V1.3 are connected BLE URAT TX/RX
ports to D4,D5 with jumper caps by default. If you find the Bluetooth TX/RX
ports is not connected to D4,D5, you need use a jumper cap or jumper wire to
connect B-TX to D4 and B-RX to D5
Step 4: Insert Bluetooth Module into OSOYOO Uart WiFi shield V1.3
Bluetooth slot as following graph:
 Loading...