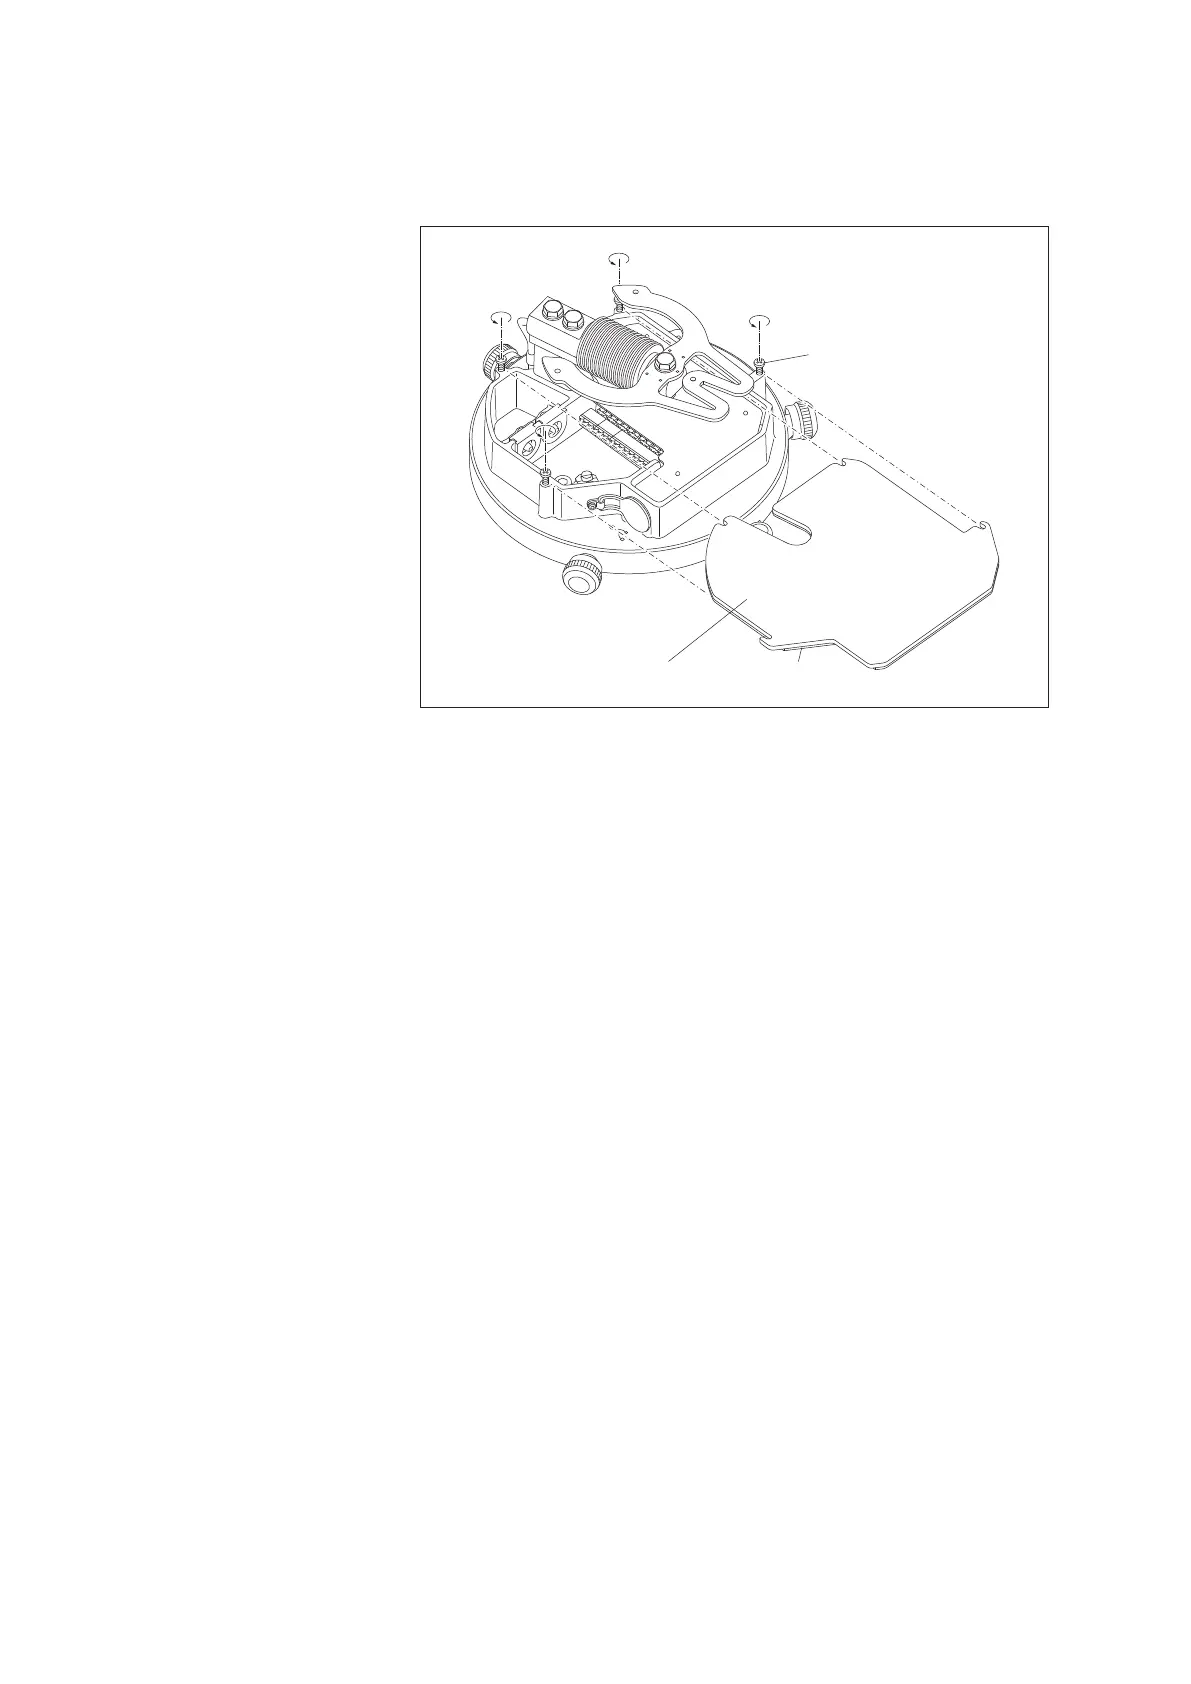
䡵 Unscrew 4 Phillips screws on the cover of the electronics unit approx. 3 mm,
raise the cover slightly and pull it off forwards. When the foam rubber seal
f
or the cover is stuck to the surface below, carefully pry the cover off using a
slotted head screwdriver.
5.5 Preparing the connection cable
Connection cable for data collection device/power supply:
䡵 Cut the connection cable so that it sticks out approx. 30 – 35 cm above the
pedestal. (The „excess“ cable can be stored in the pedestal later.)
䡵 Take the rubber grommet out of the electronics unit (see Fig. 13). Remove the
white blanking plug from the rubber grommet and push the grommet onto the
connection cable.
䡵 Strip off approx. 10 cm of the outer sheath of the connection cable.
䡵 Strip off approx. 5 mm of the insulation of the individual wires.
䡵 Put the cable shielding together and twist it.
䡵 For a stranded connection cable: push ferrules onto the wires and crimp using
crimping pliers.
䡵 Connect the cable to the supplied screw terminal strips (included in the poly-
bag); see Fig. 10 and 11:
– SDI-12 interface ➝ 8-wire screw terminal strip, contact 3
– RS-485 interface
2-wire ➝ 8-wire screw terminal strip, contacts 1/2
4-wire ➝ 6-wire screw terminal strip, contacts 5/6 +
8-wire screw terminal strip, contacts 1/2
– Pulse output ➝ 6-wire screw terminal strip, contacts 1/2
(Accu RT-NRT) + contacts 3/4
(pulse status information; as required)
– Power supply ➝ 8-wire screw terminal strip, contacts 6/7
(precipitation gauge) + contacts 5/8
(orifice rim heater; optional)
Orifice rim heater connection cable (optional)
䡵 If using a separate connection cable for the orifice rim heater: Assemble the
cable as described above and connect to the 8-wire screw terminal strip, see
Fig. 11.
Phillips screw
(4 x)
Electronic
unit cover
Foam rubber seal
Fig. 9: Removing the cover
from the electronics unit.
20