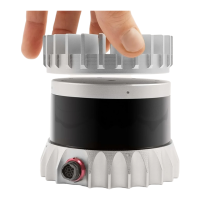
Mountingonaconcretewall:
Check the wall conditions before drilling any pilot holes and make sure there are no cracks or
moldsorhollowbricks.
UsingtheCADFilesandmechanicaldrawingsprovidedbyOuster,markatemplatewithapencil
onthewallwhereyouwanttomountthesensor(needstobemountedonabaseplate).
Usingappropriatedrillbit,drillpilotholesaccordinglyandmountthesensorcarefully.
Forconcretewalls,makesuretochooseanappropriatestainlesssteelscreworawedgeanchor
basedonthetypeofwall.
Makesureyoucheckforproperinstallationofthesensorandthatallscrewsaretightlyfit.
Note: Ifyou do not feelcomfortable followingthe steps above for mounting please contact Ouster
Supportsowecanwalkyouthroughthestepsthoroughly.
Warning: The sensor cables are not rated for running in any environmental air handling space,
including source ducts or air returns that are commonly the spaces above false ceilings and are
notincompliancewithNFPA70(USNEC),300.22(B)and(C).
PleaserefertosectionMounting InterfaceBox formoreinformationonmountingtheinterfacebox.
3.4 OperatingTemperatures
Thermal requirements specific to Rev7 are listed below. The sensor has three operating states in
order to manage high temperatures: Active, Shot Limiting, or Inactive. In the standard Active state
thesensorwillperformtotherangeand precision specifications of the datasheet. When the sensor
reachesacertaintemperature(seetablebelowforreference),itentersShotLimitingstateandissues
analert.
In Shot Limiting state, the sensor reduces power to the lasers in order to reduce the thermal load.
Whileinthisstate,sensorrangeandprecisionmaydegradebyupto20%. Whenthesensorreaches
themaximumoperatingtemperaturespecifiedbelow,thesensormaybecomeInactiveandshutoff.
15
 Loading...