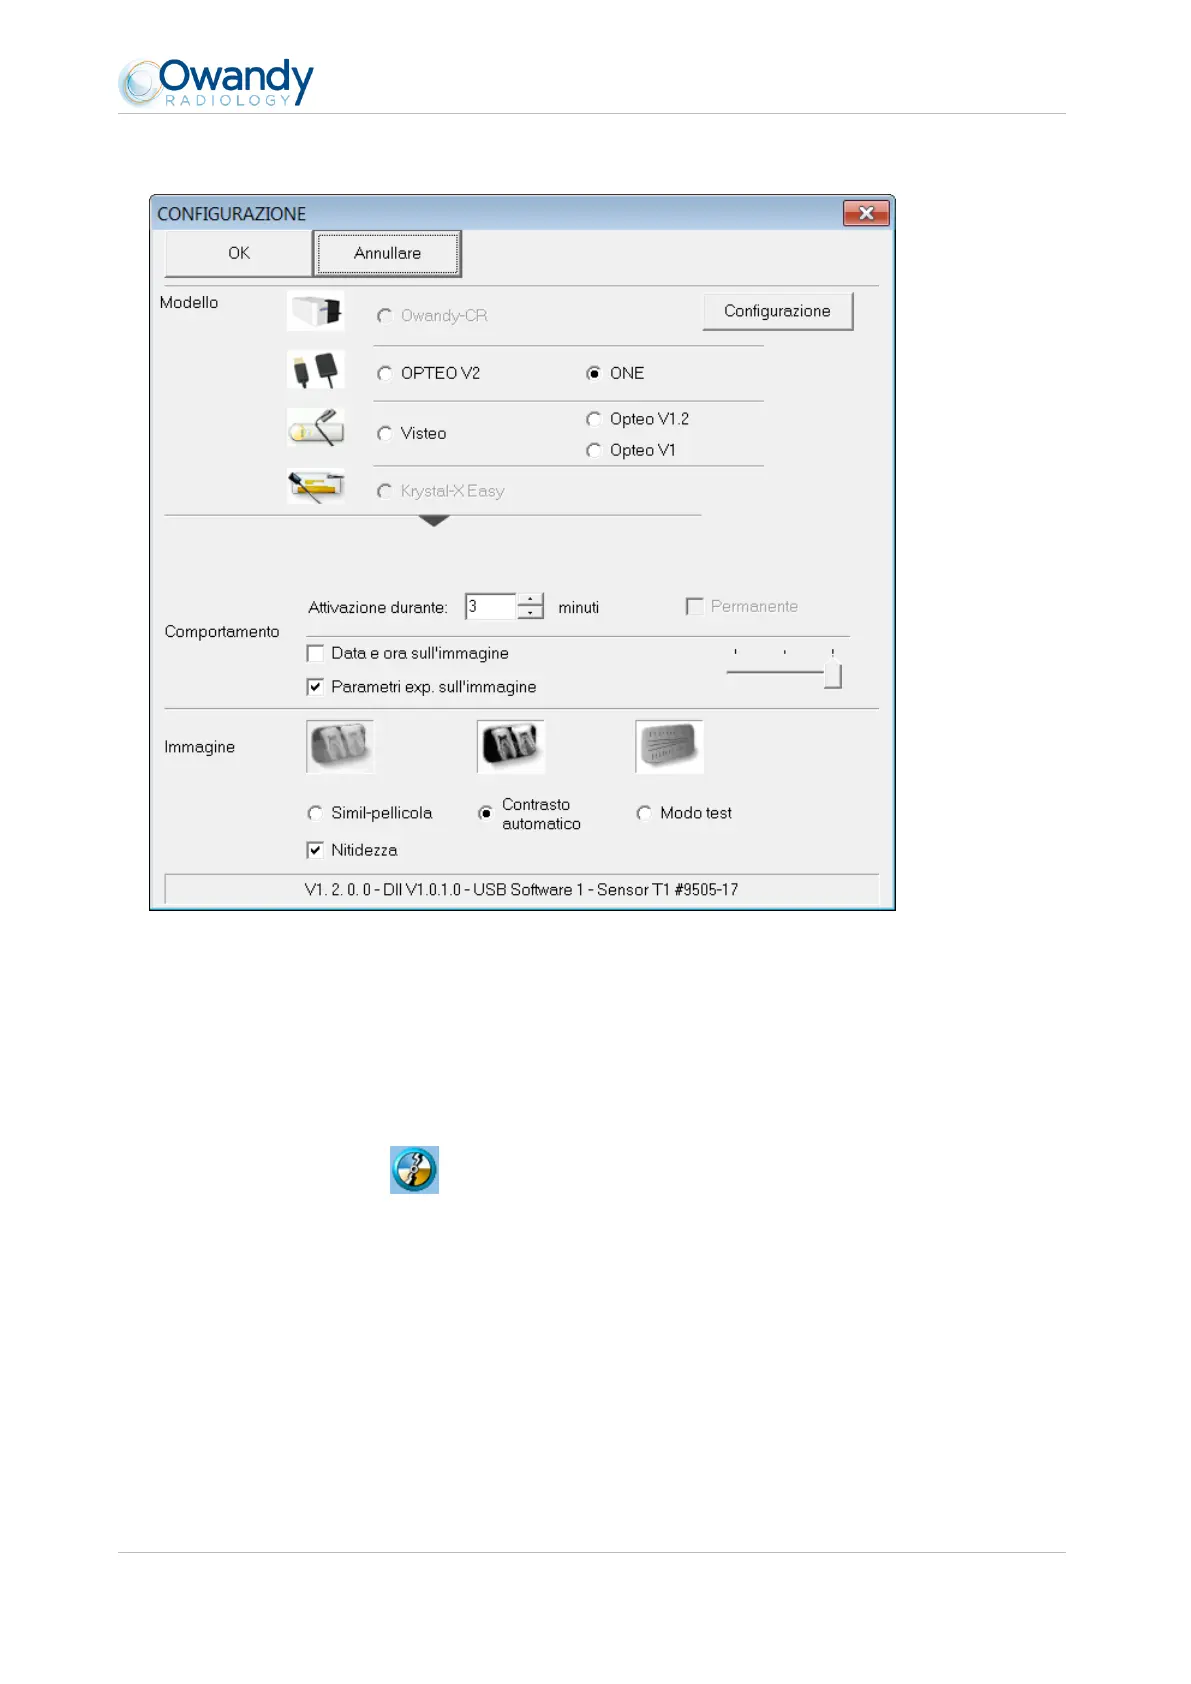
(*) When the “Film alike” option is activated, the contrast depends on the exposure time. Adjust the X-ray dose on the generator to obtain
a good image.
(*) When you select the option “Auto contrast” the contrast is constant. Exposure errors are corrected automatically, which reveals noise
in badly exposed images.
In both cases, the exposure bar (blue/green/red) helps to find the correct exposure of the images.
(**) This option appears only when the sensor is used from certain Owandy software programs; it allows the change of the sharpness
setting or the high resolution for each acquired image.
5. Click on “OK” to confirm your choice.
6. Then click on the “Save” button (QuickVision 3) or on the “Validate” button (QuickVision 4) to validate the
settings.
The use of the kit is identical to the use of the Owandy XIO StandAlone software described below.
3.5 Sharing the sensor and box between different workstations
Sharing the sensor allows you to use one or more sensors in turn in a practice with multiple chairs. It is recommended
to link the different workstations in a network to allow for the central storage and sharing of the images.
A USB port must be plugged into each workstation to allow for an easy connection of the box. Windows will
automatically recognise the equipment when it is connected and it will be available immediately for image
acquisition.