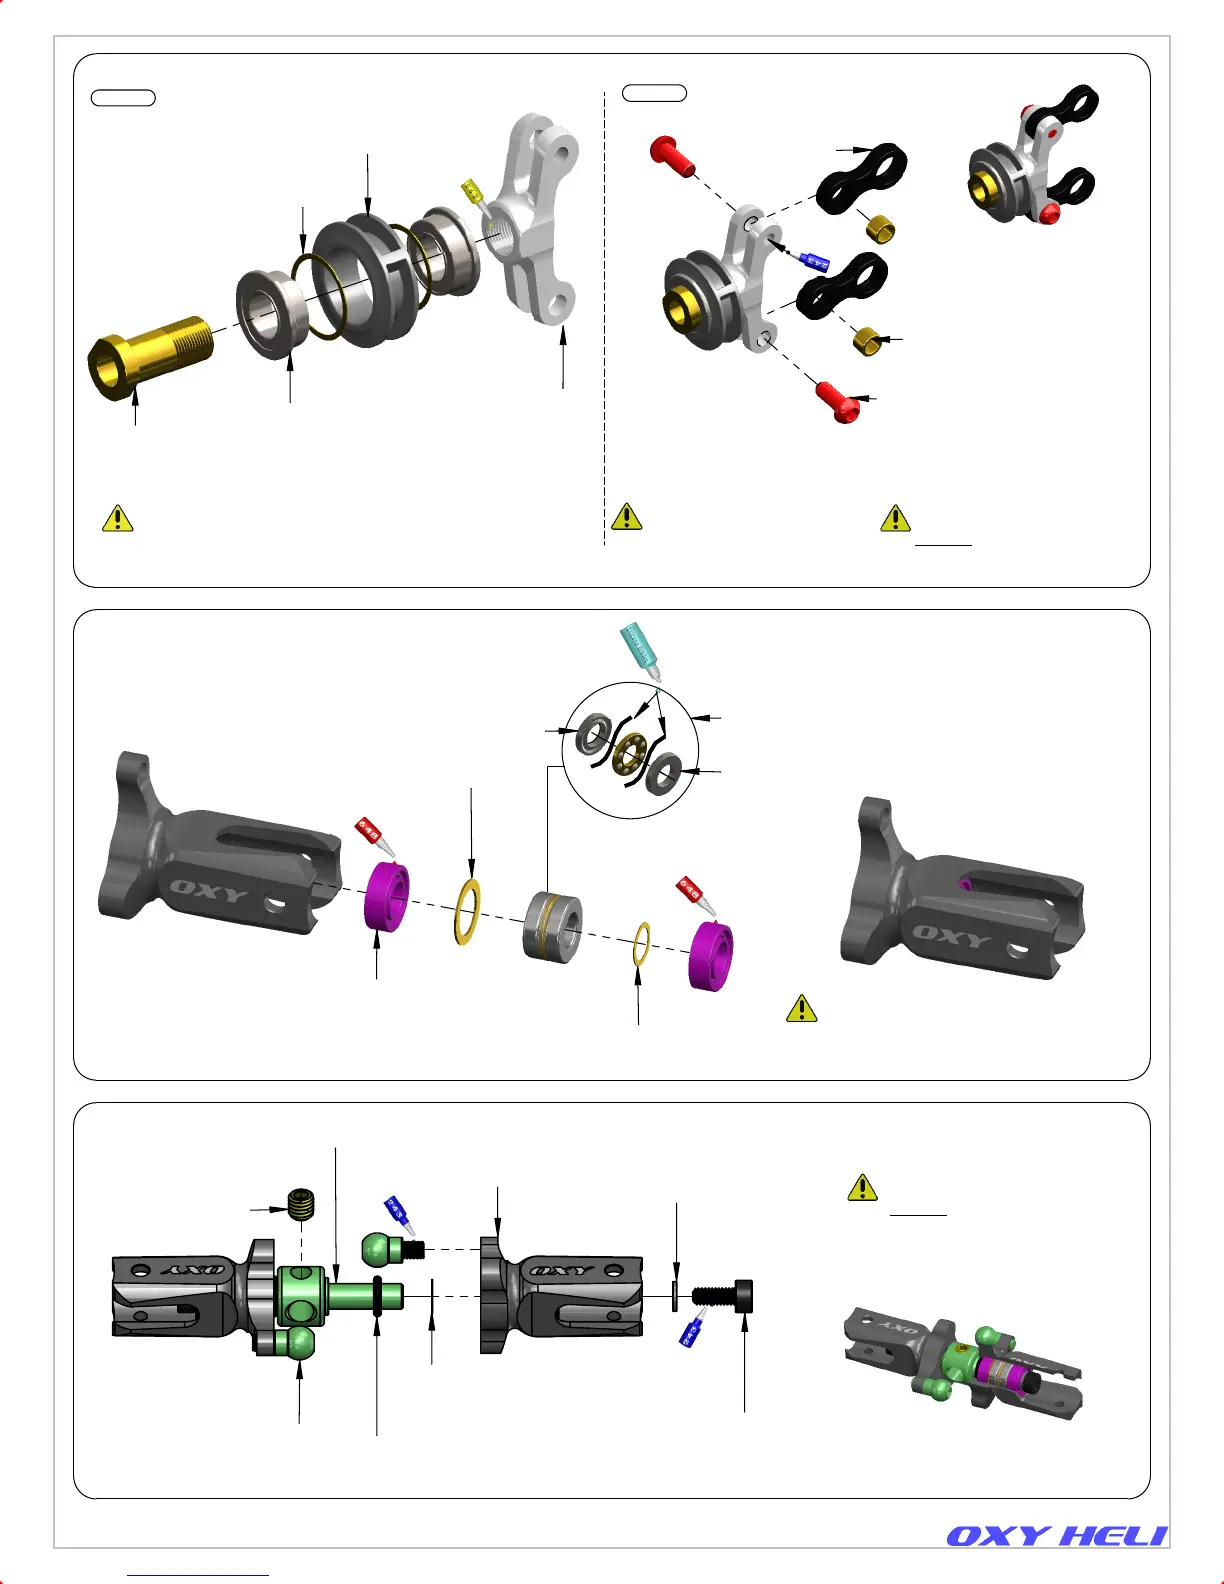
2 x MR63-W2
Radial Bearing 3X6X2
OXY0053
Washer 4.2X6X0.2
OXY0054
3x4x0. 1 Shim Washer
2 x OXY0050
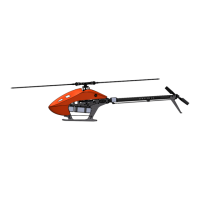
Linkage Ball
4 X 3 M2
2 x OXY0055
Shim Washer
2X3.5 W 0.5
OR-2X1
O-RING ID 2 - W1
Note: each side
of the hub
OXY0054
3x4x0. 1 Shim Washer
Note: each side
of the the hub
OXY0049
Tail Hub
2 x TCEM2X5
Hex Cap Screw
M2X5
2 x OXY0051
Tail Grip
SCM3X3
Set Screw
M3X3
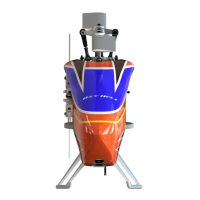
OXY0060
Tail Slider Bushing
OXY0063
Tail Pitch Slider
Half Moon
2 x MF74-ZZ
Flange Bearings
4x7x2.5
OXY0061
Tail Pitch Slider Ring
2 X OXY0139
Shim 7x8x0.1
2 x TBEM2X5
Button Hex Cap
Screw M2X5
2 x Bushing
2 X 3 H2
2 x OXY0064
Link Control
Step 2
F3-6G-W3.5
Thrust Bearing 3x6 W3.5
Thrust Washer(Larger ID)
Thrust Washer(Smaller ID)
Tail Pitch Slider Assembly.
(Box 02 / Bag 1)
Page 5
Step 1
Tail Grip Assembly.
(CNC components)
Important Note:
This part, for tuning reason
come factory pre assembled
with grease and loctite. Ready
to use.
Tail Hub Assembly.
(CNC components)
Important Note:
This part come pre assembled
without
lock thread for quality
reason. Follow instruction per
final assembly.
Important Note:
This part, for tuning reason
come factory pre assembled
with grease and loctite. Ready
to use.
Important Note:
This part come pre assembled
without
lock thread for quality
reason. Follow instruction per
final assembly.
Assure lock thread don't
contaminate the bushing
sliding. In case of friction
reassembly after cleaning.
Chapter 5, Tail Assembly