ENGLISH
- 40 (E) -
[ADJUSTMENT with ROP]
1. Select the first camera to be adjusted by pressing
the CAM CONTROL button.
2. Press the MENU button to display the menu on the
LCD panel.
3. Turn the CONT dial to display the G/L SETTING
menu.
4. Push the CONT dial straight down twice to display
SC COARSE on the bottom line of the LCD. The
sub carrier phase can now be adjusted coarsely by
turning the CONT dial.
When the CONT dial is pushed three times, SC
FINE appears, and the sub carrier phase can now be
adjusted finely by turning the CONT dial.
5. Keep adjusting the SC COARSE and SC FINE
phase so that the sub carrier (colour) phase of the
video signal output is aligned with the colours of
the programme output (split colour bar output) of
the video switcher or other unit that serves as the
reference.
The colour phase can be adjusted more accurately if
a vectorscope is used.
6. Select the next camera by pressing the CAM
CONTROL button, and adjust the sub carrier phase
of the next camera. Repeat this for all the connected
cameras.
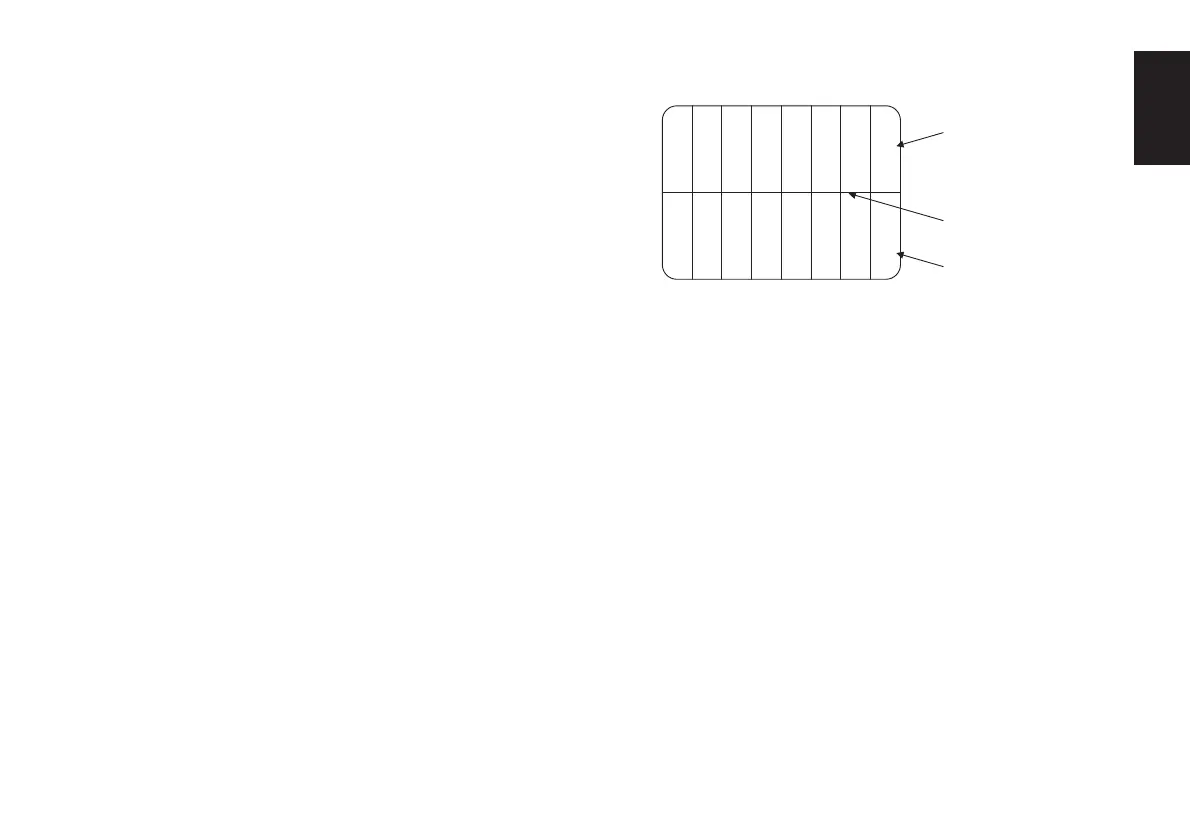
White
Yellow
Cyan
Green
Magenta
Red
Blue
Black
Colour bars
of camera
Colour bars of
special effects unit
Split line