D
Destiny WilsonSep 12, 2025
What to do if images on SD card do not look normal on Panasonic HDC-HS100?
- JJoseph BeasleySep 12, 2025
The data may be corrupted by static or electromagnetic waves. Back up important data on a PC or disc.
What to do if images on SD card do not look normal on Panasonic HDC-HS100?
The data may be corrupted by static or electromagnetic waves. Back up important data on a PC or disc.
Why are some playback images skipped automatically on Panasonic HDC-HS100?
The play mode is likely set to (Intelligent scene selection). Change the play mode to (All scenes).
Why is the colour balance strange on Panasonic HDC-HS100?
In locations with multiple light sources, like a gymnasium, the auto white balance function may not work correctly. Set the white balance to [(Indoor mode2)]. If clarity is still an issue, use [(Manual adjustment mode)].
Why does Panasonic HDC-HS100 recording start but stop immediately?
The unit may disable recording if its temperature is too high. Turn off the power and allow the unit to cool down.
How to turn on Panasonic HDC-HS100?
First, ensure the LCD monitor is opened. If it still doesn't turn on, charge the battery using the AC adapter. If that doesn't work, the battery protection circuit might have activated. Attach the battery to the AC adapter for 5 to 10 seconds. If the unit still fails to power on, the battery may be faulty and need replacement.
How to fix remaining battery indication on Panasonic HDC-HS100?
If you believe the remaining battery capacity indication is inaccurate, fully charge the battery, allow it to fully discharge, and then charge it again.
How to delete scenes on Panasonic HDC-HS100 Camcorder?
Protected scenes cannot be deleted until you release the protect setting. Also, scenes/still pictures where the thumbnails are displayed as cannot be deleted. If these scenes/still pictures are unnecessary, format the SD card or HDD to erase the data. If the SD card’s write protect switch is set to LOCK, deletion is disabled.
How to fix auto focus on Panasonic HDC-HS100?
First, ensure the AUTO/MANUAL switch is set to AUTO. If the scene is difficult to focus in auto mode, switch to manual focus mode and adjust the focus manually.
What does “ERROR OCCURRED. PLEASE TURN UNIT OFF, THEN TURN ON AGAIN.” mean on Panasonic HDC-HS100?
This message indicates an error has occurred. Try restarting the unit by turning the power off and then on again. If the message continues to appear after restarting, it may indicate a need for repair. Disconnect the power and consult the dealer from whom you purchased the unit.
What to do if Panasonic HDC-HS100 Camcorder cannot be operated when it is turned on?
Ensure the LCD monitor is open when the LCD/EVF select switch is set to LCD. If it still doesn't operate, try turning the power off and on again. If the issue persists, remove the battery or AC adapter, wait about 1 minute, and then reconnect it before turning the power back on.
| Filter size | 37 mm |
|---|---|
| Digital zoom | 700 x |
| Optical zoom | 12 x |
| Image stabilizer | Yes |
| Focal length range | 2.95 - 35.4 mm |
| Focal length (35mm film equivalent) | 42.1 - 505 mm |
| Sensor type | MOS |
| Total megapixels | 2.1 MP |
| Optical sensor size | 1/6 \ |
| Effective megapixels (movie) | 0.52 MP |
| Focus | F1.8 (WIDE)/F2.8 (TELE) |
| Video out | 1 |
| Power requirements | DC7.2 V/9.3 V |
| Power consumption (typical) | 6.7 W |
| Display diagonal | 2.7 \ |
| Video formats supported | AVCHD |
| Still image resolution(s) | 1920 x 1080 |
| Camera shutter speed | 1/25 - 1/8000 s |
| Minimum illumination | 2 lx |
| USB 2.0 ports quantity | USB 2.0 ports have a data transmission speed of 480 Mbps, and are backwards compatible with USB 1.1 ports. You can connect all kinds of peripheral devices to them. |
| Compatible memory cards | SD, SDHC |
| Internal storage capacity | 60 GB |
| Product color | Black |
| Depth | 138 mm |
|---|---|
| Width | 74 mm |
| Height | 76 mm |
| Weight | 420 g |
Key safety warnings to prevent fire, shock, and damage.
Information on environmentally friendly disposal of the product.
Legal notices, copyright laws, and product licenses.
Details on SD and SDHC cards compatible with the unit.
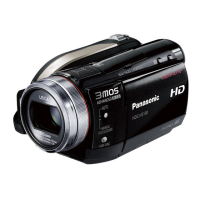
Highlights key capabilities like HD imaging and AVCHD format.
Lists essential accessories and optional items for the camera.
Guidelines for handling the internal HDD, including backup and transport.
Identifies key buttons, ports, LCD, and lens on the camera body.
Explains the remote control buttons and battery installation.
Information on compatible batteries and how to charge them.
Guide to preparing and handling SD/SDHC cards for use.
How to use the menu system to configure settings like language.
Procedures for setting the camera's date, time, and world time.
Tips for proper camera handling and positioning during recording.
Explains automatic shooting modes and intelligent features like AGS.
How to use Quick Start and Quick Power On for faster access.
Step-by-step guide to recording motion pictures.
Instructions for capturing still photographs.
How to use zoom functions and optical image stabilization.
Using icons to apply effects like fade, backlight compensation, and self-timer.
How to use scene modes for optimal recording in various conditions.
Configuring microphone settings and adjusting input levels.
Adjusting sharpness, color, exposure, and using zebra patterns.
Manually controlling shutter speed and iris for exposure adjustment.
Steps for playing back recorded motion pictures.
Steps for playing back recorded still pictures.
Using playback controls, volume, and remote operations.
Options for organizing playback by date or intelligent scene selection.
How to delete unwanted scenes or still pictures.
Process for dividing scenes to edit specific portions.
How to protect recordings from accidental deletion.
Configuring DPOF settings for direct printing.
Procedures for copying data between the SD card and internal HDD.
Steps for copying recorded data to DVD discs.
How to play back discs that have been copied.
Connecting the camera to a TV for viewing content.
Details on connecting via HDMI and component cables.
Using VIERA Link for integrated TV and camera control.
Overview of PC functions like data copying and editing with HD Writer.
Guide for installing and uninstalling the HD Writer software.
Steps for connecting the camera to a PC and ensuring recognition.
Instructions for copying files on Macintosh computers.
Explains various icons and indicators shown during recording and playback.
Lists and explains common error and confirmation messages.
Solutions for common operational problems and issues.
Important precautions for safe operation and handling of the unit.
Guidelines for battery and AC adaptor maintenance and storage.
Definitions of key technical terms used in the manual.
Technical details of the camera's hardware and performance.
Specifications for recording media and data compression formats.