208
Playback/Editing
You can erase unnecessary parts recorded on the pictures taken.
•
The erasure operation can only be performed by touching. [Clear Retouch] automatically
enables the touch operation.
1 Select the menu.
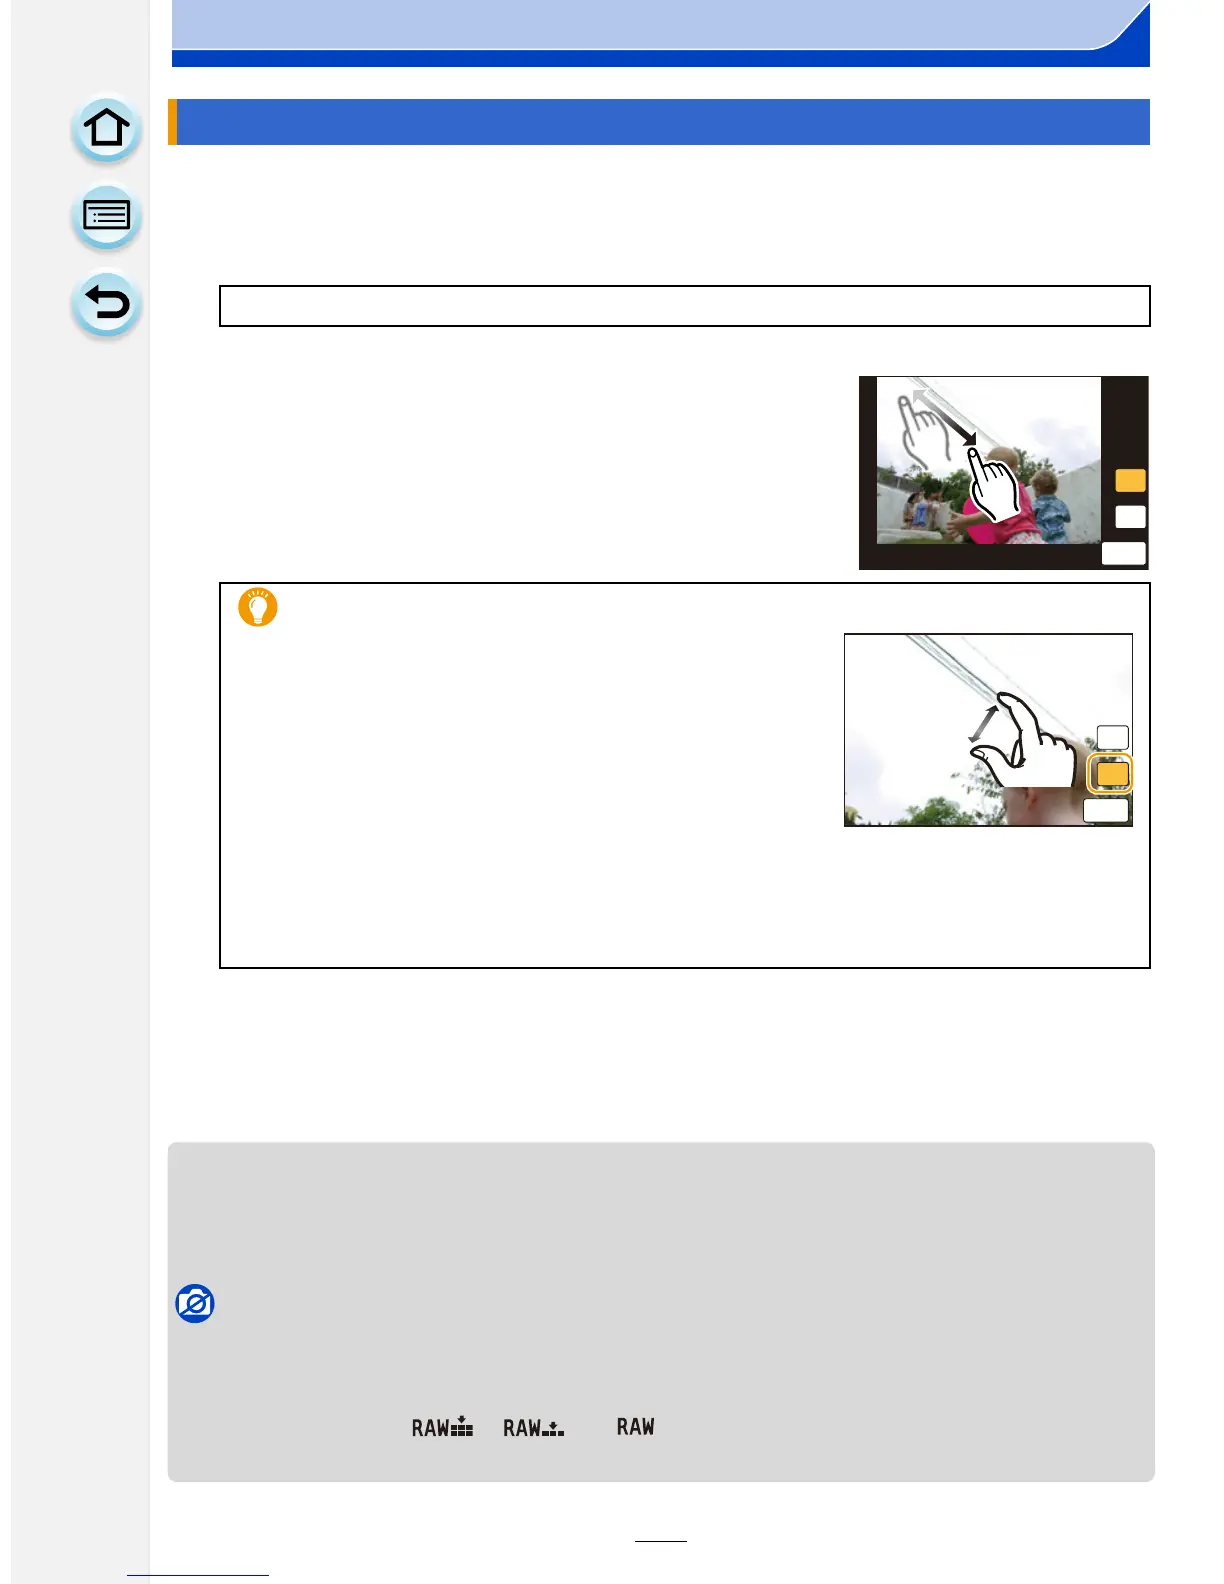
2 Drag the screen horizontally to select an image, and then touch [Set].
3 Drag your finger over the part you want to delete.
•
The parts to be erased are colored.
• Touching [Undo] returns the colored parts to a previous
state.
4 Touch [Set].
•
Preview screen is displayed.
5 Touch [Save].
•
Confirmation screen is displayed. It is executed when [Yes] is selected.
Exit the menu after it is executed.
• Pictures may appear unnatural because the background of deleted parts is artificially created.
• For group pictures, perform [Clear Retouch] on each picture. (They cannot be edited at once.)
• When [Clear Retouch] is performed on group pictures, they are saved as new pictures separate
from the original ones.
Not available in these cases:
•
[Clear Retouch] cannot be performed on the following images.
– Motion pictures
– Pictures taken in Panorama Shot Mode
– Pictures taken with [ ], [ ] or [ ]
– Pictures recorded with other equipment
[Clear Retouch]
[MENU] > [Playback]>[Clear Retouch]
Erasing details (enlarging the display)
1 Touch [SCALING].
•
The screen is enlarged.
• Pinching out/pinching in (P16) the screen allows
you to enlarge/reduce it.
• You can also enlarge/reduce the picture by moving
the function lever.
• Dragging the screen allows you to move the
enlarged part.
2 Touch [REMOVE].
•
Operation returns to that of selecting the parts you
want to delete. The parts you want to delete can be
selected while the enlargement is maintained.
 Loading...