10. Using the Wi-Fi function
256
Connecting with a password further enhances security. You can scan a QR code or
manually enter a password to set up a connection.
Preparations:
Set [Wi-Fi Password] to [ON].
> [Setup] > [Wi-Fi] > [Wi-Fi Setup] > [Wi-Fi Password] > [ON]
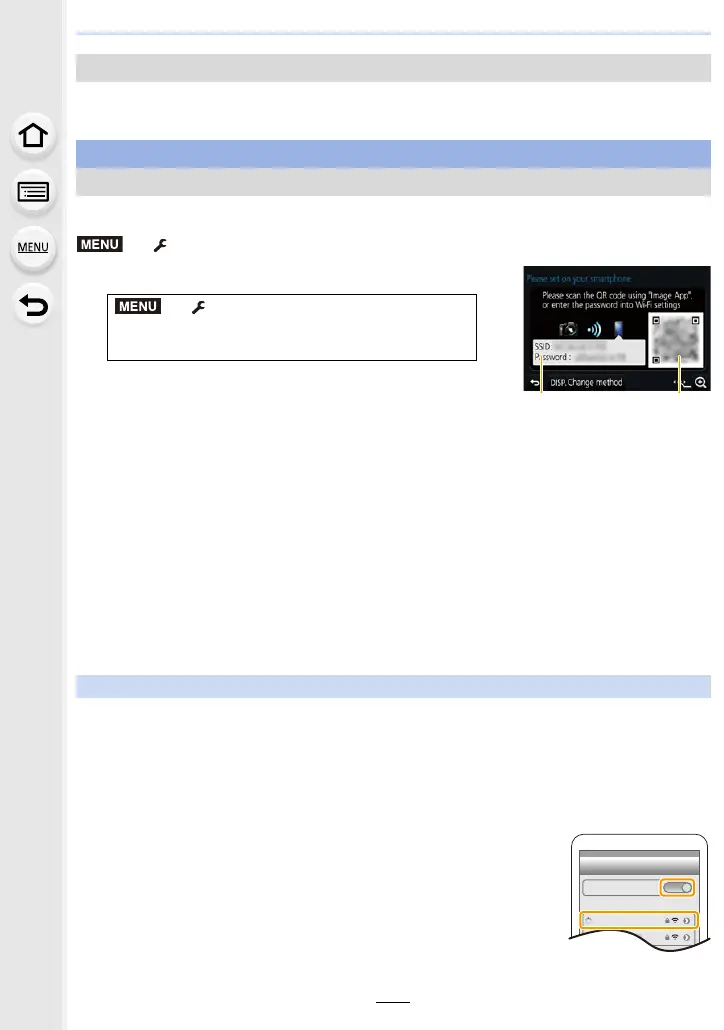
1 Select the menu on the camera. (P54)
A SSID and password
B QR code
• When the camera is ready to be connected to the
smartphone, the QR code, SSID and password are displayed.
• You can also display the information by pressing [Wi-Fi] on the camera.
2 On the smartphone, start “Image App”.
3 Select [QR code].
•
When the smartphone is connected to a wireless access point, it may take time to display
[QR code].
• (For iOS devices) A confirmation screen will be displayed. Select [OK] to proceed.
4 Use the “Image App” to scan the QR code displayed on the screen of the
camera.
•
If you press [MENU/SET] on the camera, the QR code will be enlarged. When it is difficult
to scan the QR code, try enlarging it.
5 Install the profile to the smartphone.
•
If the smartphone is locked with a passcode, enter the passcode to unlock the
smartphone.
6 When a message is displayed on the browser, press the home button to close
the browser.
7 Turn on the Wi-Fi function in the setting menu of the smartphone.
8 On the Wi-Fi setting screen of the smartphone, select the
SSID displayed on the camera.
9 On the smartphone, start “Image App”.
•
(iOS devices) Steps 2 through 6 are not required from the second
time on.
Using a password to set up a connection
For both iOS devices (iPhone/iPod touch/iPad) and Android devices
Using the QR code to set up a connection
> [Setup] > [Wi-Fi] > [Wi-Fi
Function] > [New Connection] > [Remote
Shooting & View]
For iOS devices only
MENU

 Loading...