EasyManua.ls Logo

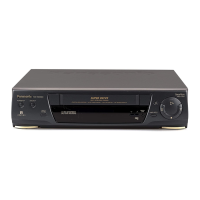
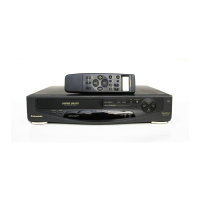
Panasonic NV-HD90 - Infra-Red Remote Controller

Panasonic NV-HD90
40 pages
To Next Page IconTo Next Page
To Previous Page IconTo Previous Page
Loading...
18
VAY)
To
programme
a
timer recording.
‘To
set
the
clock.
19
DATE
(Mm)
To
programme
a
timer recording.
*To
set
the
clock.
20
TIMER
REC
To
turn
the
timer
recording
function
on
and
off.
Sis
lit
or
not
lit.
Once
operating
timer
recording
function,
the
normal
VTR
operation
is
not
possible
unless
this
button
is
set
to
off.
21
VIDEO
PLUS+
To
programme
a
Video
Plus~
PiusCode.
22
CHECK
To
check
timer
programmes
while
the
Timer
recording
function
is
on.
23
RECORDING
SP/LP
To
select
the
tape
speed
desired
for
recording.
SP
gives
the
best
picture
quality.
LP
gives
the
longest
recording
time.
24
CONFIRM
To
convert
the
data
of
a
PlusCode.
25
INPUT
SELECT
To
select
the
“A1™
external
recording
source.
26
AUDIO
OUT
To
Select
the
desired
sound mode.
At
the
every
push
of
this
button,
the
audio
output
mode
changes
as
follows.
peers
lel
Right—+Normal
audio
track)
The
Left
(L)
and
Right
(R)
Indicators
show
which
sound
mode
is
selected
in
the
following
way.
Stereo:
Both
the
Left
(L)
and
Right
(R}
indicators
are
Fit.
Left:
The
Left
(L}
Indicator
is
lit,
Right:
The
Right
{R)
Indicator
is
lit,
Normal:
Both
the
Left
(L)
and
Right
(R)
Indicators
are
not
lit.
27
CLOCK/PRESET
To
set
the
clock.
‘To
set
the
satellite
position.
To
set
the
manufacturer
number
of
the
TV.
28
RESET
To
reset
the
tape
counter
(elapsed
time)
to
“0:00.00".
The
tape
counter
is
automatically
reset
ta
“Ox
00.
oo"
when
a
video
cassette
is
inserted.
29
No
tunction,
30
TAPE
SELECT
To
set
the
cassette
tape
length
in
order
to
obtain
correct
indication
of
the
remaining
tape
time.
£195,
For
£30,
-60,
-80,
-120,
-180
and
-195
tapes
£240:
For
£240
tape
£260:
For
£260
tape
Infra-red
Remote
Controffer
31
TRACKING/V-LOCK
To
adjust
the
tracking
and
the
vertical
locking.
(See
page
21.}
32
Programme
Position
Selector
Buttons
To
select
the
programme
positions
(1-42).
*
E-G+Gy
To
enter
a
PlusCode.
33
TRANSMIT
To
transmit
the
data
that
has
been
set
on
the
remote
controlier
to
the
VTR.
34
CANCEL
To
cancel
the
settings
made
for
atimerrecording.
__
35
OFF
(HM)
®To
programme
a
timer
recording.
To
set
the
clock.
To
set
the
manufacturer
number
of
the
TV,
To
set
the
satellite
position.
36
ON(D)
To
programme
a
timer
recording.
To
set
the
clock.
Power
Source
for
the
Remote
Controller
‘The
remote
controller
is
powered
by
2
“UM3"
or
“R6"
size
batteries.
The
life
of
the
batteries
is
about
one
year,
although
this
depends
on
the
frequency
of
use.
Precautions
for
Battery
Replacement
Load
the
new
batteries
with
their
polarity
(@
and
O)
~
aligned
correctly.
Do
not
apply
heat
to
the
batteries,
or
an
internal
short-circuit
may
occur.
SPW
RARE
If
you
do
not
intend
to
use
the
remote
controller
for
a
jong
period
of
time,
remove
the
batteries
and
store
them
ina
cool
and
dry
place.
5
ie
Remove
spent
batteries
immediately
and
dispose
of
them.
Do
not
use
an
old
and
a
new
battery
together,
and
never
use
an
alkaline
battery
with
a
manganese
battery.
Installing
the
Batteries
7

Related product manuals