Chapter 2 Getting Started — Connecting
54 - ENGLISH
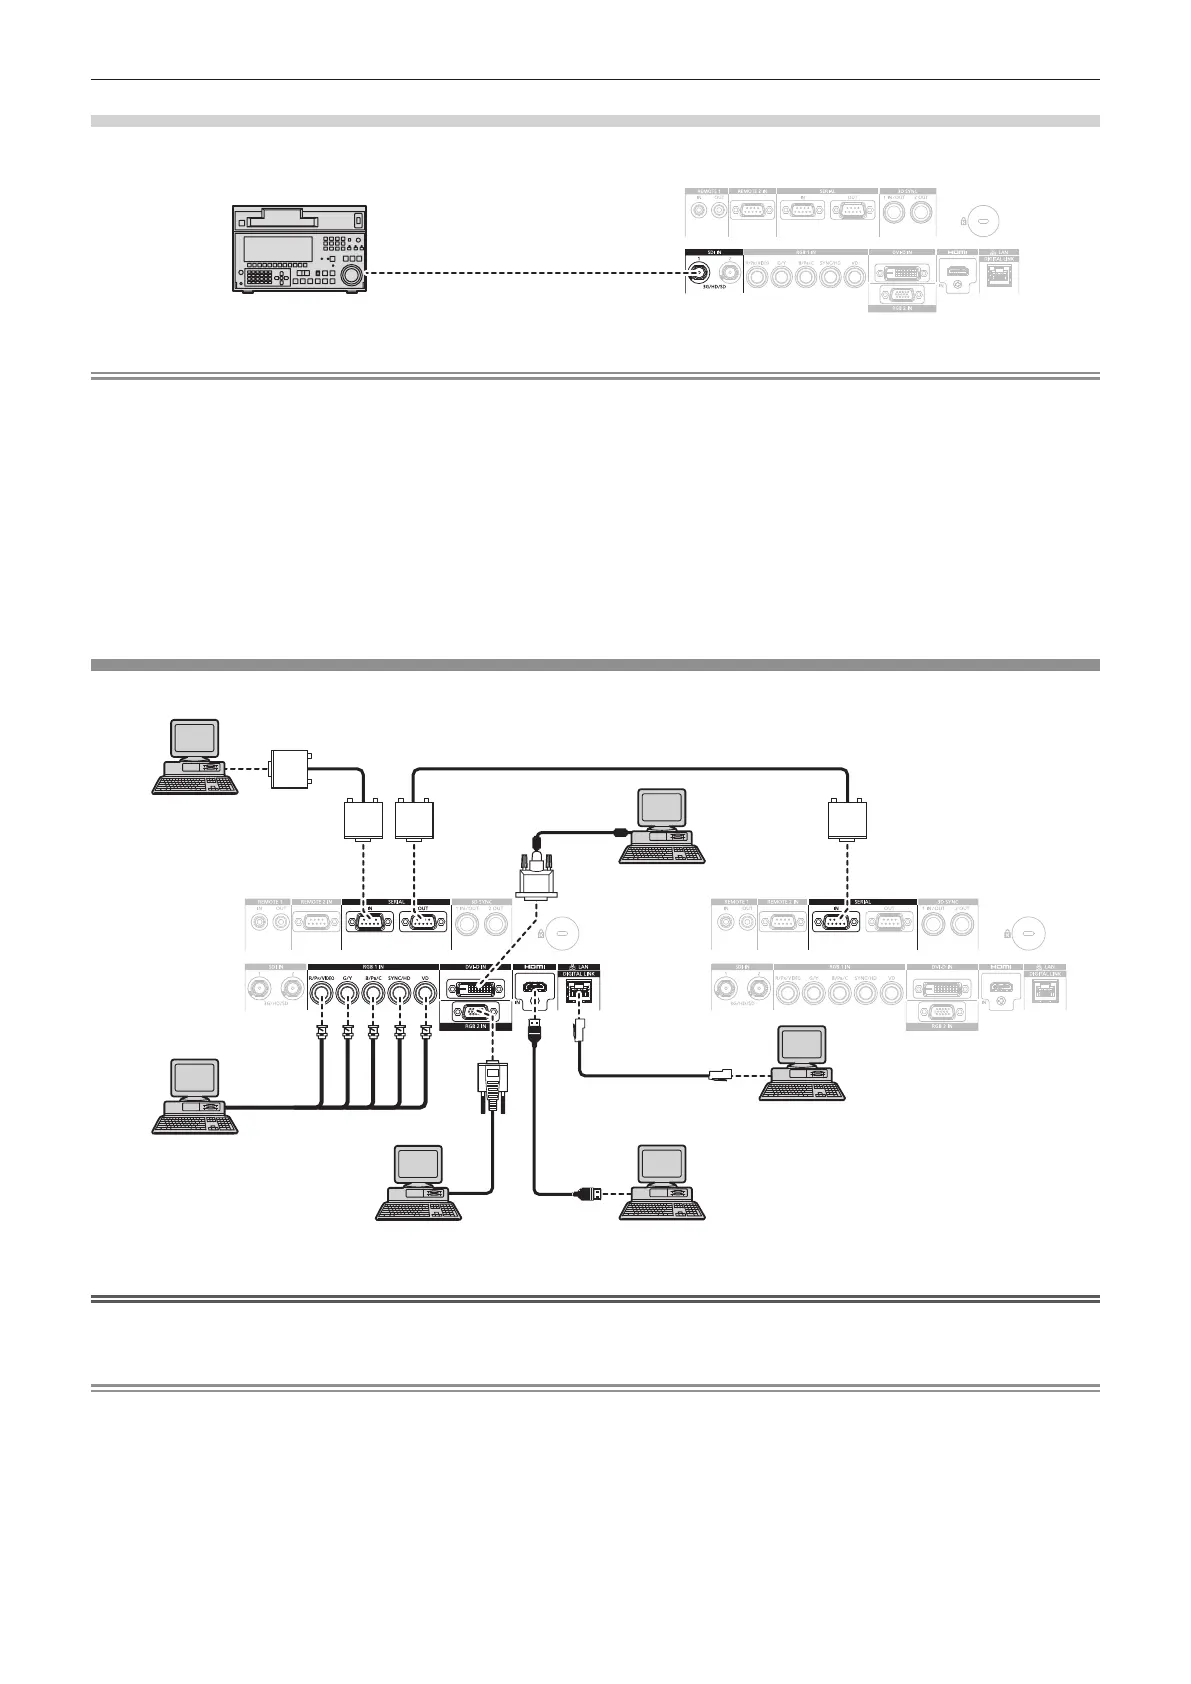
For <SDI IN 1>/<SDI IN 2> terminals (PT-DZ21K2, PT-DS20K2), <SDI IN> terminal (PT-DZ16K2)
The connection example is for PT-DZ21K2 and PT-DS20K2.
SD-SDI signal, HD-SDI signal, or 3G-SDI
signal
Digital VCR for commercial use
Note
f Use the [PICTURE] menu → [SYSTEM SELECTOR] to switch the input format.
f Some external devices to be connected require the [DISPLAY OPTION] menu → [SDI IN] to be set.
f Use a 5CFB or higher (such as 5CFB, or 7CFB) or a Belden 1694A or higher connection cable to properly transmit images. Use a
connection cable of 100 m (328'1") length or less.
f To input the dual link signals, it is necessary to set [SDI LINK] in [SDI IN]. (Only for PT-DZ21K2, PT-DS20K2)
f To input the dual link signals, use same length and same type of cables to connect to the <SDI IN 1>/<SDI IN 2> terminals. The image may
not be displayed correctly when the difference in length of the connection cables is 4 m (13'1") or more. (Only for PT-DZ21K2, PT-DS20K2)
f To input the dual link signals, directly connect with the external devices that will output the signal without using a distributor, etc. A phase
difference between the LINK-A signal and the LINK-B signal may occur, and the image may not be displayed correctly. (Only for PT-DZ21K2,
PT-DS20K2)
f When an unsteady signal is connected, an error in signal detection may occur. In such a case, use the [PICTURE] menu → [SYSTEM
SELECTOR] to switch to a system that matches the signal format.
Connecting example: Computers
The connection example is for PT-DZ21K2 and PT-DS20K2.
Control computer
Computer
Computer
Computer
Computer
Control computer
Attention
f When connecting the projector to a computer or an external device, use the power cord supplied with each device and commercially
available shielded cables.
Note
f When entering DVI-D, it may be necessary to switch the setting using the [DISPLAY OPTION] menu → [DVI-D IN] → [EDID SELECT]
depending on the external device to be connected.
f For the HDMI cable, use an HDMI High Speed cable that conforms to the HDMI standards. If a cable that does not conform to the HDMI
standards is used, images may be interrupted or may not be displayed.
f The <HDMI IN> terminal of the projector can be connected to an external device equipped with a DVI-D terminal using an HDMI/DVI
conversion cable. However, this may not function properly for some external devices, and images may not be displayed.
f The <DVI-D IN> terminal supports single links only.
f When entering the SYNC ON GREEN signal, do not enter sync signals to the <SYNC/HD> terminal or the <VD> terminal.
f If you operate the projector using the computer with the resume feature (last memory), you may have to reset the resume feature to operate
the projector.
 Loading...