Chapter 3 Basic Operations — Switching on/off the projector
76 - ENGLISH
Making adjustments and selections
It is recommended to perform the focus adjustment after 30 minutes have elapsed with the focus test pattern
displayed. For details of the test pattern, refer to “[TEST PATTERN] menu” (x page 193). To use the active focus
optimizer function, set the [PROJECTOR SETUP] menu → [LENS] → [ACTIVE FOCUS OPTIMIZER] → [ACTIVE
FOCUS] to [ON], and then adjust the focus. (x page 163)
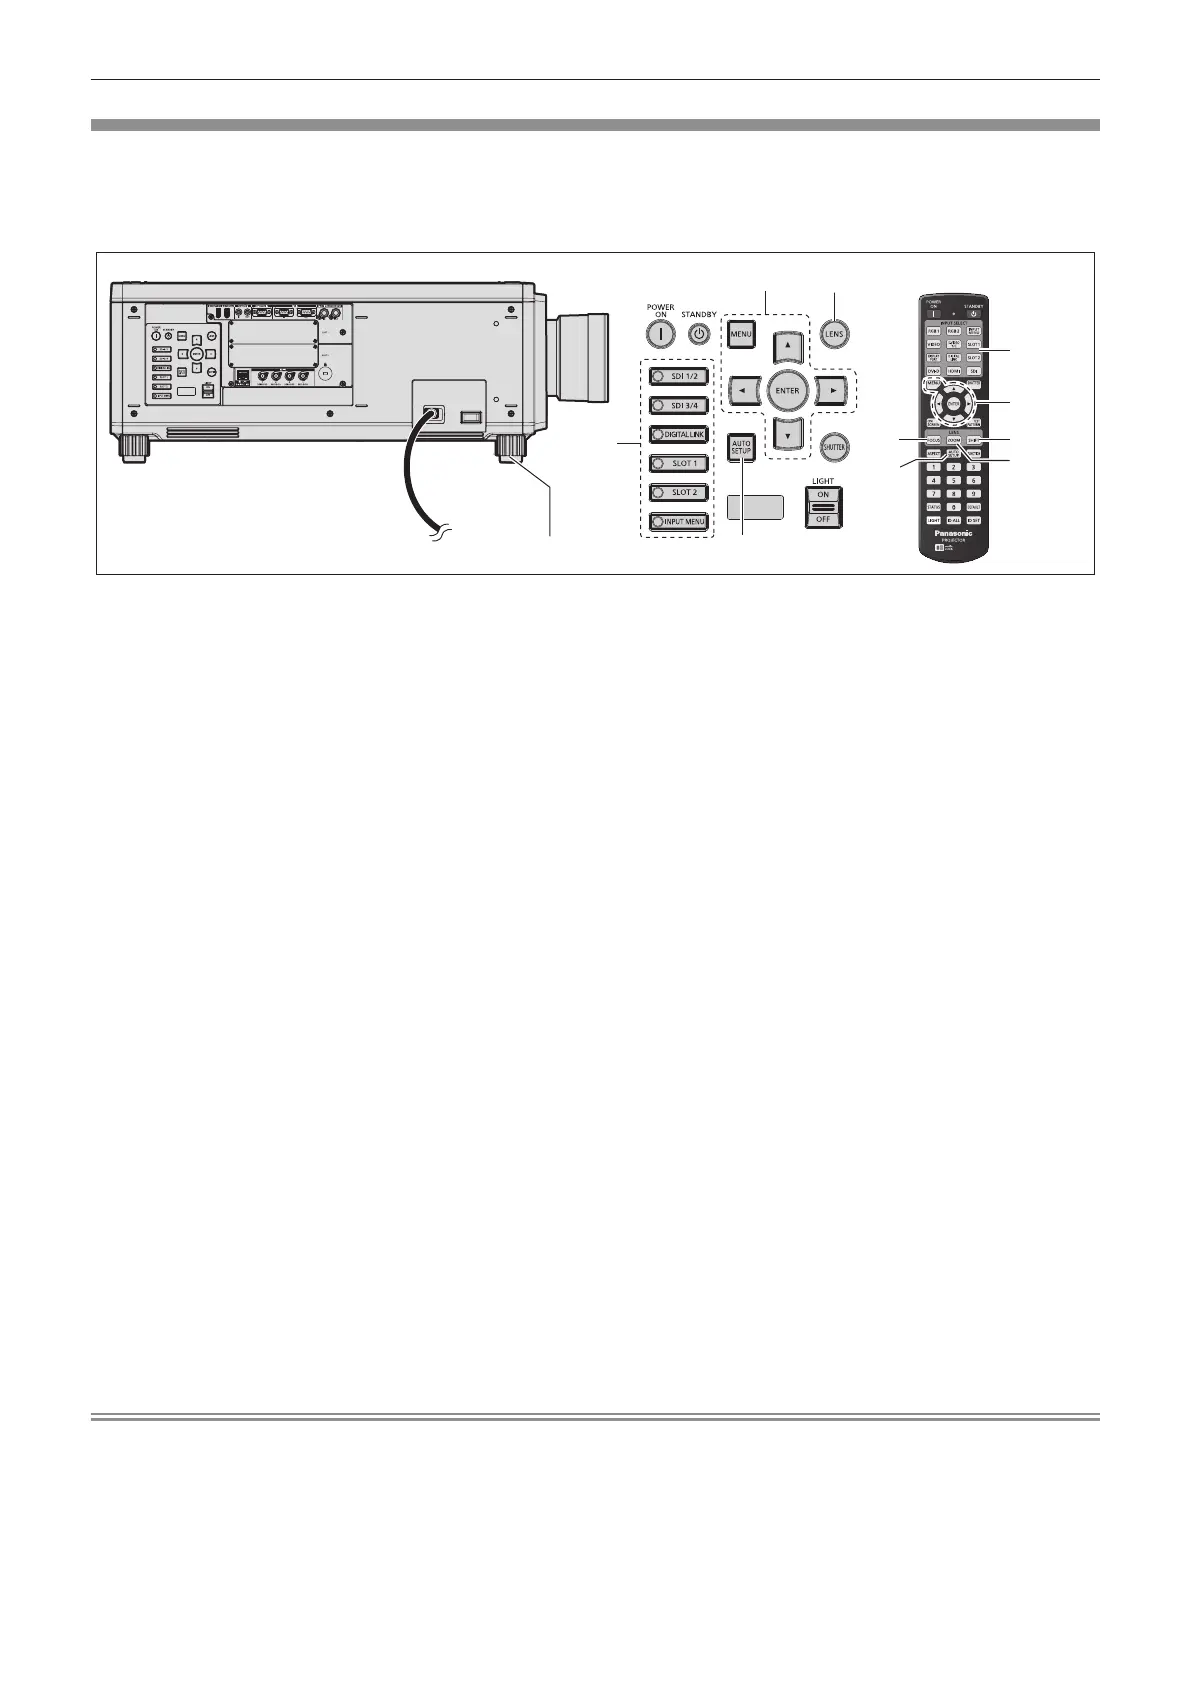
1) 10)
7)
8)
5)
9) 11)
5)
2) 3) 4)
6)
1) 7) 9) 10) 11)2) 3) 4)
8)
1) Press the <FOCUS> button to roughly adjust the focus of the projected image. (x page 80)
2) Change the setting of the [PROJECTOR SETUP] menu → [PROJECTION METHOD] depending on the
installation mode. (x page 40)
f Refer to “Navigating through the menu” (x page 94) for the operation of the menu screen.
3) Set [LENS TYPE].
f Conrm the setting of the lens type when using the projector for the rst time after attaching the projection
lens. (x page 83)
4) Execute the lens calibration.
f Execute the lens calibration when using the projector for the rst time after attaching the projection lens.
(x page 84)
5) Select the input by pressing the input selection button on the remote control or the control panel.
f The buttons that can be used on the remote control or the control panel are as follows.
Remote control:
<SDI> button, <DIGITAL LINK> button, <HDMI> button, <DVI-D> button, <SLOT 1> button, <SLOT 2>
button
Control panel:
<SDI 1/2> button, <SDI 3/4> button, <DIGITAL LINK> button, <SLOT 1> button, <SLOT 2> button
f For details of operation for input selection, refer to “Selecting the input signal” (x page 78).
6) Adjust the front, back and sideway tilt of the projector with the adjustable feet. (x page 53)
7) Press the <SHIFT> button to adjust the position of the projected image.
8) If the input signal is DVI-D/HDMI signal, press the <AUTO SETUP> button.
9) Press the <ZOOM> button to match the projected image size to the screen.
10) Press the <FOCUS> button again to adjust the focus.
11) Press the <ZOOM> button again to adjust the zoom and match the projected image size to the screen.
Note
f When the projector is switched on for the rst time after purchase, as well as when the [PROJECTOR SETUP] menu → [INITIALIZE] →
[ALL USER DATA] is executed, the focus adjustment screen is displayed after projection starts, and then the [INITIAL SETTING] screen is
displayed. For details, refer to “When the initial setting screen is displayed” (x page 70).

 Loading...


