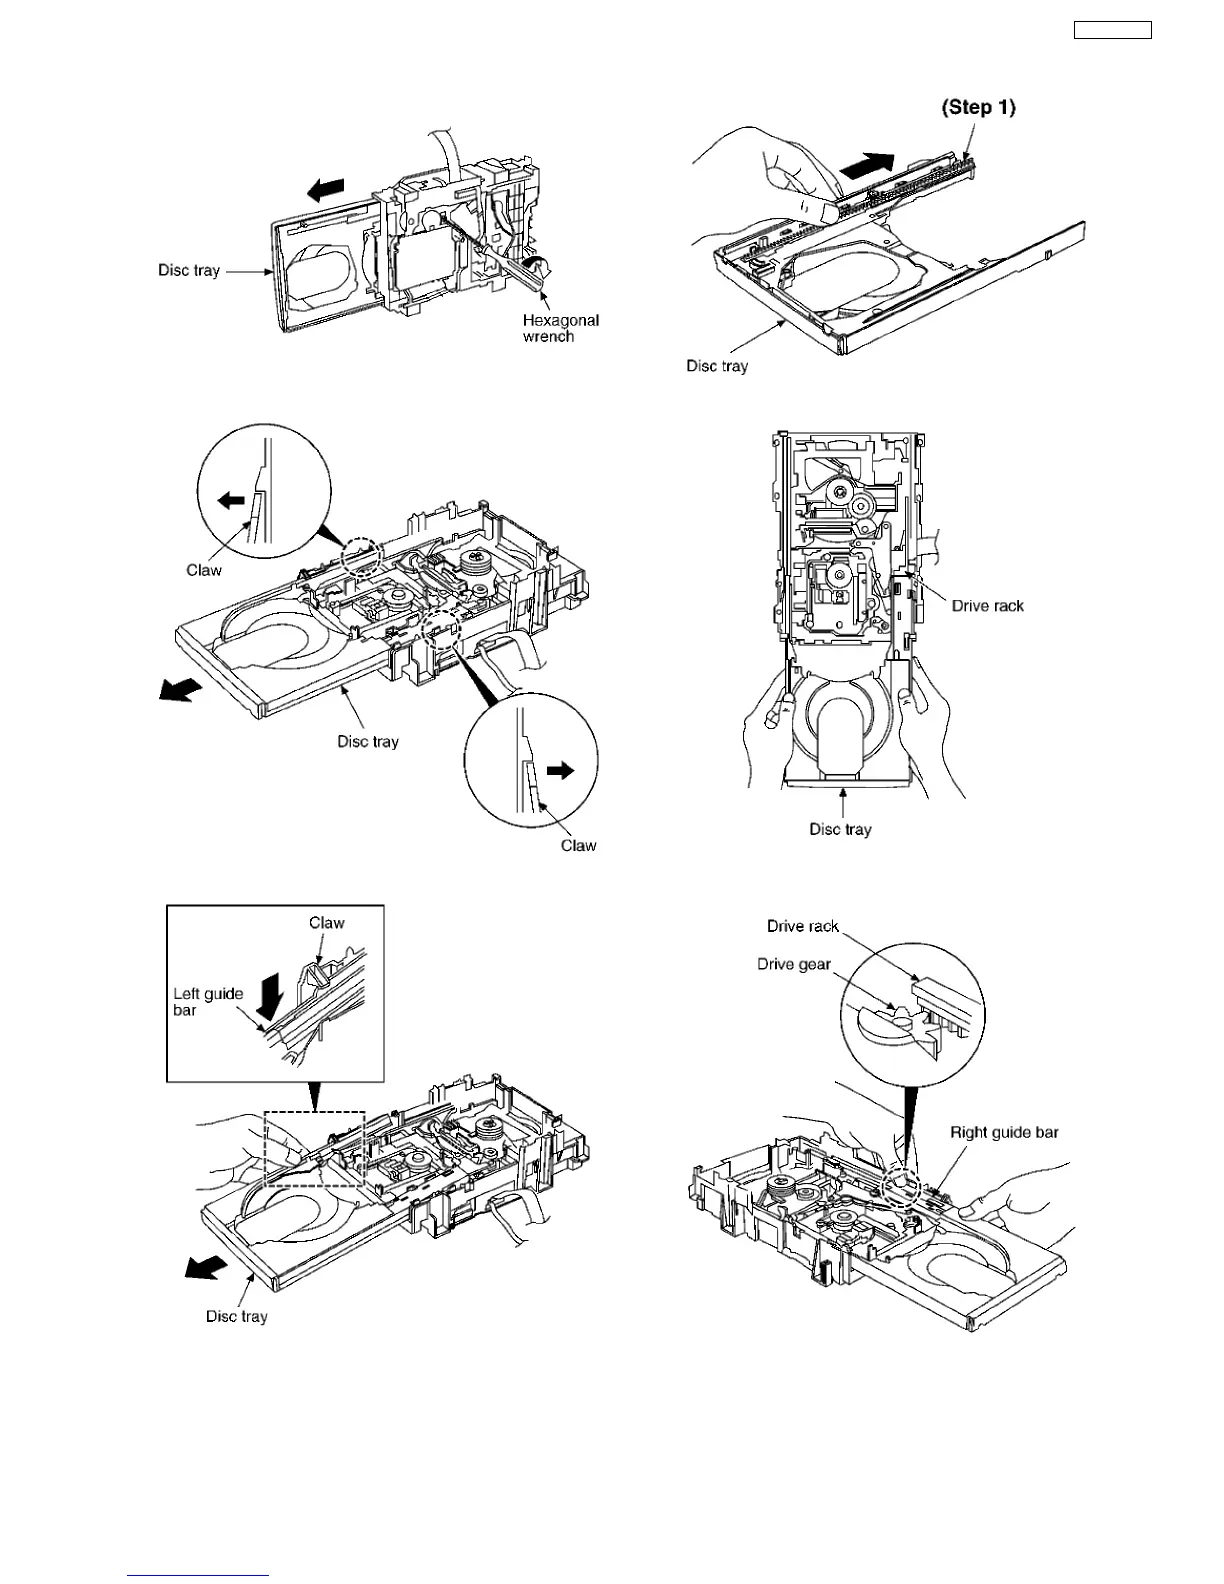
Step 6 Insert the gear with hexagonal wrench into the hole.
Step 7 Rotate the hexagonal wrench in the direction of arrow,
and then open the disc tray fully.
Step 8 Release the both claws, and then draw the disc tray.
Step 9 With forcing the left guide bar manually because the left
guide bar interfers with claw, draw the disc tray.
[Installation of the disc tray after replacement]
Step 1 Slide the drive rack fully in the direction of arrow.
Step 2 Holding the drive rack not to move, install the disc tray.
Step 3 Align the drive rack with the drive gear.
NOTE:
Force the right guide bar of tray base manually not to move
upwards.
41
SA-VK61DGS