24
TH-50LFE7U/TH-50LFE7W/TH-50LFE7E
7.10. LCD Panel Assy replacement
Caution about the sticking parts of LCD Panel Assy
• The sticking parts for LCD Panel Assy are enclosed.
When replacing the LCD Panel, please replace the sticking
parts simultaneously.
* Attachment specifications are subject to change with-
out notice and parts may remain.
* Please stick on the same place as before.
Cautions about replacing the LCD Panel
• Please be sure to remove metal fittings from the LCD Panel
and attach them to the LCD Panel Assy for repair.
1. Remove the Key button bracket.
(Refer to “7.7. K-Board, LED Panel and LED Panel Case
replacement”)
2. Remove the LED Panel Block.
(Refer to “7.9. K-Board, LED Panel and LED Panel Case
replacement”)
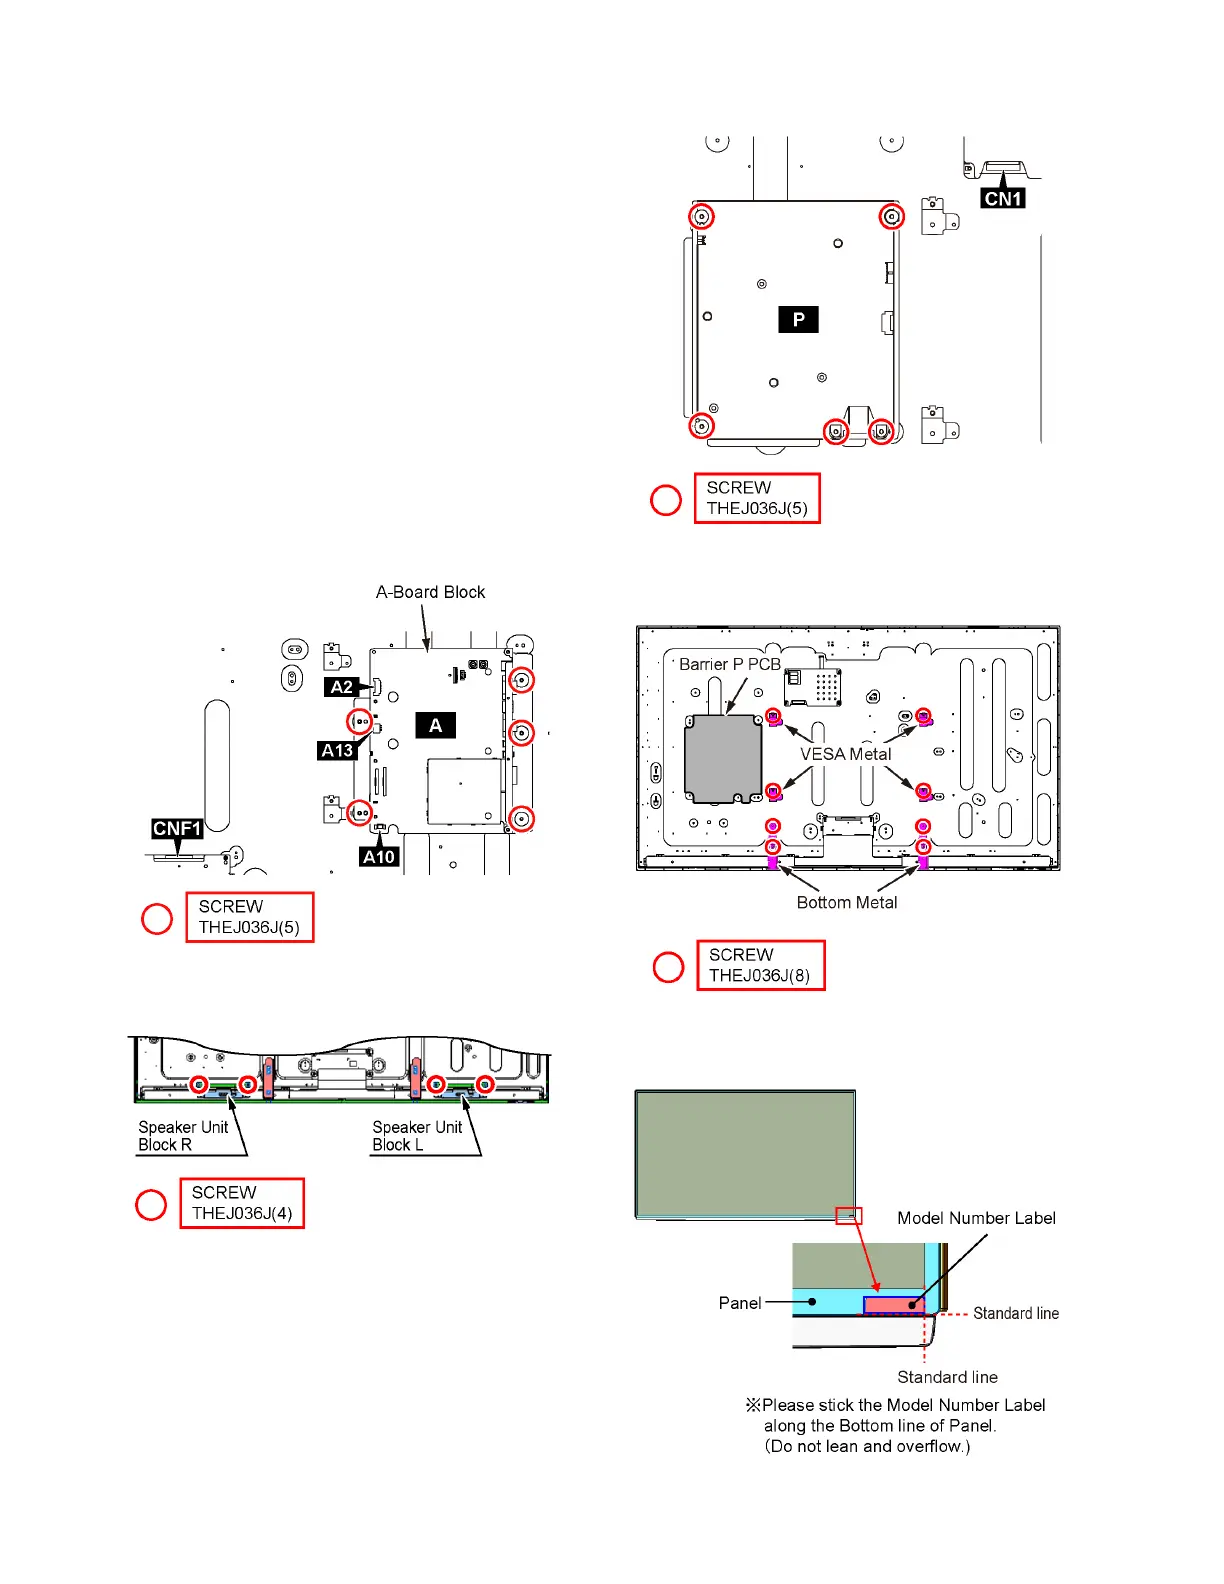
3. Disconnect the connectors and remove the screws, and
then remove the A-Board Block.
4. Remove the screws and remove the Speaker Unit Block
(L) (R) .
5. Disconnect the connectors and remove the screws, and
then remove the P-Board.
6. Remove the screws and remove the VESA Metal, Bottom
Metal and Barrier P PCB., and then replace the LCD
Panel Assy.
Caution when replacing the LCD Panel
• Please stick the Model Number Label on the position of the
following figure when replacing the LCD Panel.
 Loading...