English
56
[Changing Serial/IR terminal]
Sets whether to change the control terminal setting
or maintain the current setting when performing auto
setup.
[No]: Maintains the settings.
[Yes]: The setting of each IN/OUT terminal
connected via DIGITAL LINK are changed to
[DIGITAL LINK].
Note
●
If there is a terminal connected with the DIGITAL
LINK daisy chain on the display with only the input
side or the output side connected, the setting will be
changed.
Select [Start] and press <ENTER>.
Starts auto setting.
The following screen is displayed when the setting
is completed.
1
192.168.0.8
Multi control auto setting(DIGITAL LINK)
Status
DIGITAL LINK daisy chain
Network control / IP address
Finished
On
Display ID
020/025
●
When [DHCP] is set to [On], IP address is updated
automatically.
The following screen is displayed on the subsequent-
stage displays.
2
192.168.0.9
Multi control auto setting(DIGITAL LINK)
Status
Display ID
Network control / IP address
Finished
On
DIGITAL LINK daisy chain
021/025
●
For each subsequent-stage display, an ID number
with 1 added to the ID number of each preceding-
stage display is assigned.
If the ID number of the preceding-stage display is
“100”, ID number “1” is set.
●
When [DHCP] is set to [On], IP address is updated
automatically, so check it again on [Network status]
screen, etc.
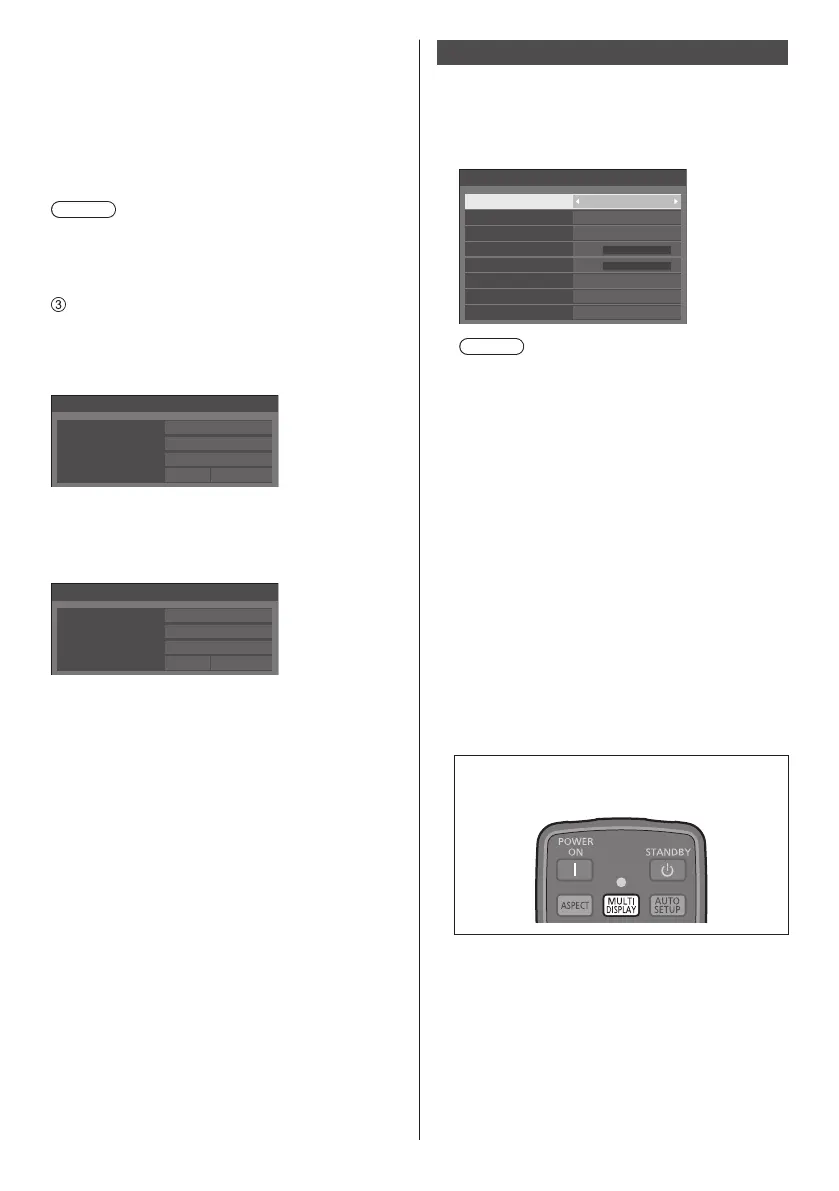
Multi display settings
1 to 10 displays can be aligned in horizontal direction
and vertical direction respectively, and those displays
are regarded as one group. The enlarged image is
shown on the combined display.
[Multi display settings] - submenu screen
0
0
A1
Auto
Off
Multi display settings
Multi display setting
Horizontal scale
Bezel H adjustment
Vertical scale
Bezel V adjustment
Location
Off
2
1
Frame control
Reverse scan
Note
●
The settings are memorised separately for each
input terminal.
●
When the multi display is set to [Off], adjust to the
same angle of view for [Position] (see page 41).
Then, set the multi display to [On]. Again, make
fine adjustment of the angle of view for [Position].
●
The [Position] menu can be adjusted in the multi
display status.
●
When using the USB input, [Frame control] and
[Reverse scan] cannot be set.
●
[Frame control] and [Reverse scan] functions are
effective when all of the vertical synchronizations
input into each display are the same.
■ [Multi display setting]
[Off]:
The display is not divided when enlarged.
[On]:
The display is divided when enlarged.
When [On] is set, the display aspect is [16:9].
To control with the remote control:
Switches ON / OFF by pressing <MULTI
DISPLAY>.
■ [Horizontal scale]
Set the horizontal scale in the multi display.
1 to 10 (1 to 2 for USB input)