18
Getting To Know Your Machine
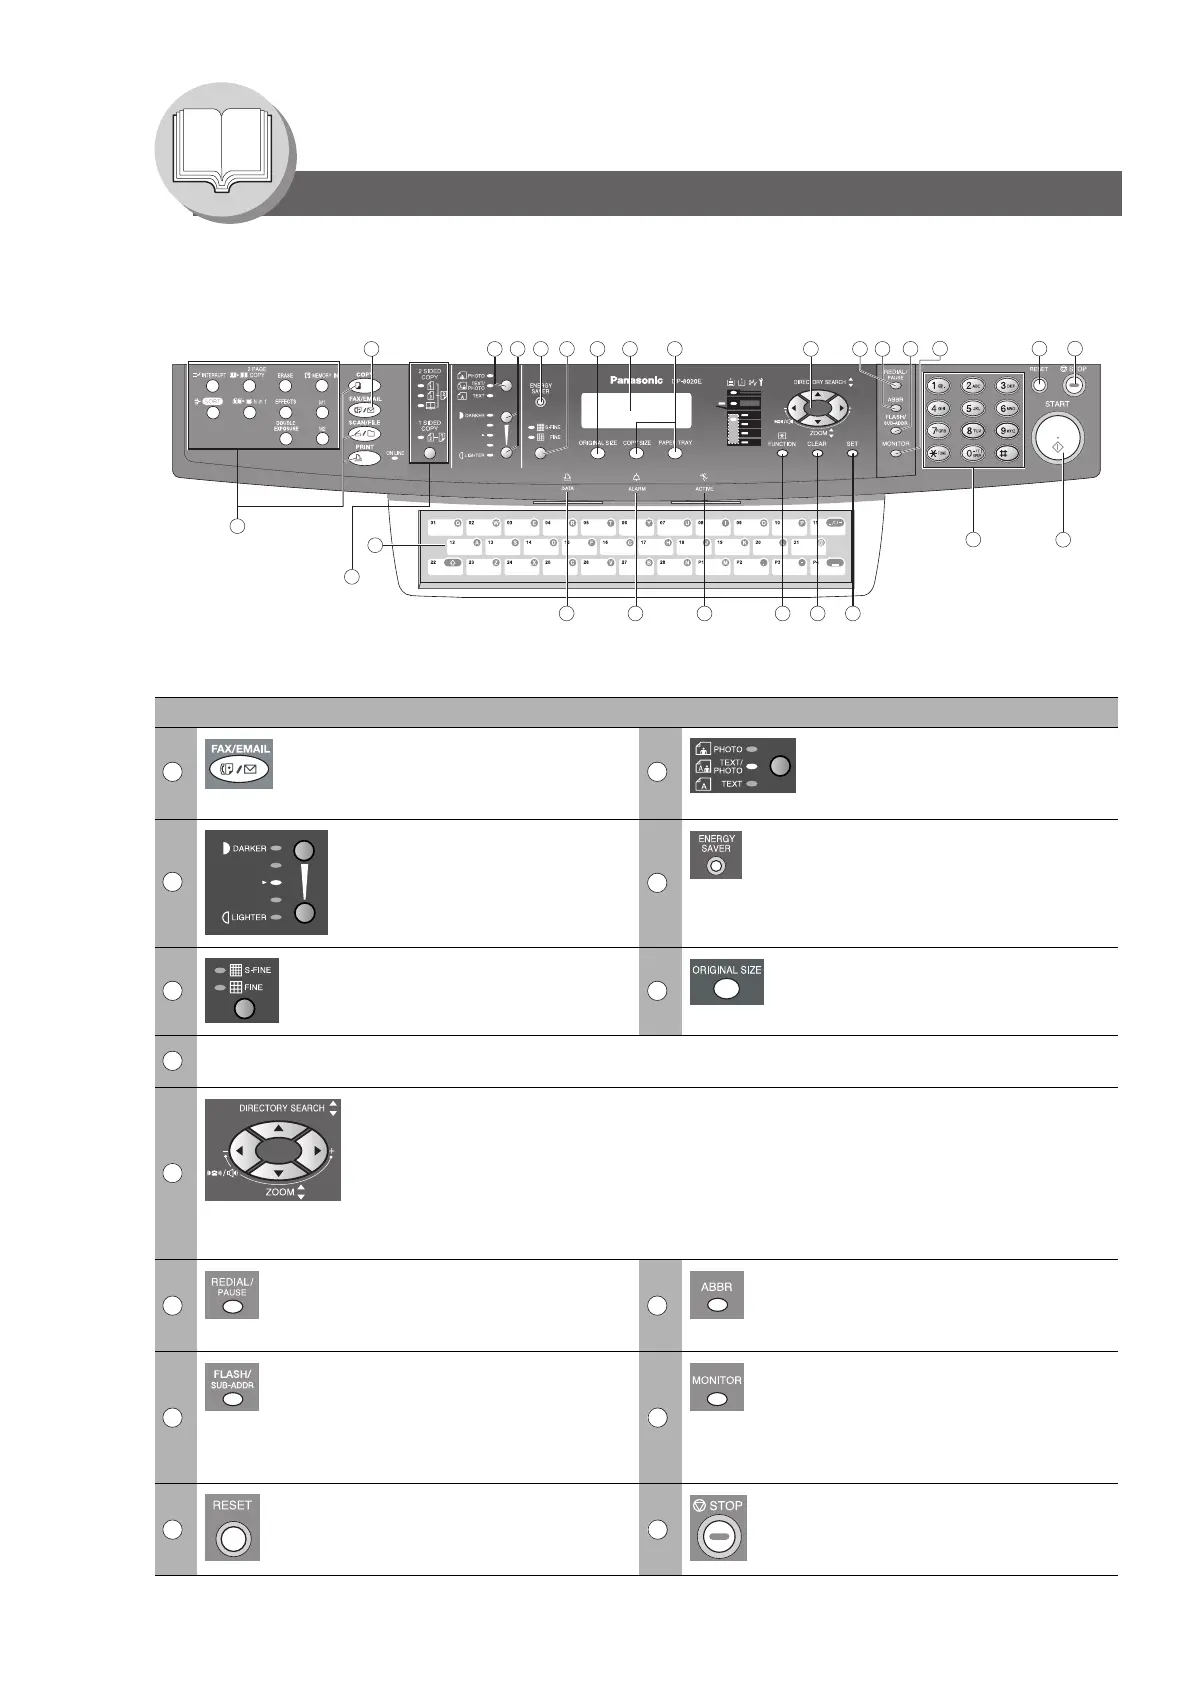
Control Panel
3
19
2
1820
17
16
14
13
12
1110
876541
24
212223
25
26
15
9
No. Icon Contents No. Icon Contents
1
FAX/EMAIL Key
Used to select the FAX/EMAIL mode.
To change the input mode between
Email Address and Telephone Number.
2
ORIGINAL Key
Used to select type of Original.
(See page 11)
3
CONTRAST (Lighter/Darker) Key
Used to adjust the Manual Exposure.
4
ENERGY SAVER Key
Used to switch the machine into Energy
Saver Mode.
5
RESOLUTION Key
Used to set Standard, Fine, Super-Fine
(400 or 600 dpi). (See page
11)
6
ORIGINAL SIZE Key
Used to select the Original Size
manually. (See page
11)
7
LCD Display
Indicates Number of Copies / Original(s) / Machine / User Error Code.
9
Cursor Keys
• Adjust the Monitor and Ringer Volume.
• Move the cursor while entering numbers and characters.
• Search the Station Name for Directory Search Dialing.
• Confirm the entered station for multi-station communication.
• Select functions.
• Confirm the current communication modes (e.g. Page Number, ID, Dialed Telephone
Number or Email Address, File Number) when the unit is ON LINE.
10
REDIAL/PAUSE Key
Used to enter a pause when recording
or dialing a Telephone Number, or to
redial the last dialed number.
11
ABBR Key
Used to start Abbreviated Dialing.
(See pages 10, 22 and 60)
12
FLASH/SUB-ADDR Key
Used to separate the Sub-Address from
the Telephone Number when dialing, or
to access some features of your PBX.
13
MONITOR Key
Used to start On-Hook Dialing or to
input a space between numerical
entries (such as, while entering
telephone numbers).
(See pages 26 and 136)
14
RESET Key
Resets all features to the initial power-
on state.
15
STOP Key
Press this button when you want to Stop
a telecommunication, registration
operation or audible tone.