DATASHEET
19
Appendix
3. ACMG8136 MESSAGE PLAYING CARD
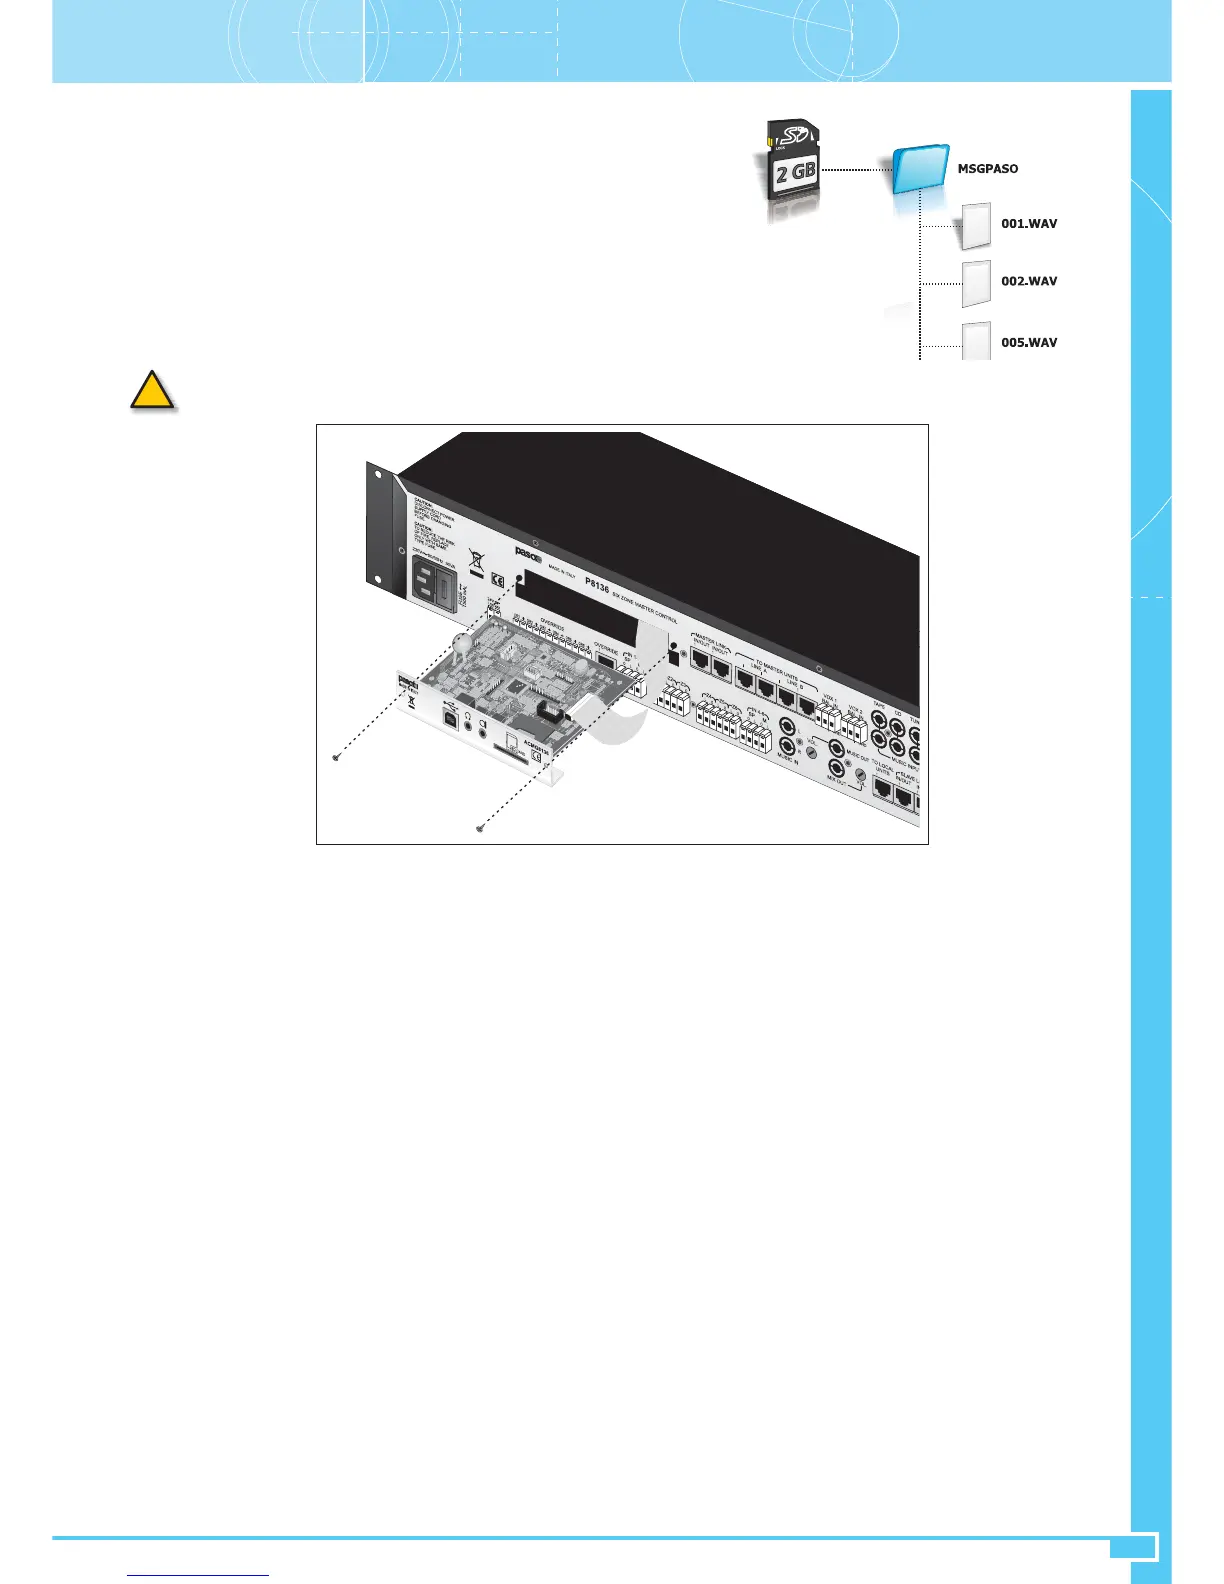
The optional ACMG8136 enables messages residing on the SD card to be played
out by activating events programmed by means of the P8136 Manager software,
specifically:
• Keys for selecting the Main Stations connected to the TO MASTER UNITS sockets.
• Input contacts of the ACIO8136 cards connected to the TO MASTER UNITS sockets.
• Timer Events with hourly, daily and weekly management, single or periodic cycles.
You can use a common application software for managing files in wave format to create
messages to be transferred to the SD card, associated with an external drive for reading/
writing to SD cards.
!
The SD card must have a capacity of at least 512 MB and not more than 2 GB (FAT16 or FAT32 formatting).
Section ASettings and Controls
*.WAV files manageable by the system must be 16-bit files, 32.0 KHz or 44.1 KHz, mono or stereo. For stereo files, only the right-hand channel will
be played out. To transfer the messages to the SD card and compile the Message Folder provided (MSGPASO), which can contain a list of up to a
maximum of 127 associated messages, it is advisable to use the application included in the P8136 Manager software (P8136 Message Folder Compiler),
together with the external drive.
If you do not use the P8136 Manager, the *.WAV files will have to be written in UPPERCASE characters.
Refer to the Help function of the P8136 Manager software for the programming procedure and for compiling the pre-recorded messages. When
compilation of the Message Folder has been completed, the SD card will be ready to be removed from the external drive and used in the ACMG8136
unit.
• Installing ACMG8136 card
Remove the cover (34) from the rear of the P8136 after unscrewing the two lateral screws, then insert the ACMG8136 card into the compartment and
connect it to the equipment by means of the 14-lead flat cable. Use the screws just removed to secure the card to the rear panel of the master unit.
Once you have completed this mounting procedure, insert the SD card into the slot provided for it.
Fig. A14