www.pelprostoves.com 7083-171H • February 23, 2015 15
13. Soot and Fly Ash: Formation & Need for Removal
in Exhaust Venting System.
• Frequency: Yearly or more frequently depending on
ash build-up.
• By: Qualifi ed Service Technician/Homeowner
Be sure the appliance is allowed to cool, has been unplugged
and the exhaust blower is off.
The products of combustion will contain small particles of fl y
ash. The fl y ash will collect in the exhaust venting system
and restrict the fl ow of the fl ue gases.
At start-up if there is incomplete combustion, or if there is a
shutdown or incorrect operation of the appliance it will lead
to some soot formation. This will collect in the exhaust vent-
ing system.
The venting (chimney) system may need to be cleaned at
least once a year or more often depending upon the qual-
ity of your fuel or if there are any horizontal pipe sections.
Ash will build up more quickly in the horizontal sections and
elbows.
11. Cleaning Exhaust Blower - Requires No
Lubrication
• Frequency: Yearly or more frequently depending on
ash build-up
• By: Homeowner or Qualifi ed Service Technician
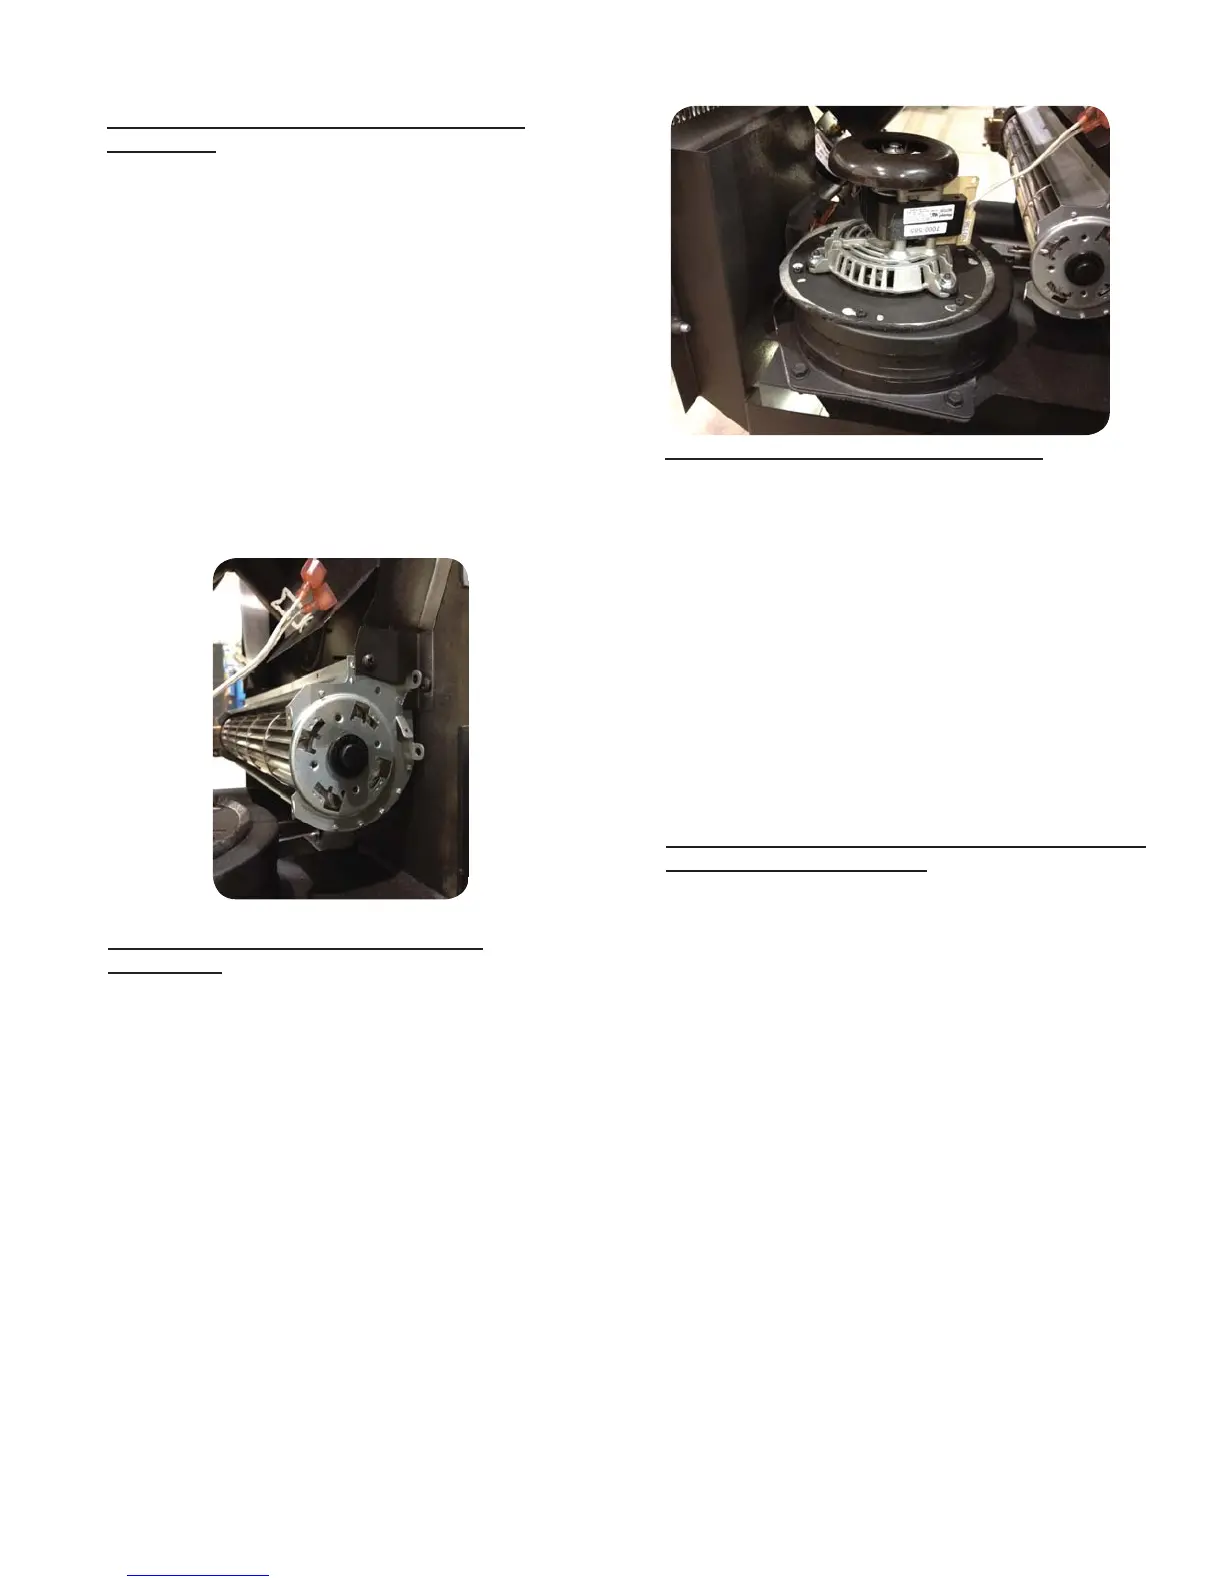
10. Cleaning Convection Blower - Requires No
Lubrication
• Frequency: Monthly depending on Dust/Dirt build-up
• By: Homeowner or Qualifi ed Service Technician
12. Preparing Firebox for Non-Burn Season
• Frequency: Yearly
• By: Homeowner
a. Be sure the appliance is allowed to cool, has been
unplugged and the exhaust blower is off.
b.
Remove all ash from the fi rebox and vacuum thoroughly.
c. Paint all exposed steel, including cast-iron.
• Purchase high temperature paint from your local
retailer.
• Must use a high-temperature paint made specifi -
cally for heating appliances.
a. Be sure the appliance is allowed to cool, has been
unplugged and the exhaust blower is off.
b. Remove the left side panel.
c. Remove the six screws holding the exhaust blower
motor to the housing and remove the motor. Using
caution as to not damage the gasket when removing
the blower. If damage occurs, install a new gasket
available as a replacement part.
d. Vacuum the blower’s impellers. Use care not to bend
or damage the blower fi ns.
e. Using a brush or vacuum attachment, clean the inside
of the exhaust outlet.
f. Reattach the motor. Make sure the wires are attached
to the terminals on the blower.
a. Be sure the appliance is allowed to cool and has
been unplugged.
b. Remove the right side panel.
c. Remove the 2 nuts holding the blower to the
convection plenum.
d. Sweep or vacuum out any build-up on the
impellers.
e. If required, unplug the blower wires and use a
brush or compressed air to loosen dirt.
f. Plug the blower wires into their corresponding wire
terminals.
g. Align the blower to the convection plenum and
install 2 nuts.
h. Replace and secure the side panel.