7083-171H • February 23, 2015 www.pelprostoves.com8
D. Firepot Burn Down
A feature of these pellet stoves is the fi repot burn down
cycle. The frequency of the cycle is once every hour the
unit is burning. During this event, the feed is reduced to
the lowest setting and the exhaust blower ramps up to
the highest setting. The purpose of the burn down cycle
is to help remove debris from the fi repot and help the unit
burn as effi cient as possible. The cycle lasts 99 seconds.
Please be aware that the burn down does not replace daily
cleaning activities but makes them easier.
E. Shutdown
To shut the appliance down, turn the dial control counter
clockwise to the OFF position. During the shutdown pro-
cess, the LED will fl ash green rapidly just like the ignition
sequence. The fi repot burn down cycle will begin but with-
out the feed motor running. The feed will be terminated
during this shutdown process. The exhaust and convection
blowers will remain on during the shutdown process until
the exhaust has cooled.
If maintenance or daily cleaning is going to be conducted
immediately following a shutdown, please use caution as
components especially those inside the fi rebox may still be
hot.
Please note that if the dial control is turned to the off
position and back on even if by mistake, the unit will
go through the shutdown sequence.
F. Starting Your First Fire
1) Turn the dial control to “OFF”.
2) Make sure the fi repot is clean, inplace, and free of
debris.
3) Plug the unit into the wall and fi ll the hopper with
wood pellets. Shut the hopper lid.
4) Turn the dial control to the desired burn setting.
The unit will go into the ignition sequence followed by
start up (The green LED will fl ash rapidly). The igni-
tion sequence involves the exhaust blower turning on,
the igniter turning on, and the feed motor running in two
stages. The fi rst stage involves the feed motor running
continuously for about a minute to preload pellets into the
fi repot. Following the preload and a delay, the feed motor
will begin cycling on and off. When the pellets are warming
up and on the verge of igniting, it is not uncommon for the
fi rebox to fi ll with smoke. Once ignition actually happens,
the smoke should evacuate quickly. During this stage as
well as any part during the burn process, the front door
should not be opened. This cycle continues until the unit
senses ignition by a rise in the exhaust temperature or the
unit times out. Following the ignition cycle the unit begins
to feed additional pellets gradually for a few minutes to
build up the fi re. This is important to have a controlled start
up to keep the unit in balance.
G. Fire Characteristics
The overall height of the fl ame will vary throughout the
burn for a couple of reasons. First is that the fl ame will
vary based on type of fuel or even batch of fuel. Secondly,
the unit adjusts the burn rate according to the how far
away the room temperature is from the set temperature.
This should not cause alarm. The third characteristic that
affects the fi re relates to general maintenance and clean-
ing. Infrequent or poor general maintenance will result is
poorer performance. Indicators of the need for additional
maintenance activities include a lazy fl ame, black sooted
glass, pellets not igniting, or pellets falling to the side of the
fi repot. See the maintenance section for additional infor-
mation.
Odors, vapors, and smoke released during initial
operation.
• Curing of high temperature paint.
• Open windows for air circulation.
Odors may be irritating to sensitive individuals.
CAUTION
C. Priming the Feed Tube (Cont’d)
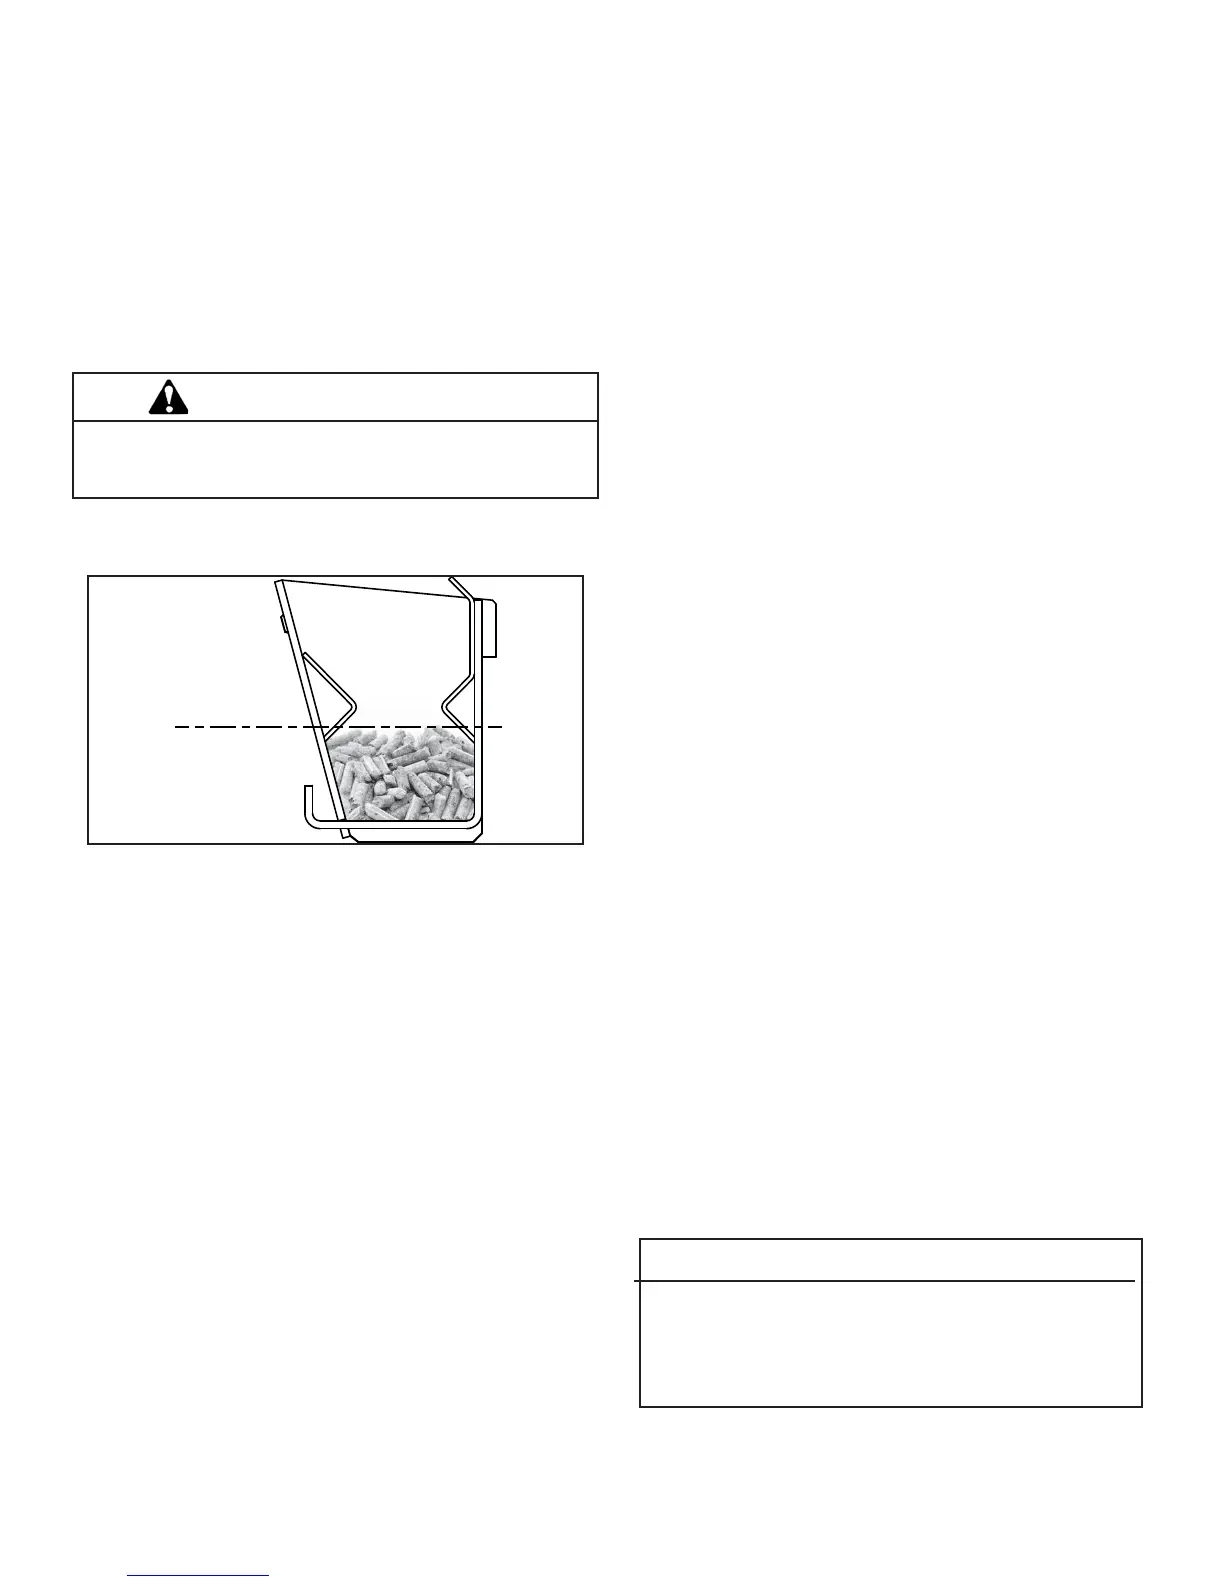
A FIREPOT THAT IS MORE THAN HALF FULL IS OVER-
FILLED AND CAN BE DANGEROUS. DO NOT OVERFILL
FIREPOT FOR IGNITION.
If the stove does not ignite follow directions below. The
LED light should blink red four times showing a missed
ignition.
Turn the stove to off and remove and EMPTY the fi repot.
CAUTION
Overfi lling the fi repot could cause an unsafe
ignition resulting in injury or damage. Firepot must
be emptied.
Return the fi repot to the stove correctly (step 3) and then
repeat step 6.
MAXIMUM
PELLET LEVEL