EN
11
Grease the square shas of the bottom bracket
sha before mounting the engine and the crank.
Lay out the cables of the wheel speed sensor and of the
electronic bottom bracket in the provided ring of the bottom
bracket mounting, and position them directly beside each
other in the upper section in two of the provided grooves in
the bottom bracket mounting.
The cables should have approximately 30 mm free length. It
does not matter which cable is on the le or right side.
The motor is mounted on the le side of the frame. Position
it first of all loosely in order to find out whether the cable of
wheel speed sensor and electronic bottom bracket are posi-
tioned in the right place, so that they can be plugged into the
motor. For this the grooves of the bottom bracket mounting
in which the cables are attached must be accurately in line
with the grooves in the motor.
If this arrangement fits, the motor can be attached imme-
diately by screwing it on. If it does not fit, you must remove
the motor again and either continue turning it and placing it
back on, or lay out the cable again so that it meets up with
the correct position for it to be connected to the motor.
Then plug the eMachine on the bottom bracket sha.
Please note by putting the motor, that the cou-
pling elements meshing each other. The motor
flange on the back, where are the grooves for the
sensor cables are in, should cover the ring, where
the sensor cables are layed in.
Now you can screw the motor up with the sup-
plied crank screw and tighten it at a torque of 32
Nm +/- 2 Nm. The screw thread should already
have a thread locking for safety. If no locking is on
the thread, use a standard liquid screw locking
(medium-strength).
Hold the motor tightly in position, it is heavy!
The gearings of the torque support and the eMachine have
to gear into each other.
7.4 eMachine
32 Nm +/- 2 Nm
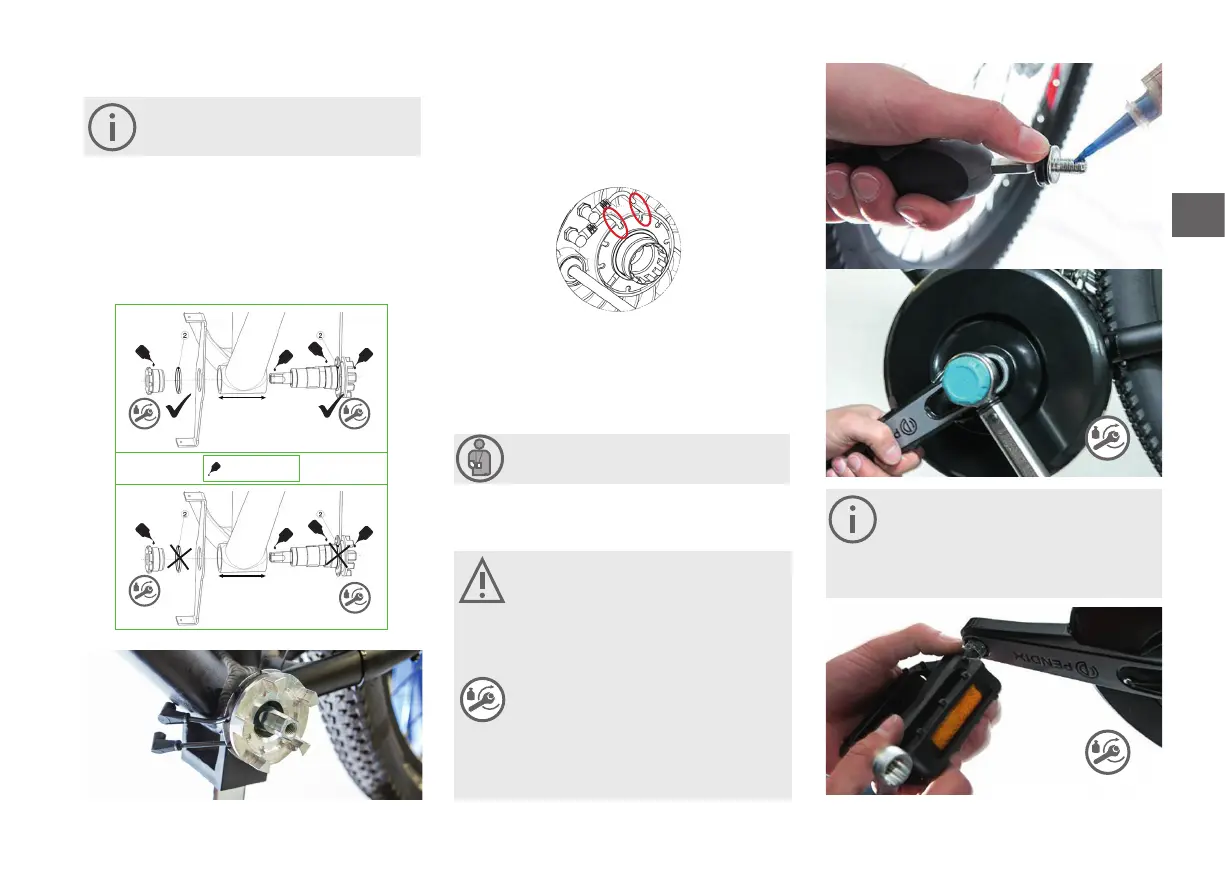
Screw the pedal into the crank. Grease the
thread. Make sure that the pedal on the le side
is attached using a le-hand thread. In this case,
the direction of tightening is anti- clockwise. The
tightening torque is 35 Nm +/- 2 Nm.
35 Nm +/- 2 Nm
68 mm
15 Nm +/- 2 Nm 60 Nm +/- 3 Nm
73 mm
15 Nm +/- 2 Nm
60 Nm +/- 3 Nm
Pendix Montage Tipps
Pendix Installation Advice
Montagefett // Grease
65
65