14
9. Mounting addition
Pendix eDrive folding
bike
Hints
Please use the original installation manual for mounting
the Pendix eDrive. In this mounting extension you will find
all information you need to mount the Pendix eDrive on a
folding bike.
Pendix eDrive folding bike version
The Pendix eDrive folding bike version diers in the following
points:
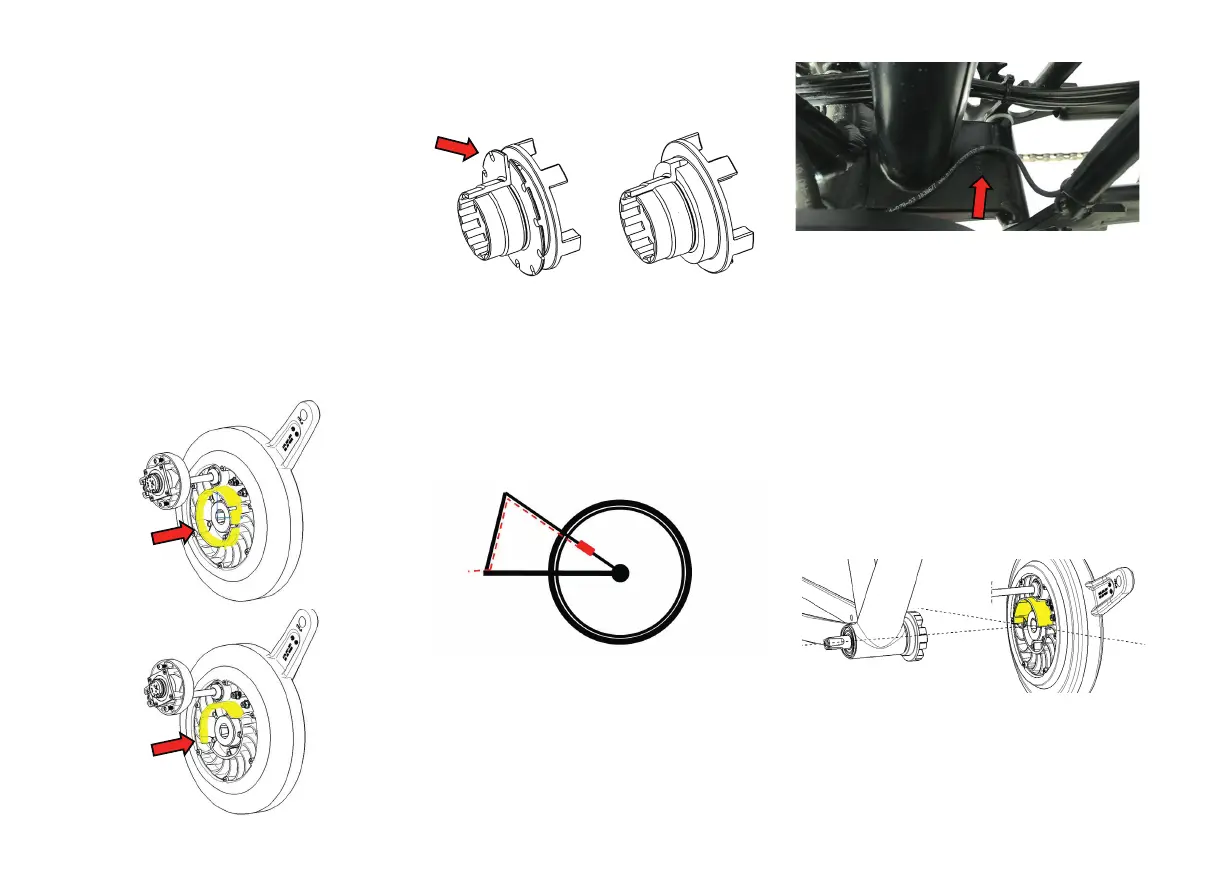
Motor flange: The flange on the back side of the engine be-
comes reworked mechanically so, that only one half of the
flange is existing
Bottom bracket mounting: The inner flange of this part
got removed by mechanical reworking.
Mounting hints
The numbering in this mounting addition refers to the Pen-
dix installation manual and give hints at the relevant points.
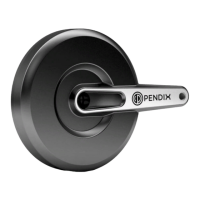
To 7.1 Wheel speed sensor
In the folding bike kit, there is a speed sensor with cable
length of 580mm included. Positioning the sensor on the
upper strut and run the cable along the strut like showed in
the following picture.
Take care of laying the cable in a way, that with folding the
rear wheel, there is no stress to it. For that, lay a small loop in
the area of the seatpost.
Please be carefully with the first try of folding for checking
the space and the needed length of the cable without dam-
aging it.
To 7.3 Battery holder
Please use the Pendix clamp mount for installing the battery
holder to the bike. The manual for clamp mount is included
in every set.
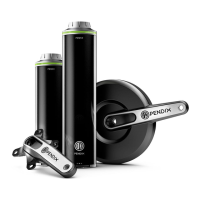
To 7.4 Drive system unit
The eMachine is mounted like described under 7.4. With that
you have to make sure, that the motor got positioned with
the existing flange on the motor above the bottom bracket.
Due to the removed flange below the bottom bracket, you
get the space for full folding functionality of the folding bike.
It will not work always to mount the flange like in the follow-
ing picture, with exact orientation to the horizontal, but most
of the flange should be positioned above the horizontal.
Please continue with the further steps of the installation un-
til the installation is finished.
the horizontal