SEBU8337 57
Maintenance Section
Belts - Inspect/Adjust/Replace
5. Proceed with ne
cessary system repairs. Reverse
the steps in order to reconnect all of the cables.
i02784753
Belts - Inspec
t/Adjust/Rep lace
Inspection
Inspect the alternator belt and the fan drive belts for
wear and for cracking. Replace the belts if the belts
are not in goo
d condition.
Check the belt tension according to the information
in Systems Op
eration, Testing and Adjusting, “Belt
Tension Chart”.
Slippage of l
oose belts can reduce the efficiency
of the driven components. Vibration of loose belts
can cause unnecessary wear on the following
components
:
•
Belts
•
Pulleys
•
Bearings
If the belts are too tight, unnecessary stress is placed
on the compo
nents. This reduces the service life of
the components.
Replacement
For applic
ations that require multiple drive belts,
replace the drive belts in matched sets. Replacing
one drive belt of a matched set will cause the new
drive belt
to carry more load because the older drive
belts are stretched. The additional load on the new
drive belt could cause the new drive belt to fail.
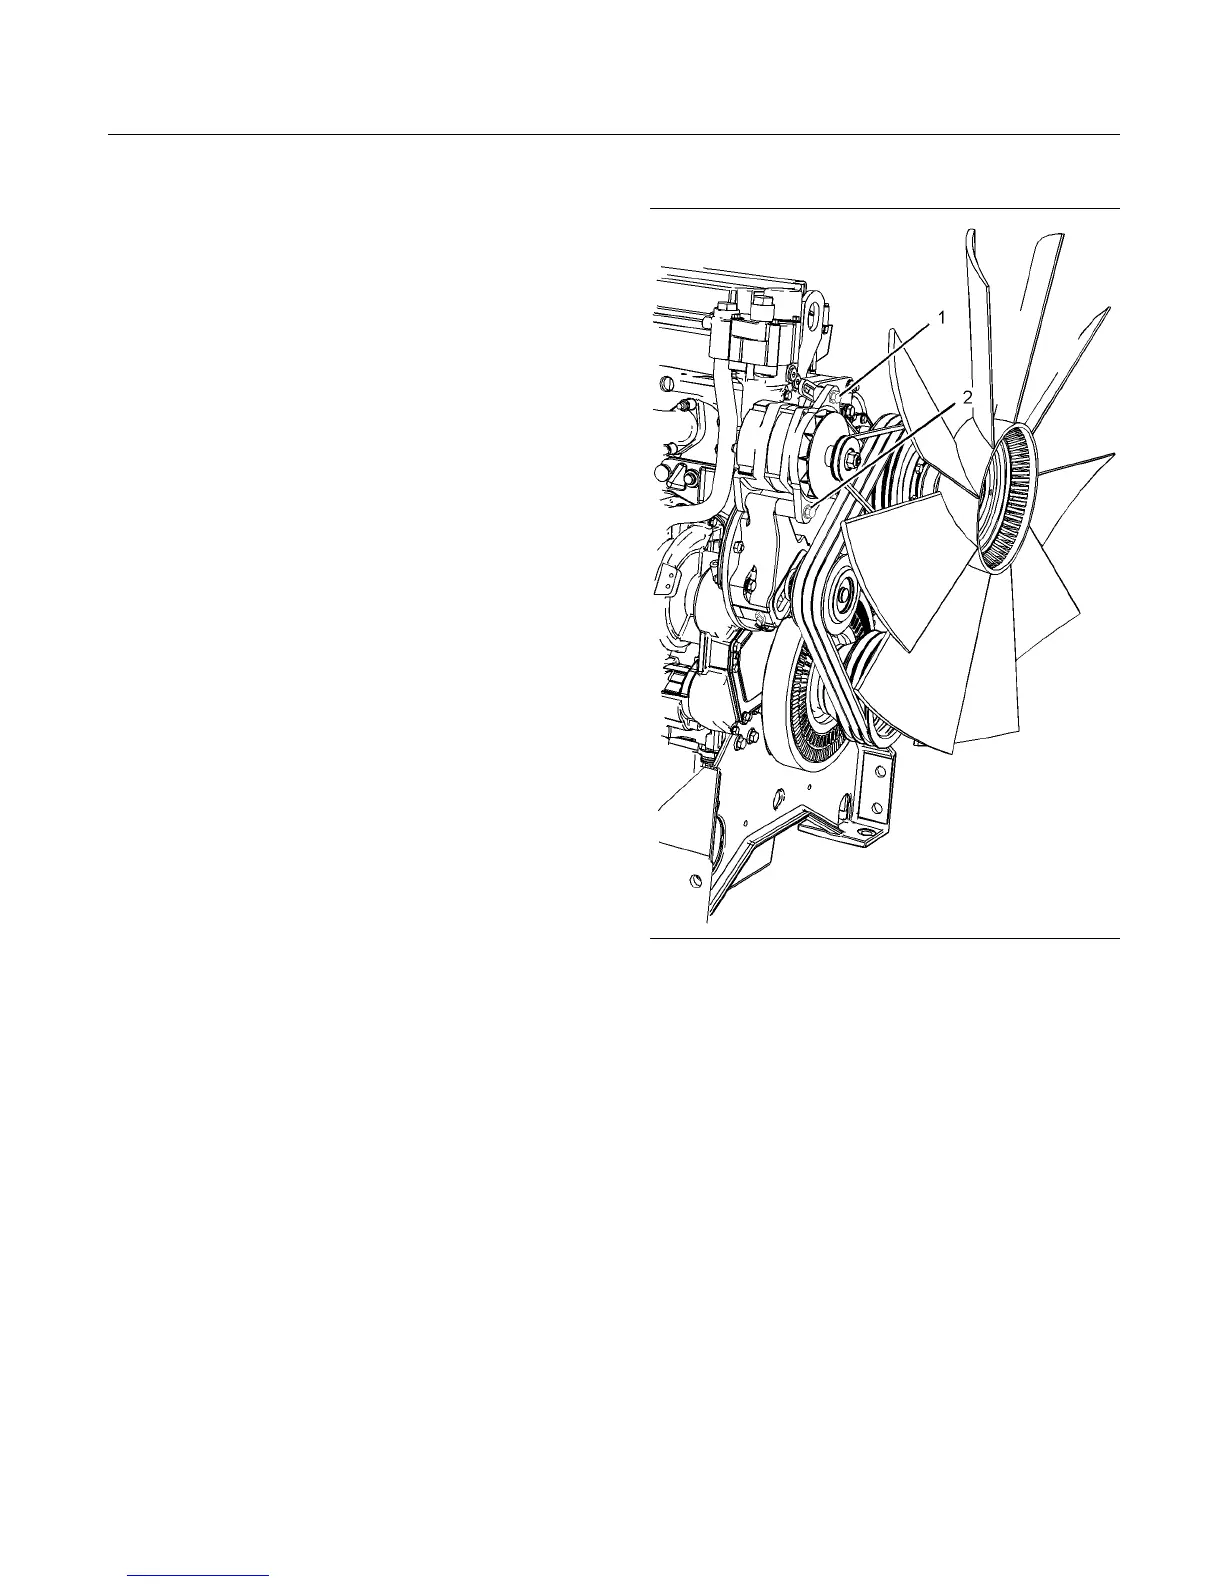
Alternator Be lt Adjustment
g01391209
Illustration 20
1. Remove the belt guard.
2. Loosen alternator pivot bolt (2) .
3. Loosen the setscrew for the adjustment link (1).
4. Move the assembly in order to increase or
decrease the belt tension. Refer to Systems
Operation, Testing and Adjusting, “Belt Tension
Chart”.
5. Tighten the setscrew for the adjustment link (1)
securely. Tighten alternator pivot bolt (2) securely.
6. Reinstall the belt guard.
If new alternator belts are installed, check the
tension of the alternator belt again after 10
minutes of engine operation at the rated rpm.
7. Remove the belt guard and check the belt tension.
When the correct belt tension is obtained, fitthe
belt guard.