Install profile seals and assemble
Requirements
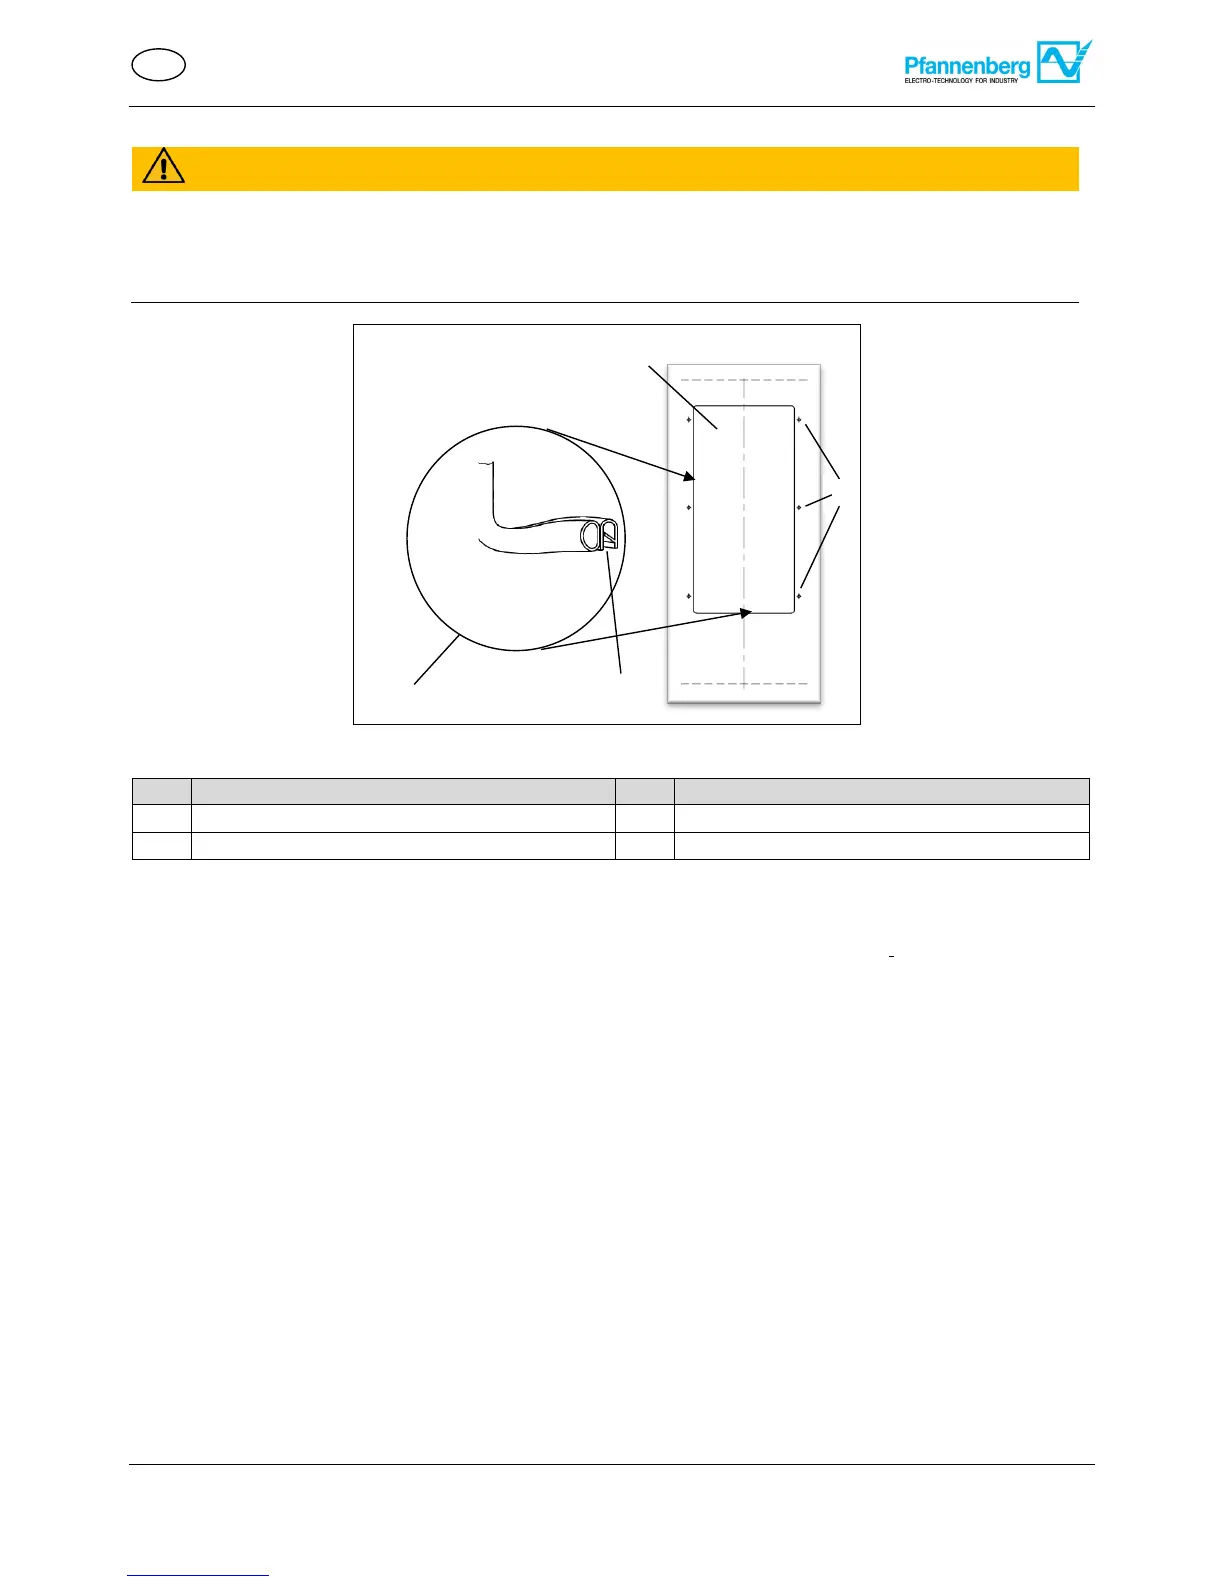
- Cut-out for the DTS cooling unit have been made; see figure DTS cooling unit assembly (side attachment).
- The cooling unit is de-energized.
Required tools and material
- Profile seal (1)
- Installation tool
- Accessory kit: Threaded bolts, screws, nuts, washers
Procedure
Insert profile seals (1) on the sheet metal edge of the cut-outs (2). Fit the seals with the slotted ends (4) down.
Screw in the two supplied threaded bolts (accessory kit) in the upper fastening points of the DTS cooling unit.
Suspend the cooling unit on the switch cabinet with the threaded bolts installed from outside.
Tighten the screws on the DTS cooling unit on the switch cabinet interior (3). Use the supplied screws, nuts and
washers (accessory kit) to fasten the unit. Firmly tighten the screw fasteners so that the profile seal is pressed
together to a thickness of 2 mm.
The DTS cooling unit is attached to the switch cabinet and ready for electrical connection;
see Electrical connection.