English
16
TIPS: Before making or changing any connections, make sure that all the devices are disconnected
from the power outlet.
Step 2: Optional Connections (continued)
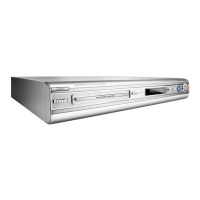
Connecting to a VCR or
other similar device
This connection enables you to record
from video tape to a DVD±R/±RW and
allows the VCR to be used for playback.
IMPORTANT!
Your new recorder can replace the
VCR for all your recording needs.
Just unplug all the connections to
your VCR.
A
Connect the Antenna/Cable TV signal to
the ANTENNA-IN jack on the
recorder.
B
Use an RF antenna cable to connect the
TV-OUT jack on the recorder to
the antenna input jack on your TV (VHF/
UHF RF IN).
C
Use the audio/video cables to connect
the VIDEO /AUDIO INPUT (red/
white/yellow) on the recorder to the
matching VIDEO/AUDIO output jacks on
the VCR.
D
Use the audio/video cables to connect
the VIDEO/AUDIO OUTPUT (red/
white/yellow) on the recorder to the
matching VIDEO/AUDIO input jacks on
the TV.
Helpful Hints:
– Most commercial video cassettes and
DVDs are copy-protected and therefore
cannot be recorded.
– Connect the recorder directly to the
TV. If there is a VCR or an additional device
in between, the picture quality may be poor
because of the copy protection system built
into the recorder.
A
B
Back of a VCR
(Example only)
VIDEO
IN
OUT
IN
AUDIO
L
AUDIO
R
VIDEO
OUT
AUDIO
L
AUDIO
R
VHF/UHF
RF IN
VHF/UHF
RF OUT
AU D IO
OUT
S-V I D E O
IN
VIDEO IN
TV