Quick Start
2 Quick Start
This Quick Start assumes that you wish to control one or more Mercury™ Class
controllers together from a single RS-232 or USB port on a host computer and are
connecting a motorized axis to each controller. Be sure to refer to the User
Manuals of all other hardware in the system.
2.1 Front and Rear Panel Elements
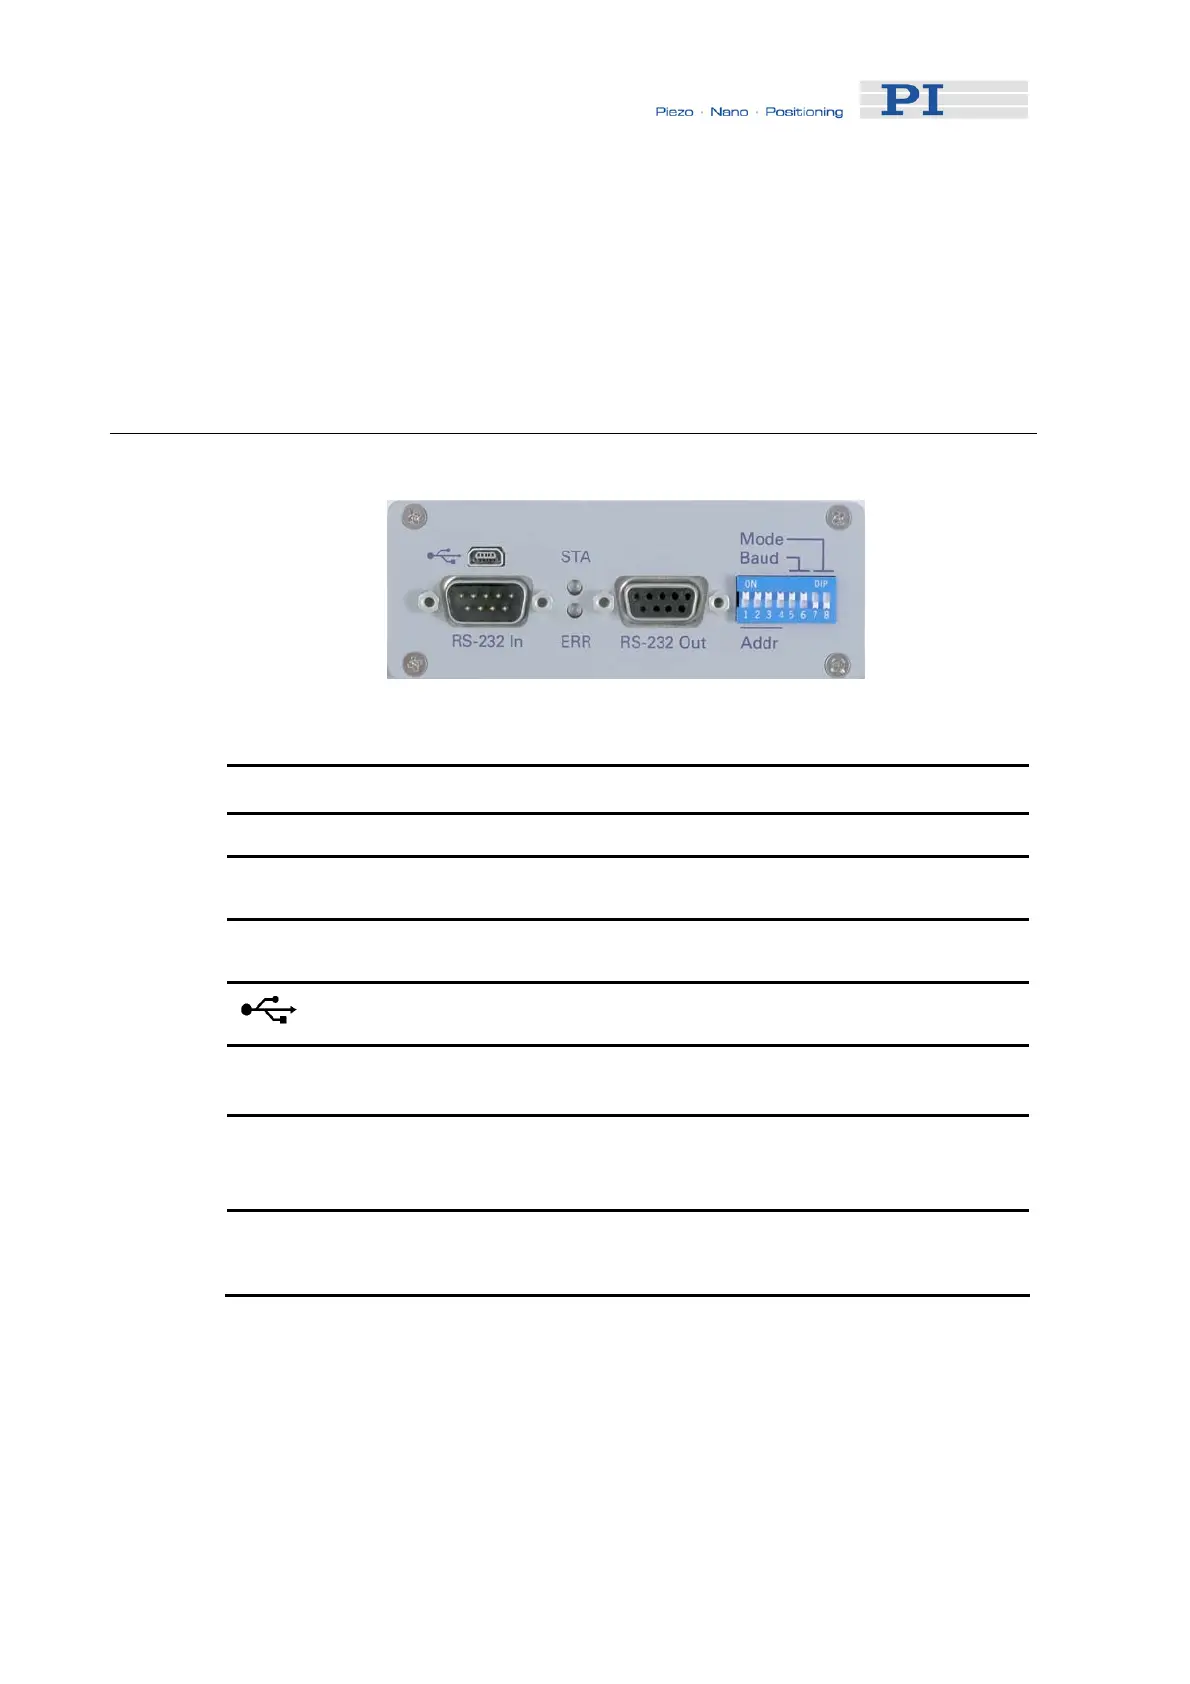
Fig. 2: Front view of C-863 Mercury™
Front
Labeling Element Type Purpose
RS-232 In Sub-D 9(m) Command routing (connects to PC or a
networked Mercury™ class controller)
RS-232 Out Sub-D 9(f) Command routing in network (connects to a
networked Mercury™ class controller)
Mini-B type USB Command routing (connects to host PC, do
not connect when RS-232 IN is connected)
STA LED
green
Power and status
ERR LED
red/green
Command error:
green: command OK
red: command error
Mode, Baud,
Addr
8-bit DIP switch Setting device number, RS-232 baud rate,
limit-switch and firmware update modes (see
DIP Switch Settings, p. 23)
www.pi.ws C-863 MS173E Release 1.2.7 Page 11
 Loading...